Tableau Server is a platform which allows us to share and edit workbooks, dashboards, and storyboards created in Tableau with selected users. One crucial aspect of managing a Tableau Server in any organisation is to effectively alter the permissions. This is so we can ensure that the correct people have access to the correct files, whilst protecting sensitive information, such as HR data, from unauthorised individuals. Permissions can be added at various different levels within Tableau Server; those being: the server level, site level, project level, and workbook level.
In this blog, I will show you how to edit permissions at the project level and down. Applying permissions at this level is recommended since it offers much more flexibility than at the site level. Before we get started, it is important to note that you must be a server administrator in order to edit permissions.
How do I access the permissions menu?
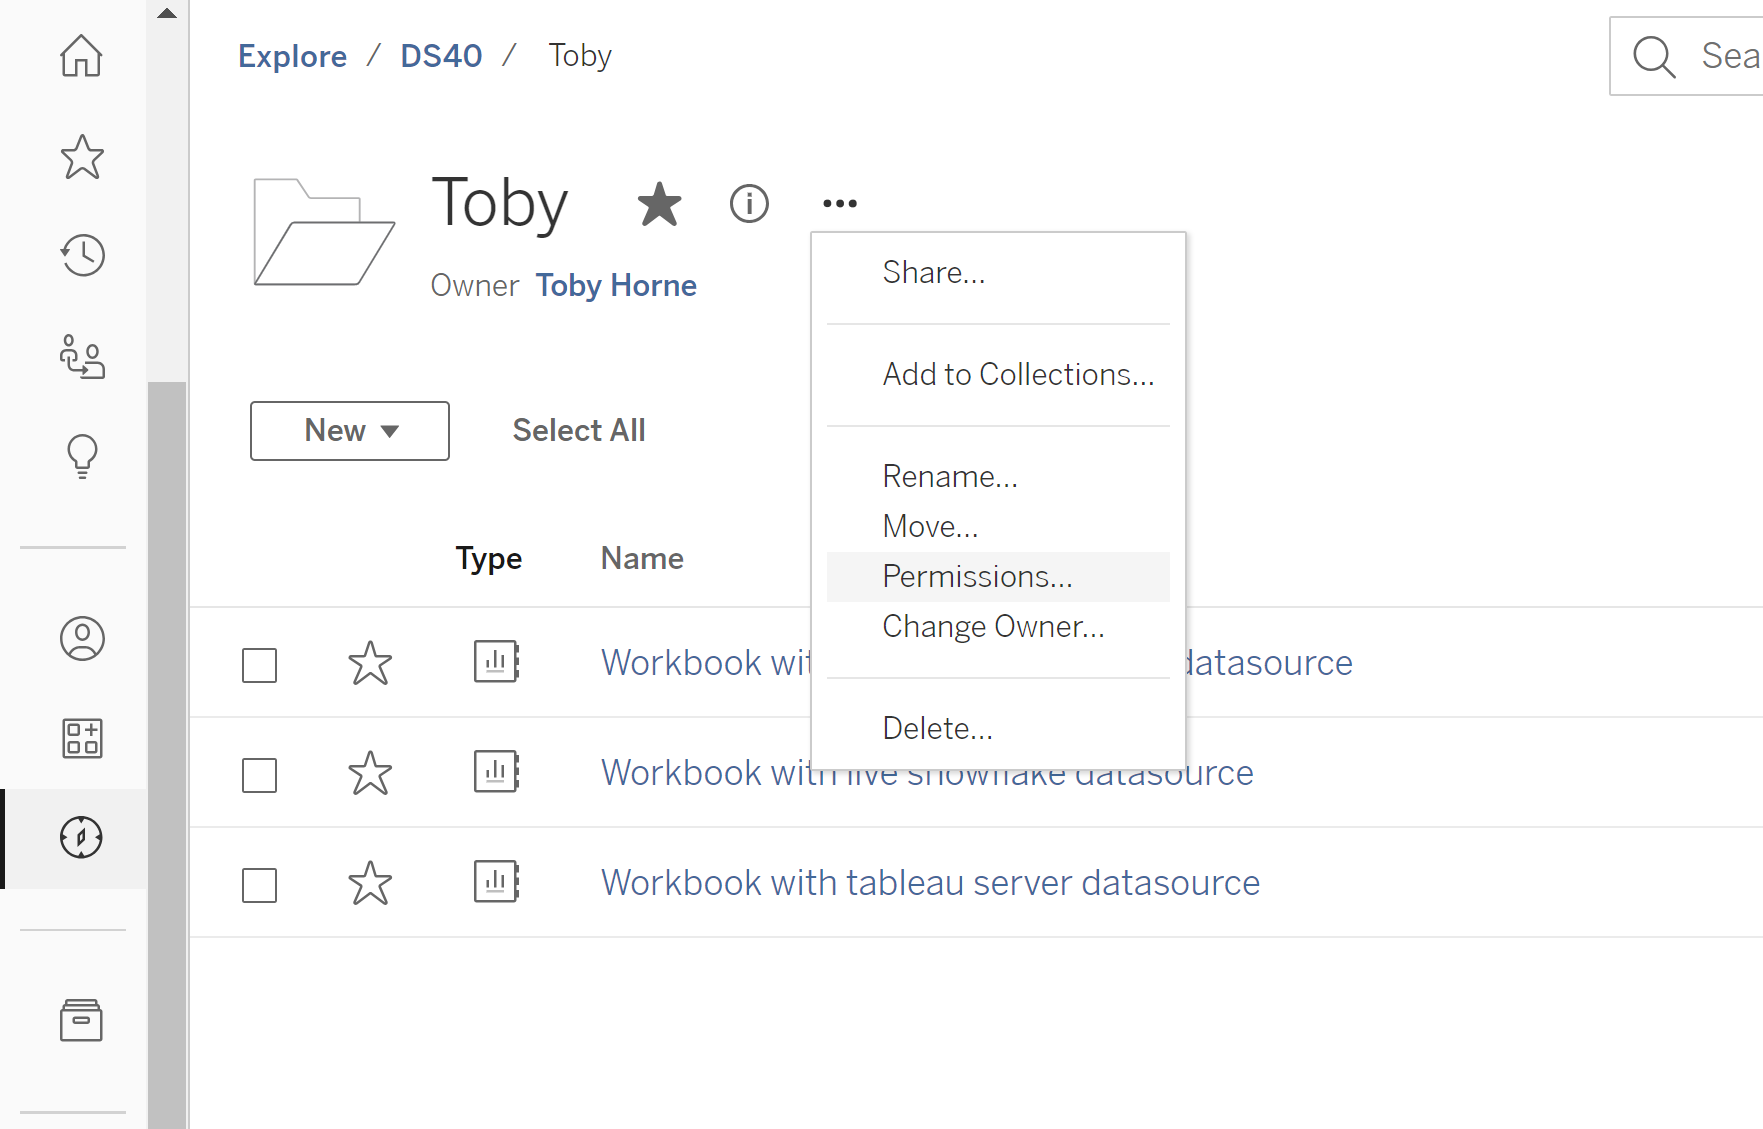
First, find the content that you wish to edit the permissions for. In this case, I am going to be editing a project.
Select the project and then click on the three dots (known as the ellipsis) next to the project name, as shown below.

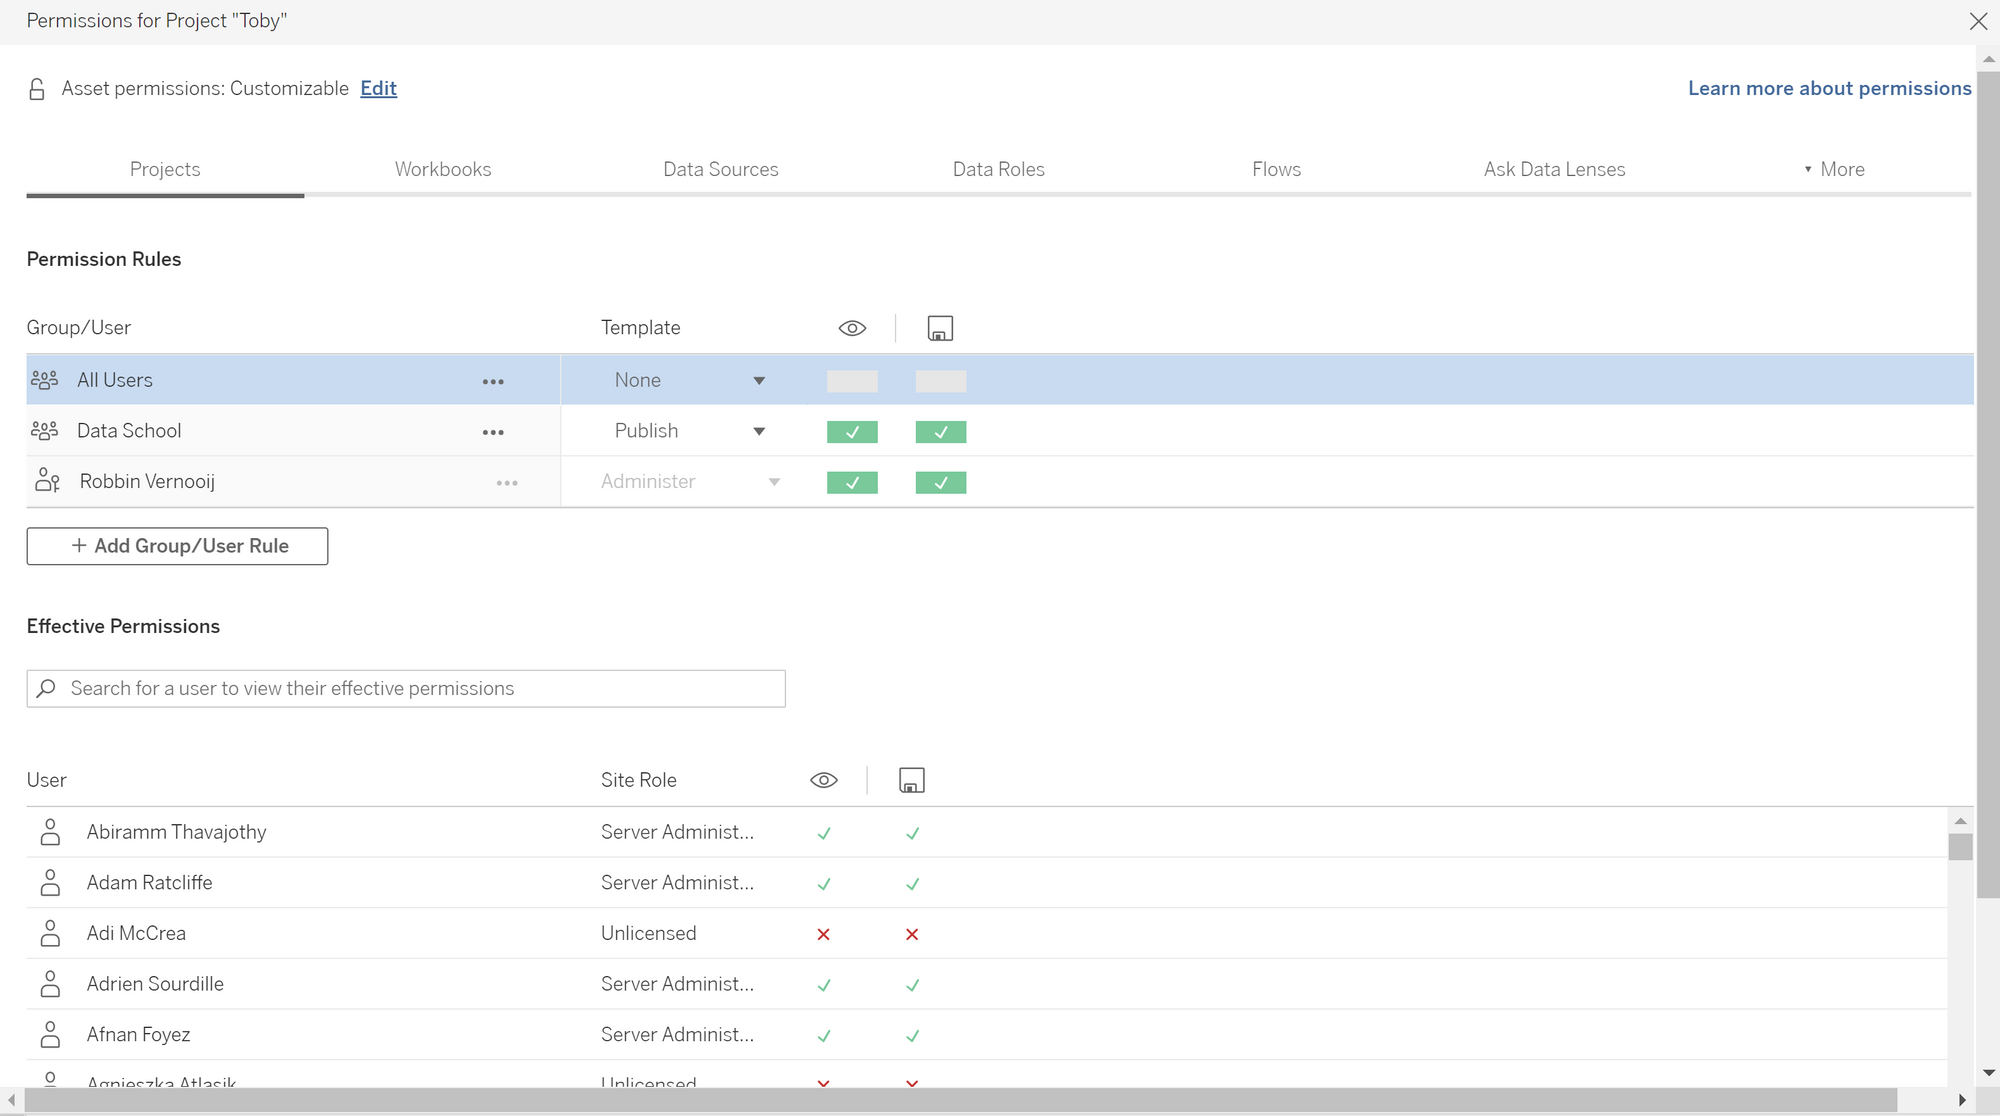
From here you are able to access the permissions menu:

Now you want to ensure that the asset permissions are customisable by clicking on the edit button next to the padlock icon at the top of the window. You can now alter permissions at different levels by switching between the tabs at the top (e.g.: 'Projects', 'Workbooks', etc.) Green boxes imply that access is permitted, red for restricted access and grey boxes indicate that there is no preference. Red boxes are the most powerful as they only need to appear once to restrict access. For example, if a given user restricted access to a particular project, but authorised access to a workbook within sed project, they will not be able to access the workbook and vice versa.
A top tip to consider when editing permissions is to create user groups and then edit group permissions as opposed to editing individual user permissions. You may want to do this apply the same set of permissions to a given team in an organisation. Sticking with our previous example of the HR department, we can create a group containing all the members of the HR team. By doing so, we can quickly change the permissions of the entire team by editing the permissions of our created HR group. We could then assign different permissions to HR managers if desired.
Ultimately, editing permissions is relatively simple in Tableau Server. However, it is extremely important that they are assigned correctly to achieve the desired results.
