


This blog post introduces you to five essential tools that are essentail for most Alteryx workflows: Input Data, Filter, Select, Formula, and Output.
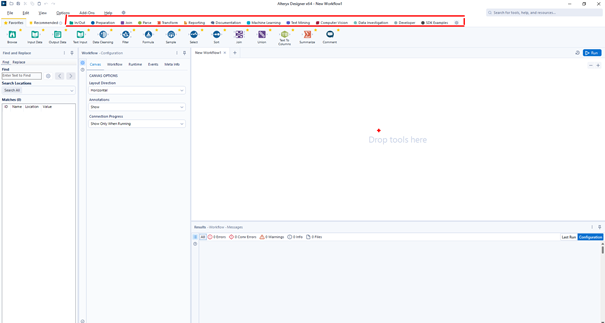
When you open Alteryx, you’ll see tool categories displayed in a bar across the top. Each category contains tools for different types of tasks like, preparation, joining data, or analyzing it.
Input Data Tool
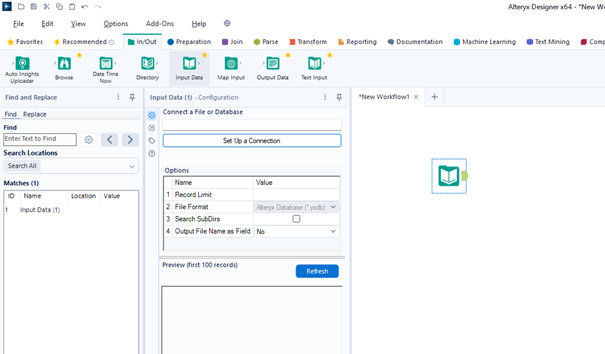
Let’s begin with the most fundamental step: bringing data into your workflow. The Input Data Tool is where every workflow begins. It allows you to connect to Excel files, CSVs, cloud data etc. You can either drag the Input Data tool from the toolbar onto the canvas and then browse to your file, or simply drop your file directly onto the canvas. Alteryx will automatically create the appropriate input tool for you. If your Excel file has multiple sheets, you can choose which one you want to work with.
Filter Tool
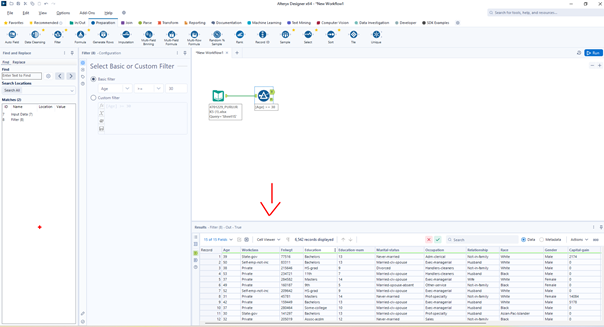
Once your data is in, the next step is often to filter it in order to focus on the relevant values. This is what the filter tool is used for. It lets you define conditions to separate the data into two streams: one that meets the condition (True) and one that doesn’t (False). For example, if you want to only look at people who are over 30, you can set the condition [Age] >= 30. The data that matches will flow through the “T” (true) output, and everything else will go through the “F” (false) path. Clicking on the 'True' anchor will display the data table in the Results window so you can instantly view the results.
Select Tool
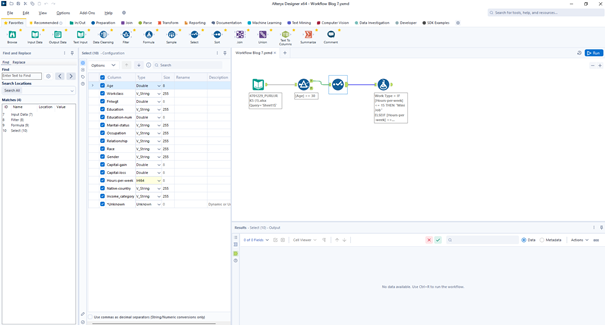
Next, I’d like to perform some calculations. Before doing so, it is often important to check your data types, and this is where the Select Tool comes in. This tool lets you rename columns, remove fields and, most importantly, change the data type of a column. In this case, we want the hours to be a number, not a string.
Formula Tool
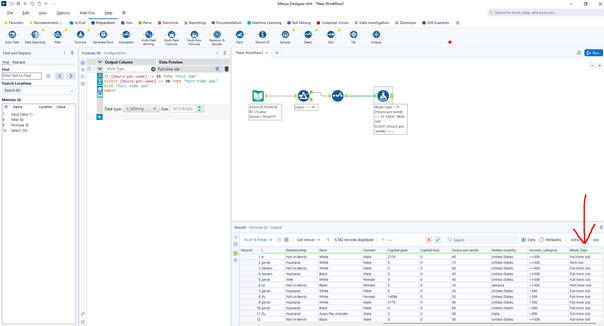
This brings us to the Formula Tool. This is where you can create new fields or update existing ones using logic and expressions. Let’s say you want to classify workers based on how many hours they work per week. Using a simple IF statement like the one below, you can create a new column that categorizes each row:
IF [Hours-per-week] <= 15 THEN "Mini Job"
ELSEIF [Hours-per-week] <= 30 THEN "Part-time Job"
ELSE "Full-time Job"
ENDIF
This creates a new column that indicates whether a job is classified as mini-, part-time or full-time, depending on the number of hours worked per week.
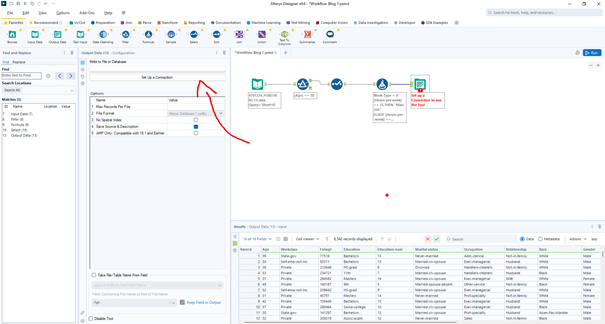
Output Tool
Finally, once your data is cleaned, filtered, and enriched, it’s time to export it. The Output Tool allows you to save your results in various formats such as Excel, CSV, or directly into a database or cloud storage. You can choose whether to overwrite existing files, append new data, or create entirely new files. Just remember: the Output Tool only saves the data, not the workflow. If you want to save your workflow itself, make sure to save the project as a .yxmd file.
These five tools are essential for most beginner workflows in Alteryx. As you become more confident, you will find yourself using them together to solve more complex data tasks. For now, though, mastering these tools will provide you with a solid foundation.