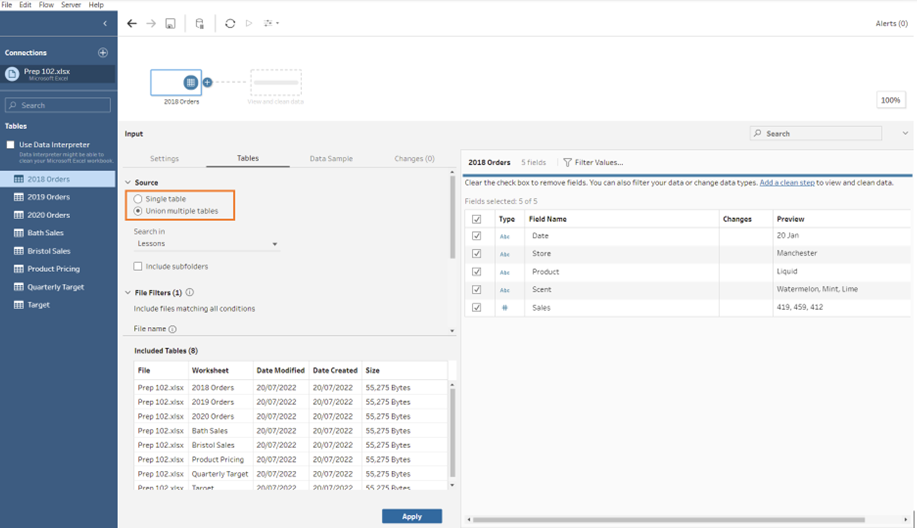
You will first need to connect to your data and drag in the table you need into Tableau Prep. In my example, I connected to an Excel file and I dragged in the '2018 Orders' table onto the flow pane. All the table names within the excel file are located on the left hand side in the connection pane. You will then need to select 'Tables' in the profile pane, which is located next to 'Settings' and 'Data Sample'. Once on the 'Tables' section, you will need to change your 'Source' from the default, 'Single Table', to 'Union multiple tables' (highlighted in the image below).

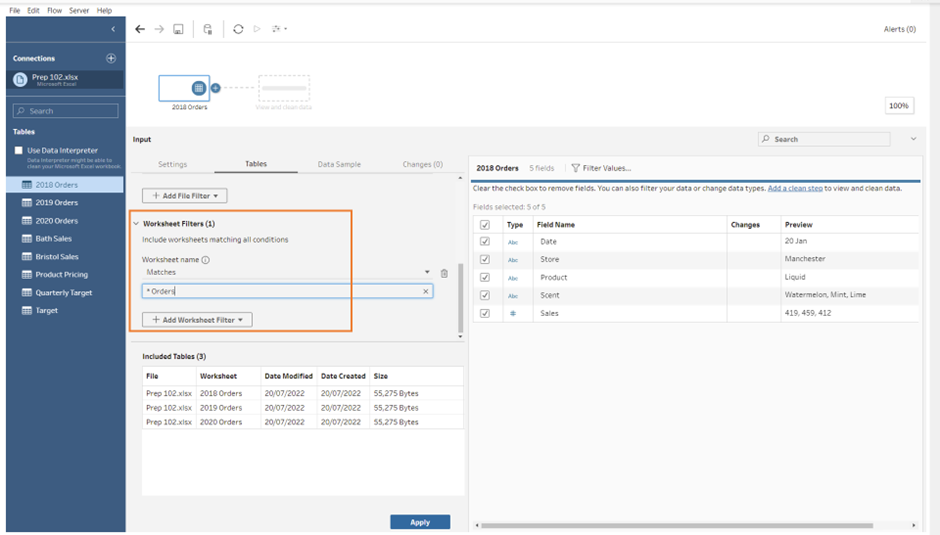
After you have changed the source, you will need to scroll down to where you can find 'Worksheet Filters'. Select 'Add Worksheet Filter' and type in the sheet name pattern; in my case, I input '* Orders'. What this is telling Prep is to find is all the sheet names that contain the word 'Orders' on the end, and the '*' signifies any arrangement of characters before the word 'Orders'.

After you have input your sheet pattern, it will show you what tables will be included just below. In my example, it included 3 Tables with differing years.
Even though Prep will show you what it expects to retrieve from the pattern you provided, it will not carry out this step until you click 'Apply' at the very bottom. If you click off the profile pane before you click 'Apply', it will reset and you will need to reconfigure what you want it to do.
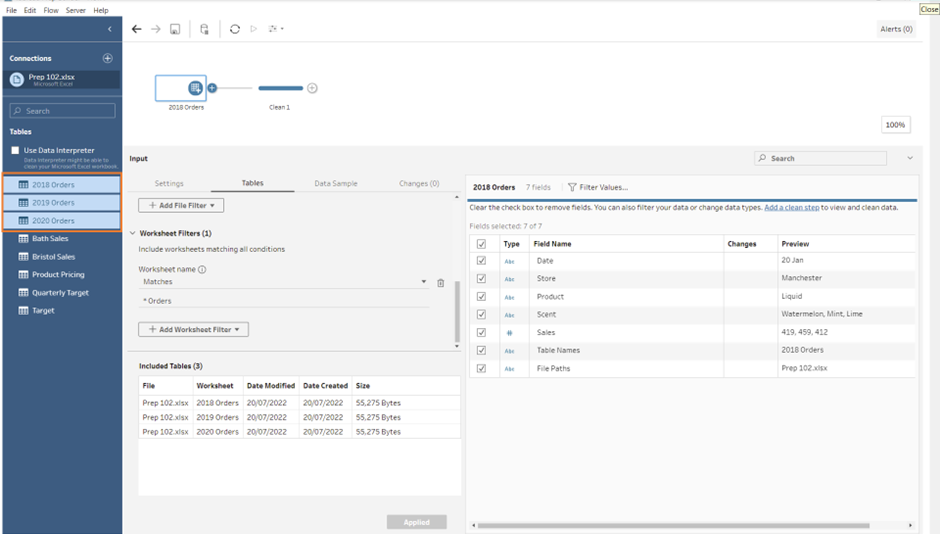
After clicking 'Apply', it will highlight the tables in the connection pane that it is unioning together. You can also then view the tables you have by using a clean option.

