


The Multi-Row Formula Tool
It is not uncommon to have a start date and end date present in your data, but be missing the values in between. The Multi-Row Formula tool in Alteryx is the thing you need if you’re in this situation.

The Multi-Row Formula tool can be found under the preparation tab or by using the search function.
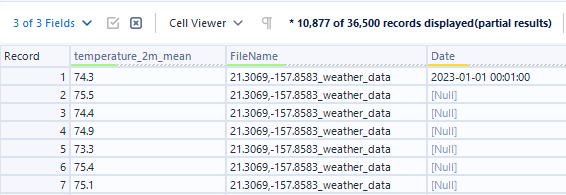
In the dataset I am working with I have daily data for 1 year for 100 cities, however, in my Date field I only have the first day of the year available.
Converting Data Type to DateTime
Note! It’s important that your Date field be in the format of DateTime in order to work with the Multi-Row Formula tool.
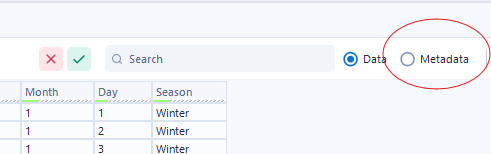
You can check your fields datatype by either checking the metadata
Or by using the Select Tool and looking in the type column

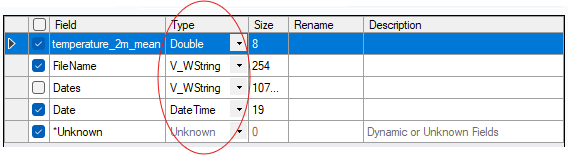
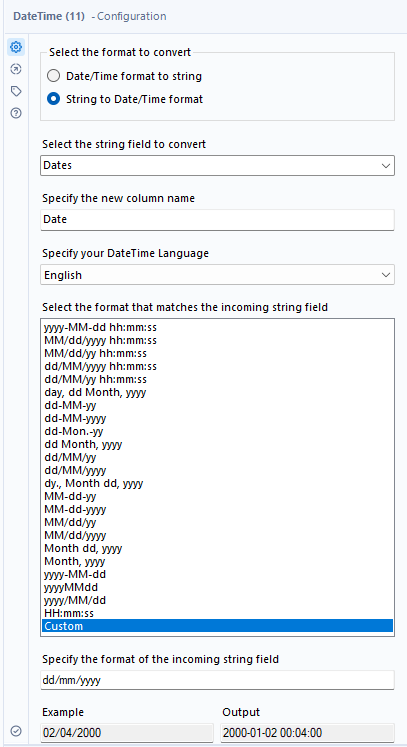
If you do need to change your field to DateTime then use the DateTime tool found under the Parse tab.

Setting up the Multi-Row Formula tool
In order to generate dates for the rest of the rows, restarting for every city and at the end of one year we will have to use the Multi-Row Formula tool.
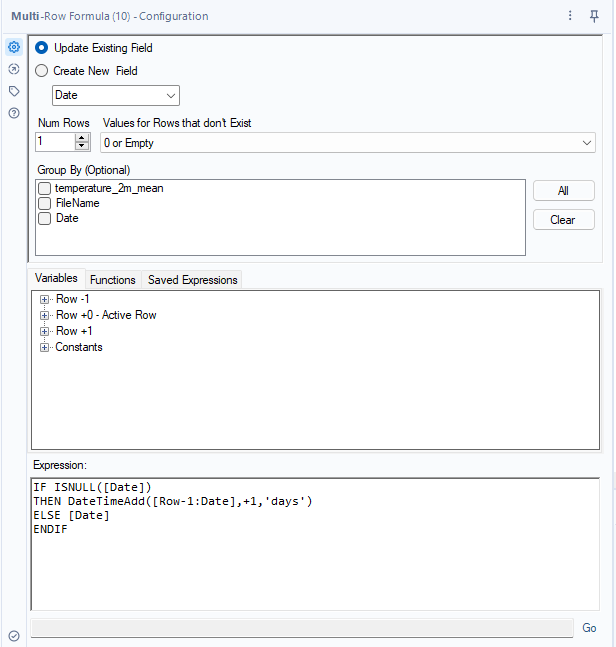
- In the Multi-Row Formula tool I have assigned it to Update Existing Field, because we are updating the existing field ‘Date’. However, I could create a new column by selecting create new field. This is a good option if you want to keep the Date column unchanged.
- I’ve set Value for Rows that don’t Exist to 0 or Empty because the rows were not null, but empty. This is an important distinction to make.
- The Group By option let’s you decide if generating rows will restart with certain groupings. For example, I could restart generating rows every time the field ‘File Name’ changes. In this case I dont have to because the first day of the year listed for every new instance of FileName.
- The Variables/Functions/Saved Expression window allows you to double click on the values automatically putin them into the Expression window.
- In the Expression window I have the formula:
IF ISNULL([Date])
THEN DateTimeAdd([Row-1:Date], +1, ‘days’)
ELSE [Date]
ENDIF
In plain text this formula means:
- IF ISNULL([Date]):
- This part checks if the value in the Date column for the current row is null (i.e., missing or empty).
- ISNULL() is a function that returns True if the value is null, and False otherwise.
- THEN DateTimeAdd([Row-1:Date], +1, 'days'):
- This part of the formula is executed if the Date is found to be null.
- DateTimeAdd() is a function used to add a specific interval to a date. In this case, it adds one day (+1) to the Date of the previous row ([Row-1:Date]).
- 'days' specifies the unit of time to be added to the date, confirming that the addition should be counted in days.
- ELSE [Date]:
- This part of the formula is executed if the Date is not null.
- It simply retains the original date from the Date column for that row.
- ENDIF:
- This ends the conditional logic structure.
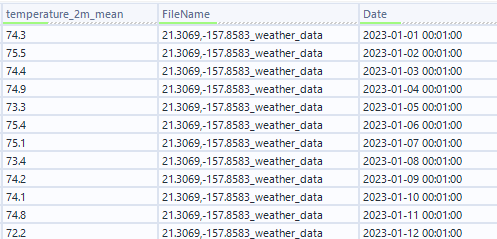
Now run the tool and you will see the Date field filled with the dates you need!
The multi-row tool can be used not just for dates, but also to create a RecordID that resets for every product or to calculate a 3-month rolling average. Its uses are varied!