Out of the many awesome things you can do in Tableau Prep, pivoting is definitely up there as one of the most useful. Don't get me wrong, it's a bit difficult to wrap your head around initially (is it columns to rows or rows to columns?), but once you've cracked it you'll be flying! Here's a simple guide to pivoting columns to rows in Tableau prep:
When to use a columns to rows pivot?
Changing columns to rows in Tableau Prep is necessary when you want to reshape your data from a wide format (where multiple columns represent different variables/metrics such as dates, or product type) to a long and narrow format (with a single column for the variables e.g. date, product type) and another column for their corresponding values).
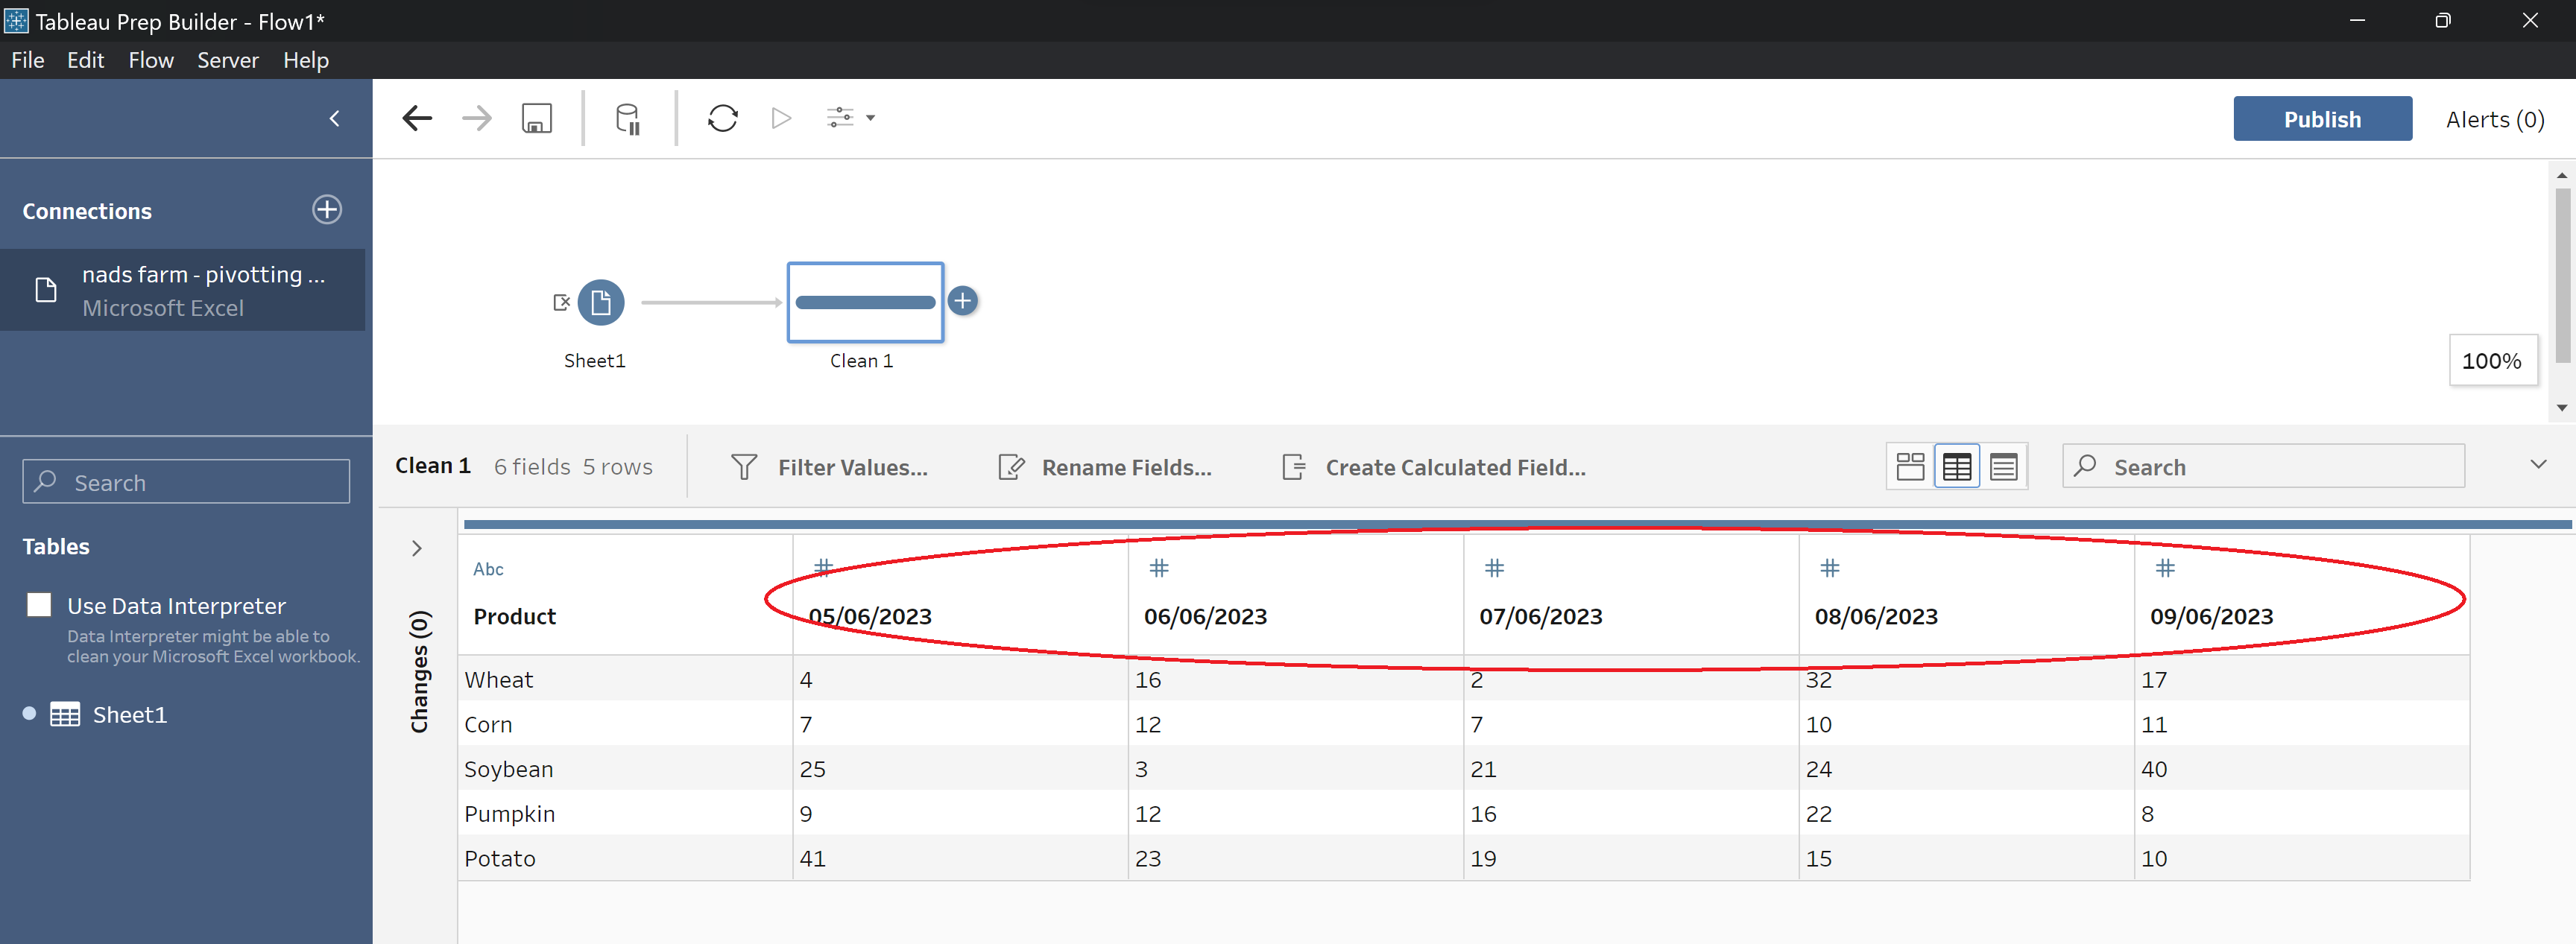
Step 1: Load your data into Tableau Prep and add a clean step to view the data and identify the rows that need to be pivoted.
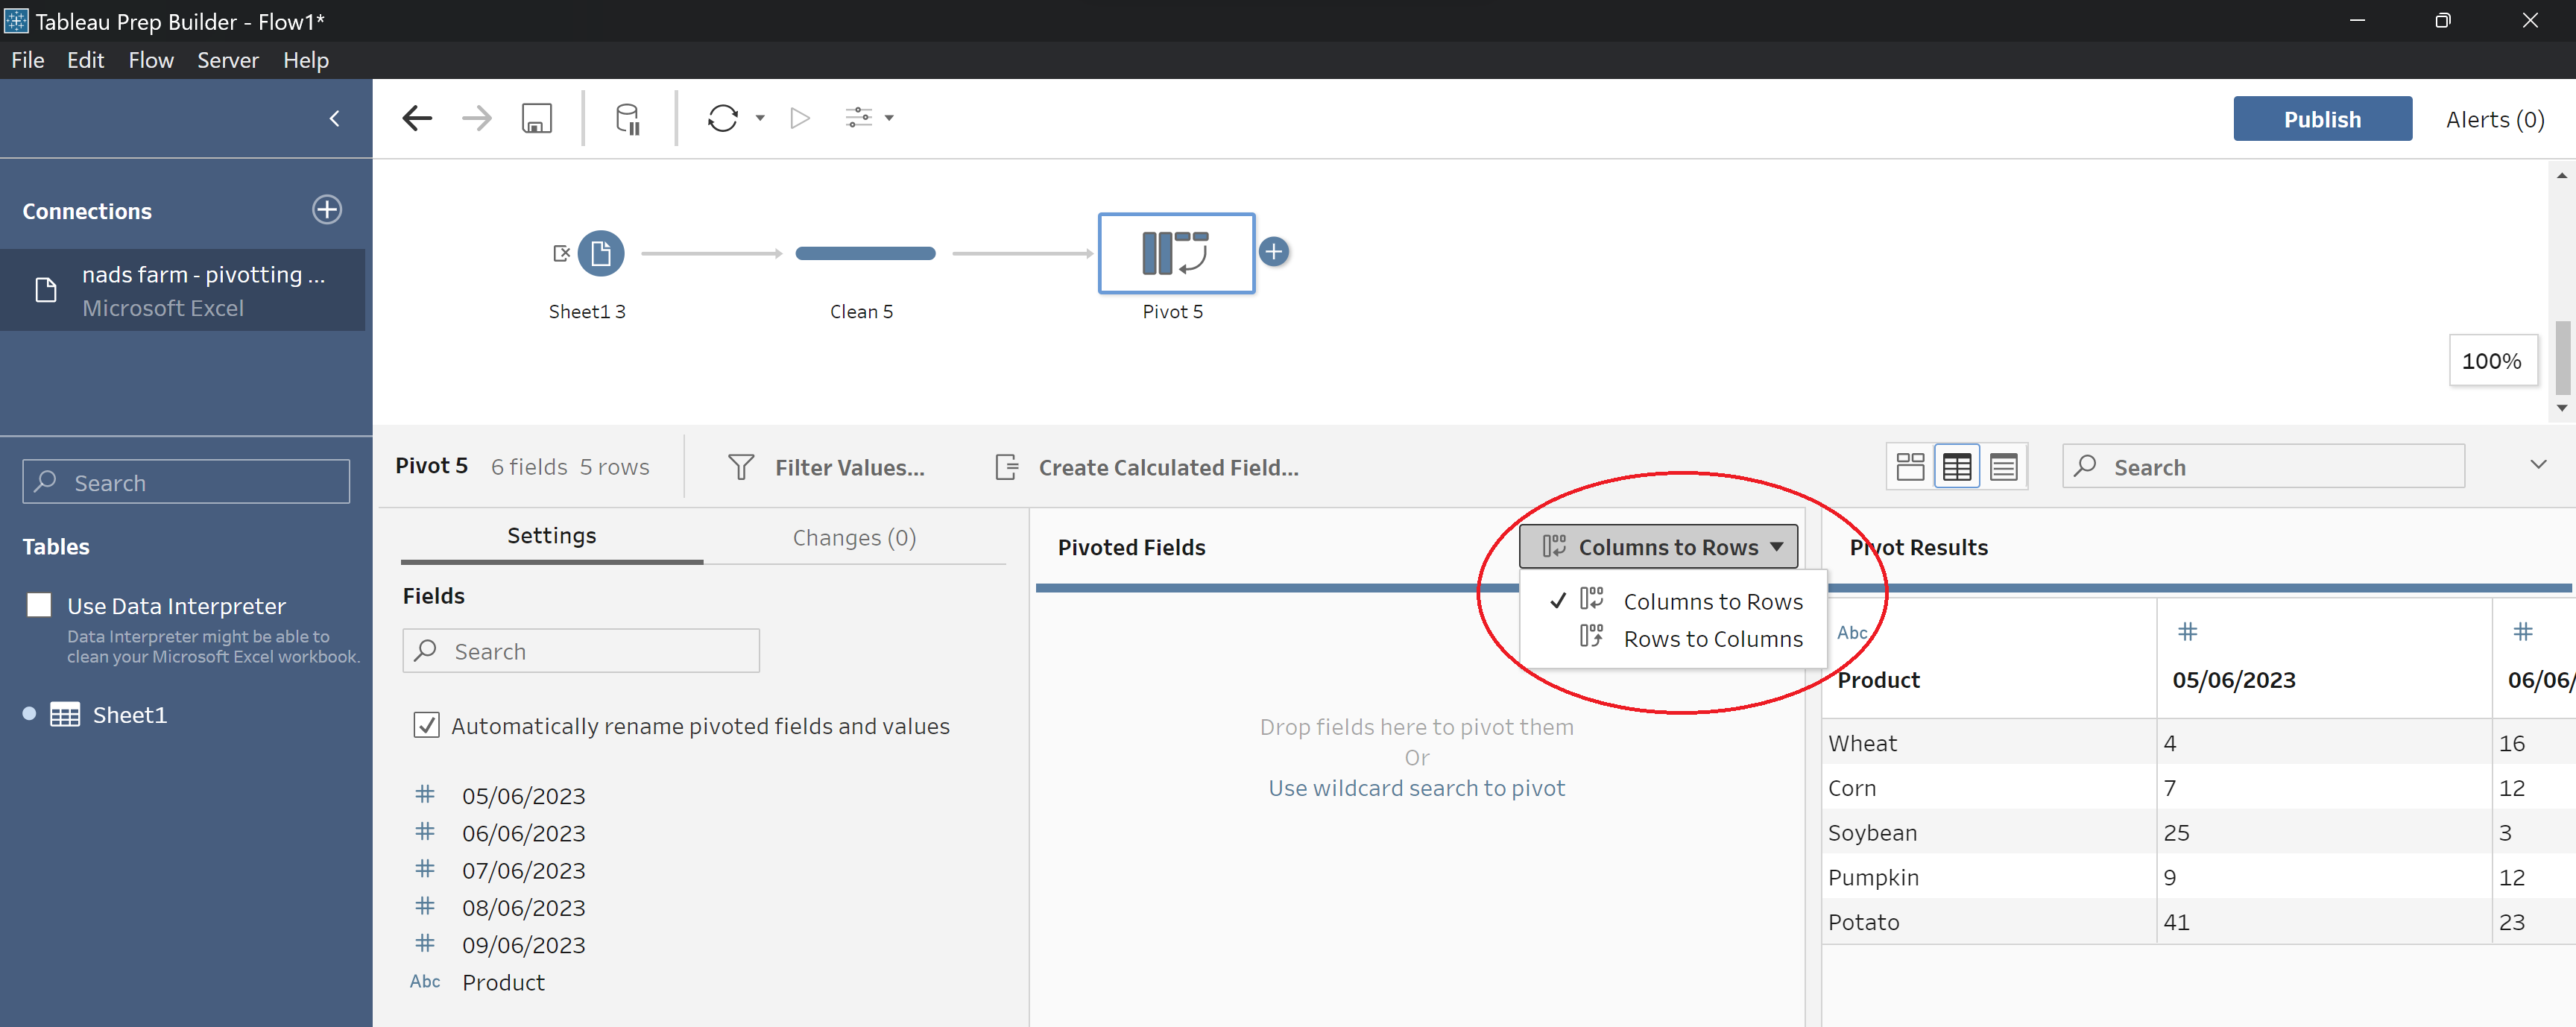
Step 2: Add a new step and select 'Pivot'. You will be presented with a list of all of your measures listed on the left hand side and an empty box to the right of it. This box is where you will drag the measures that you want to transform from columns into rows. Ensure that the drop down box above the Pivoted Fields box is selected as 'Columns to Rows'.
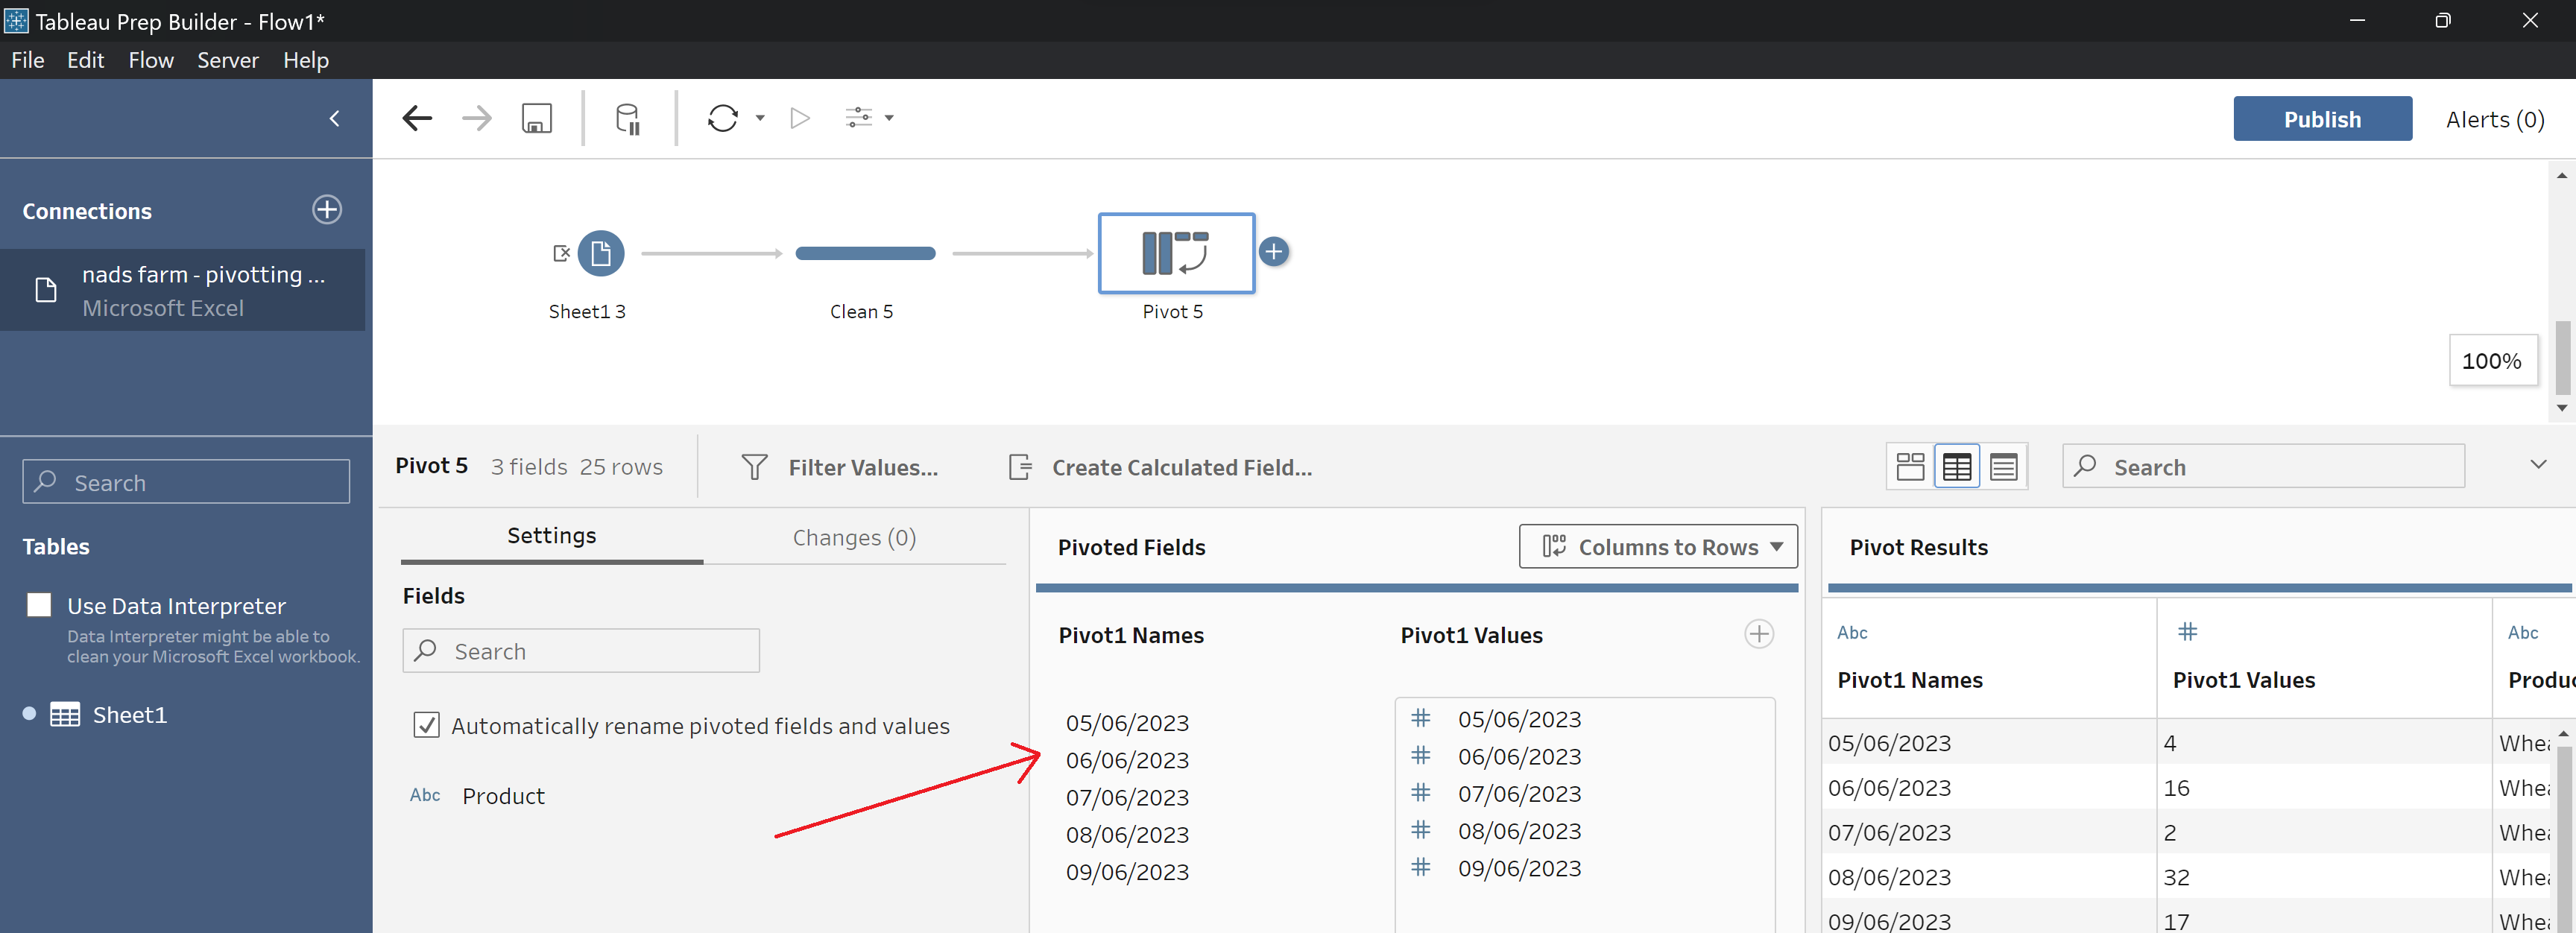
Step 3: Hold down the ctrl button on your keyboard and select your desired columns in the Fields section on the left hand side and drag them over to the Pivoted Fields box.
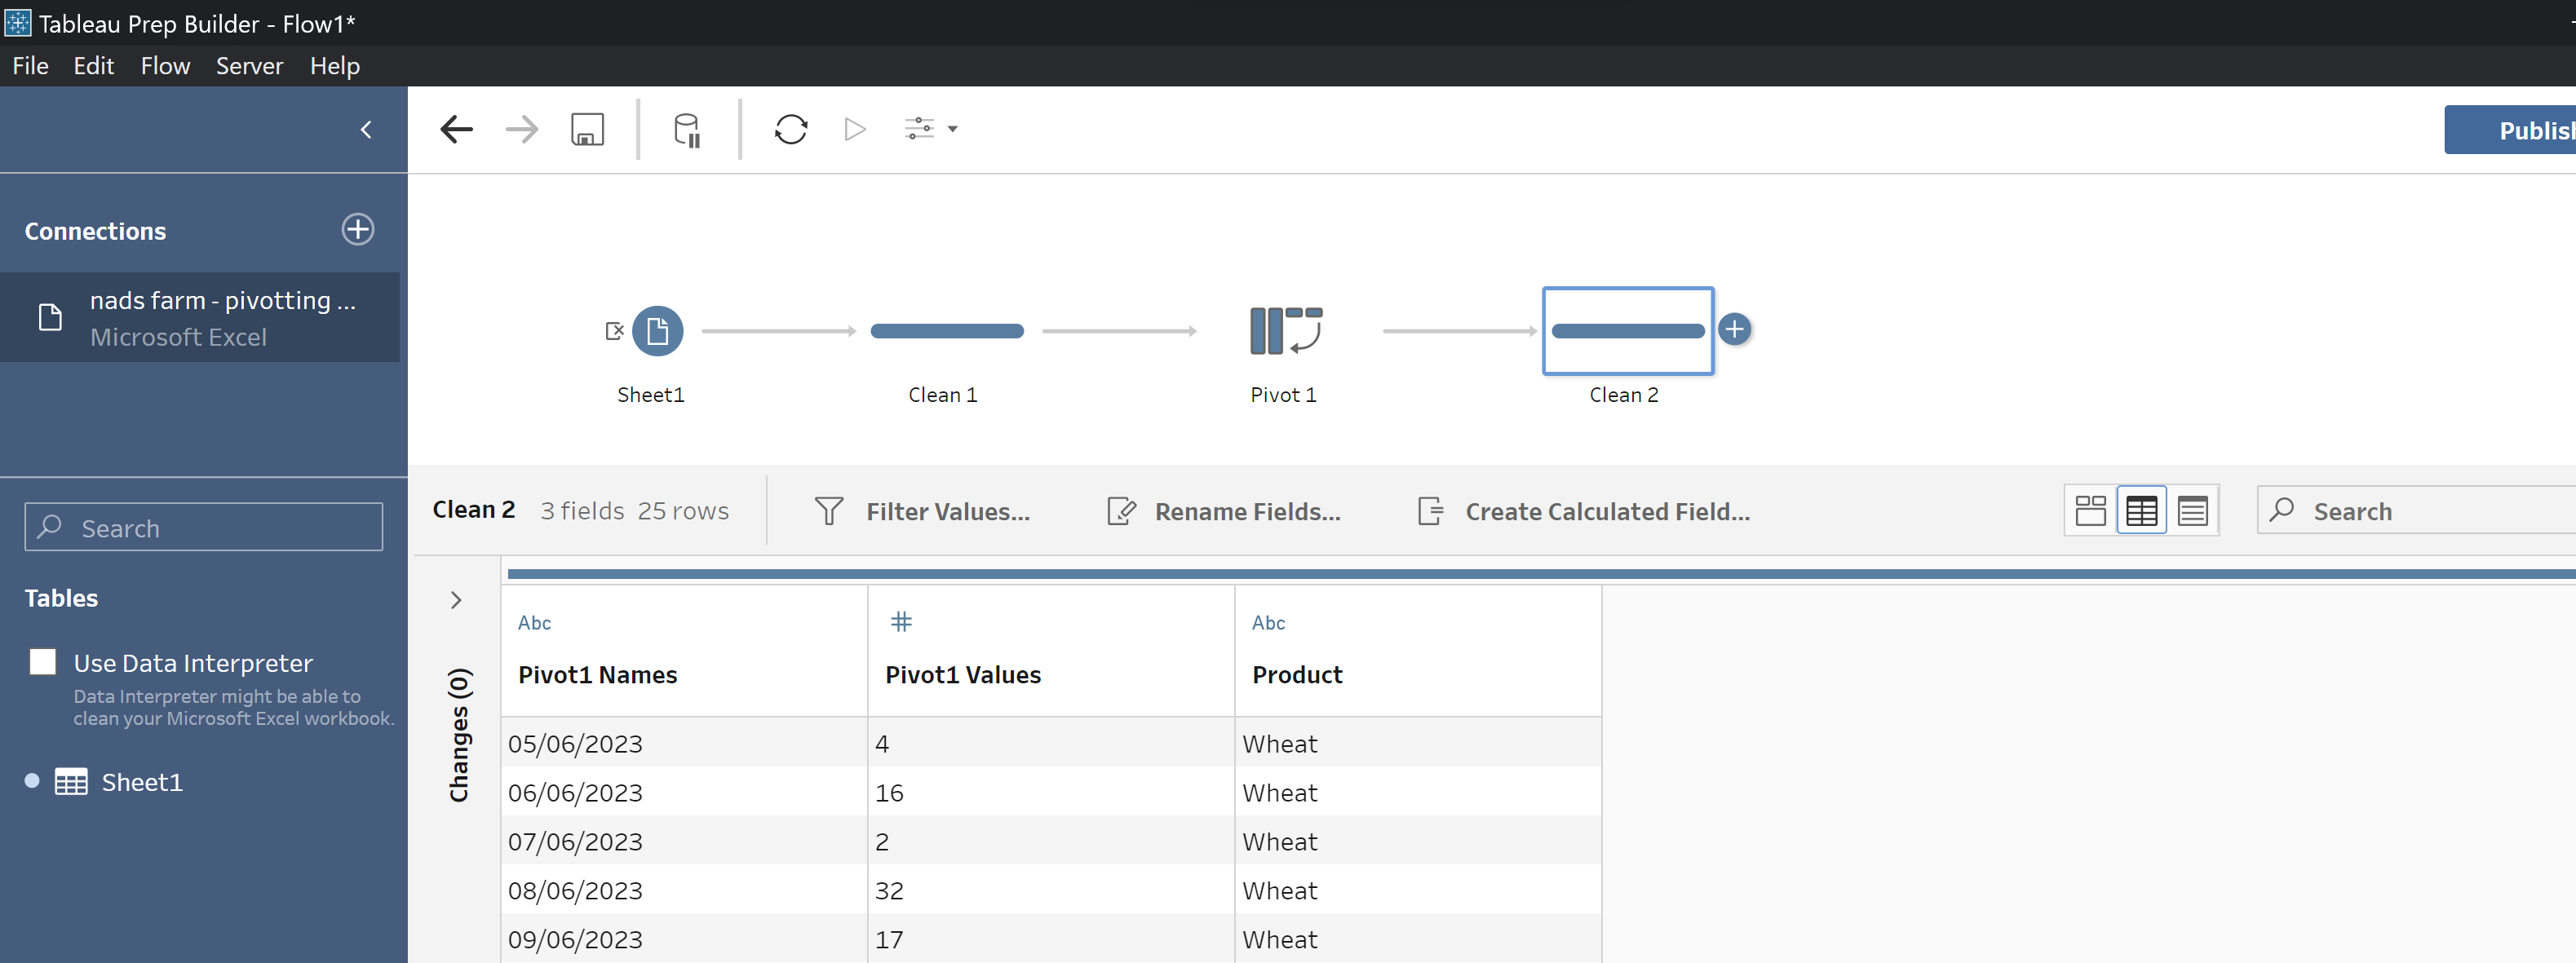
Step 4: Add a new Clean step to your workflow to view your pivot. Rename default column headings to match your data by double clicking on the headings or right clicking with your mouse and selecting 'Rename fields'.
When to use a wildcard search to pivot:
If you are anticipating your data to update in the future, you may want to use a wildcard search when selecting your fields to pivot, for example if future dates will be added. Here's how to do this:
Step 1: Once you've added your pivot step to your workflow and ensured that your drop down is set to columns to rows, select 'Use wildcard search to pivot'.
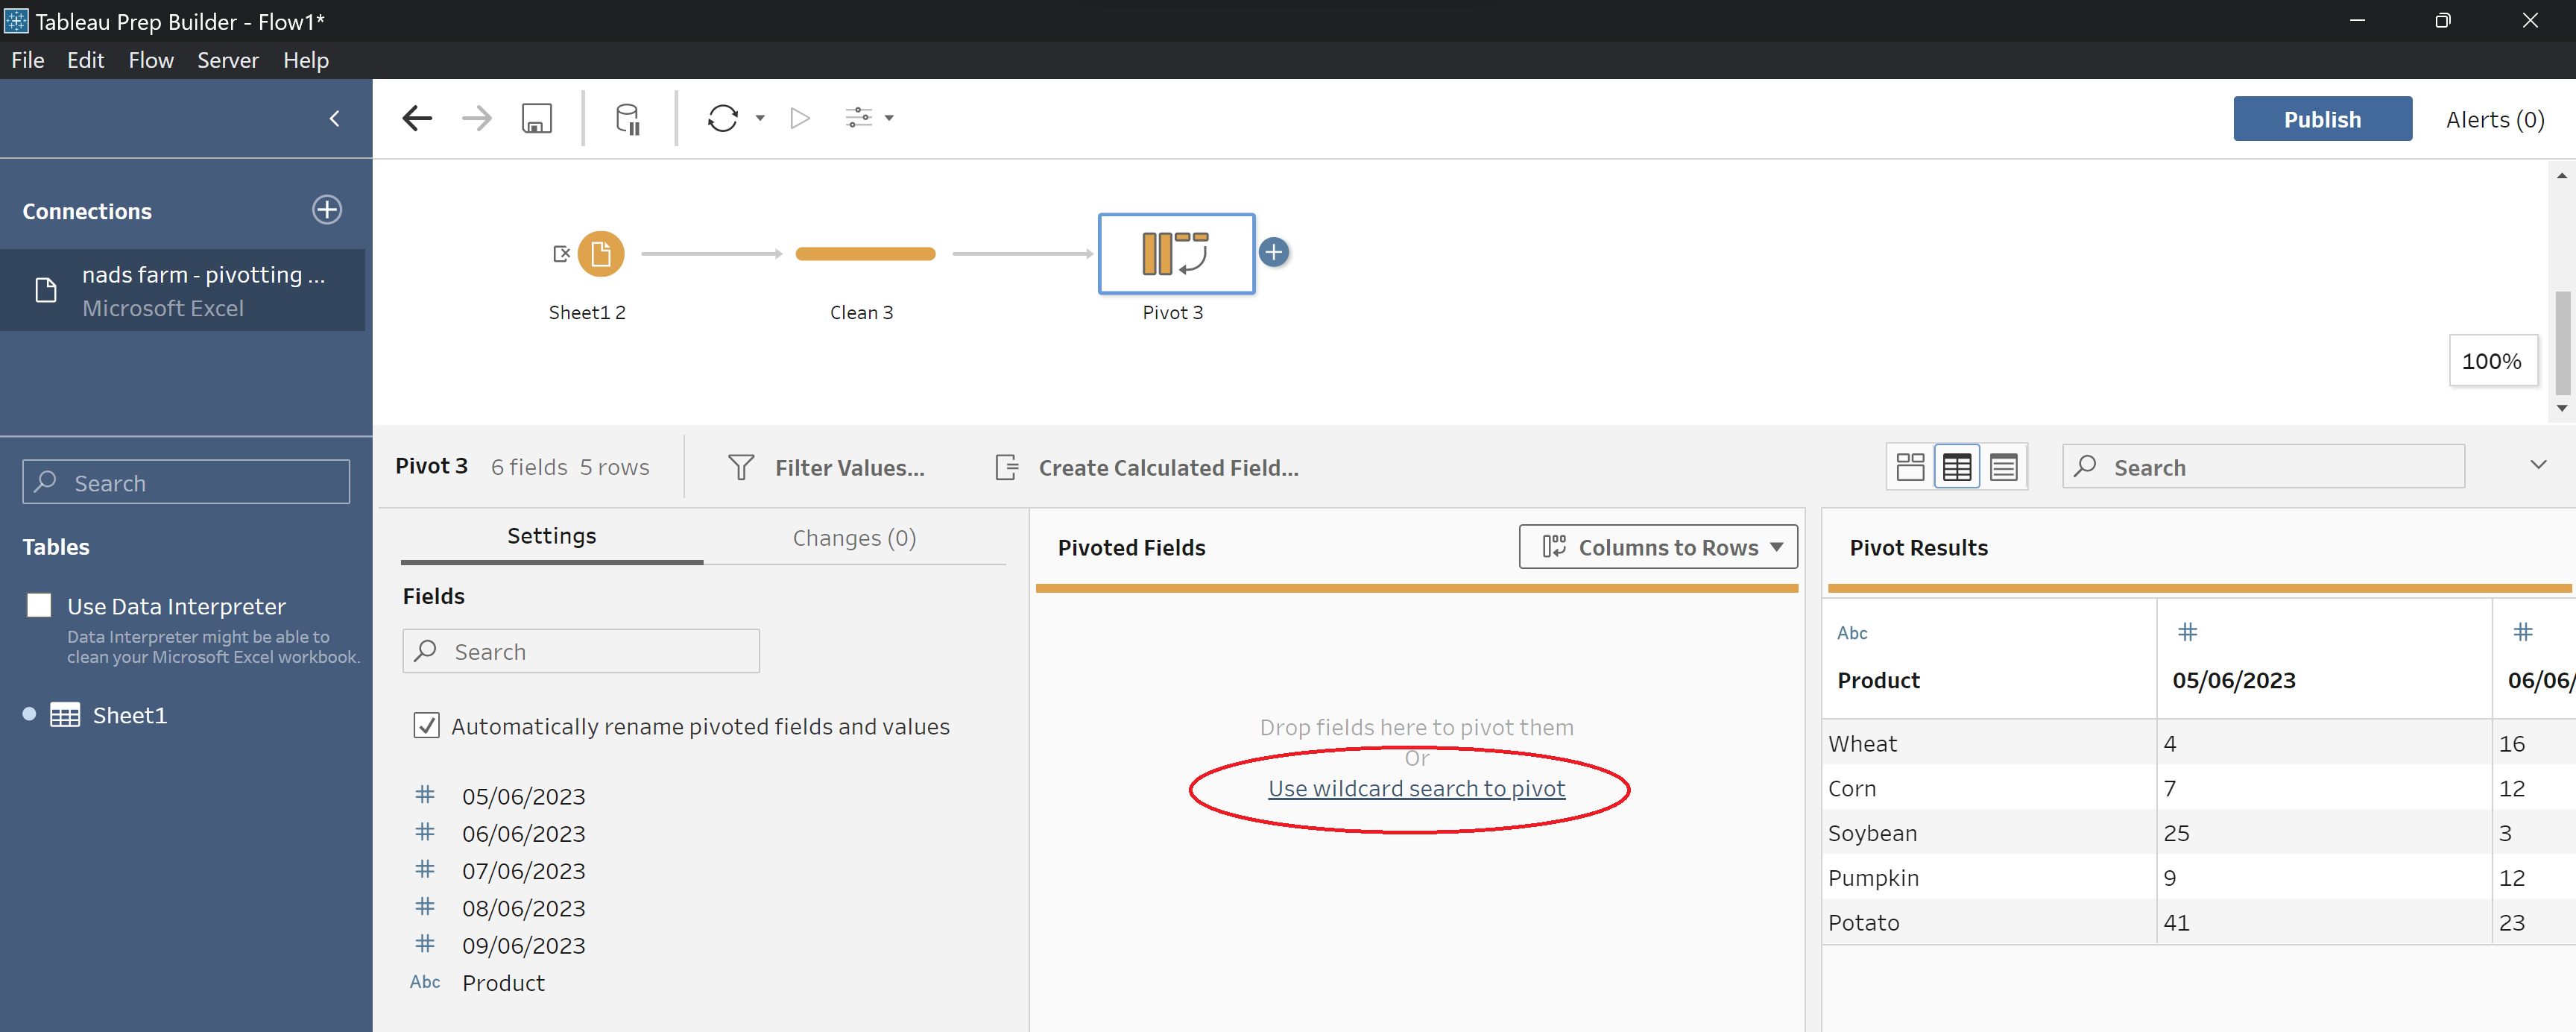
Step 2: Type a common character that will identify future data in your field. This could be a word, series of letters or punctuation for example. As the example will be identifying dates, a '/' will be used as.
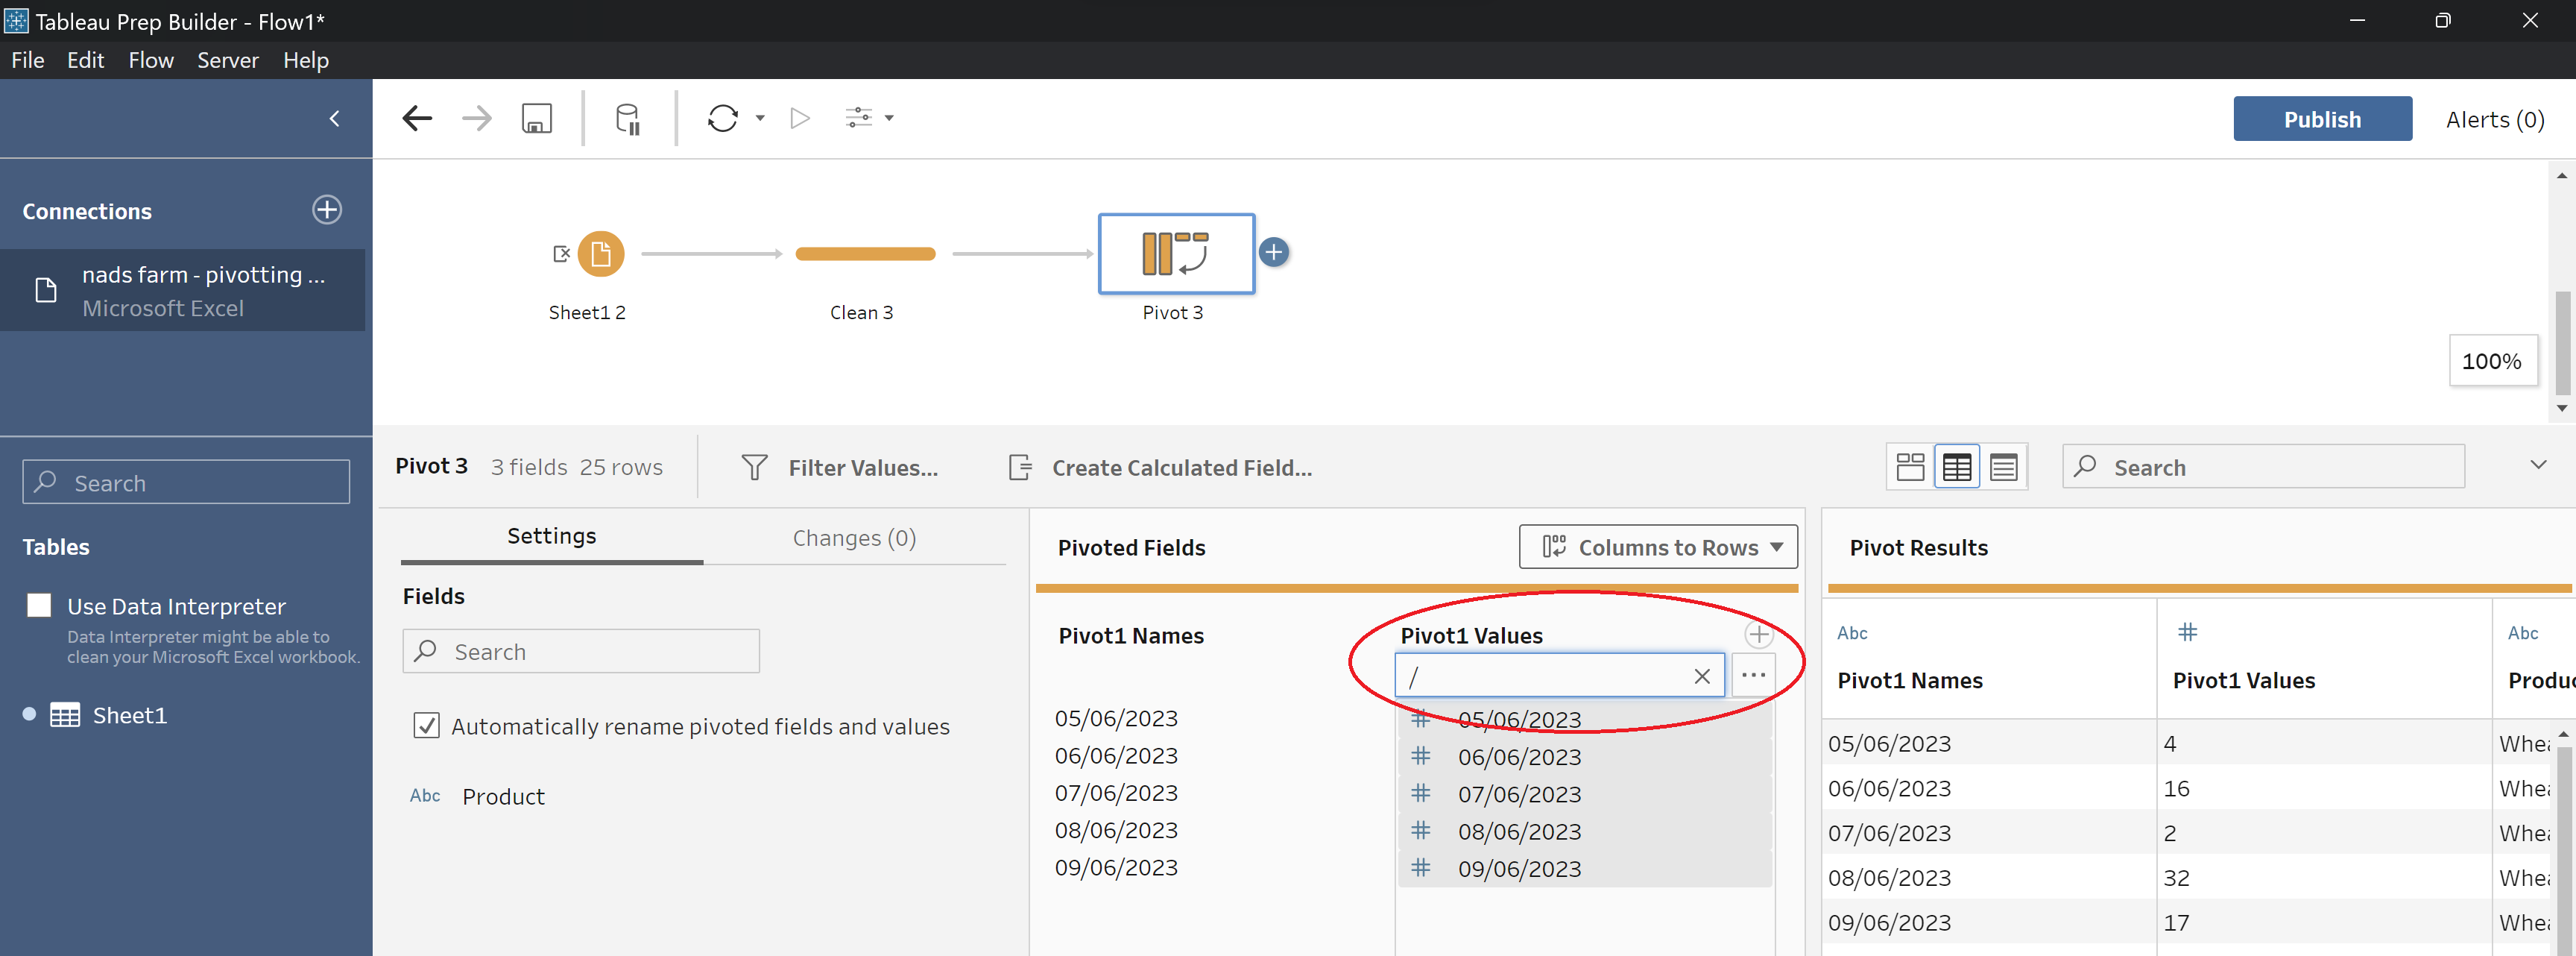
Step 3: Add a new Clean step to your workflow to view your pivot. Rename default column headings to match your data by double clicking on the headings or right clicking with your mouse and selecting 'Rename fields'.
And you're done! Best of luck on your pivoting journey and if you have any questions feel free to reach out - nadia.holloway@theinformationlab.co.uk
