When making Alteryx App, one of the most useful features is being able to choose what you want to filter on in your data set. Let's say that you are looking at a bunch of Lego sets, and you want to look at a particular set. You could put in a filter tool and filter to that particular set, but now you want to look at another one. You would now need to go back to the filter tool and put in a new calculation into the tool. With the app it is now just the click of a drop-down menu or just type in the new set into the app.
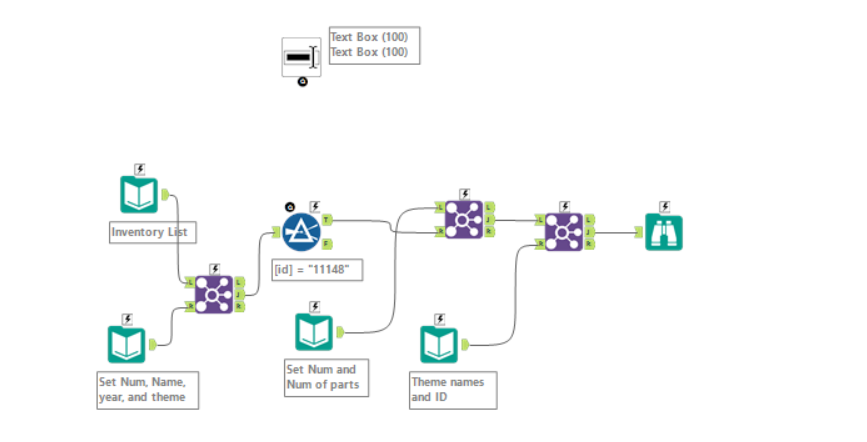
To set up the app the first thing we need to do is build the workflow. So, if we take the example from above, we will need a working workflow that filters down to one Lego set. Once you've done that, and have run it successfully we are now ready to build the app.

We now have a workflow that filters down to one set via [id] and the output is showing one model.
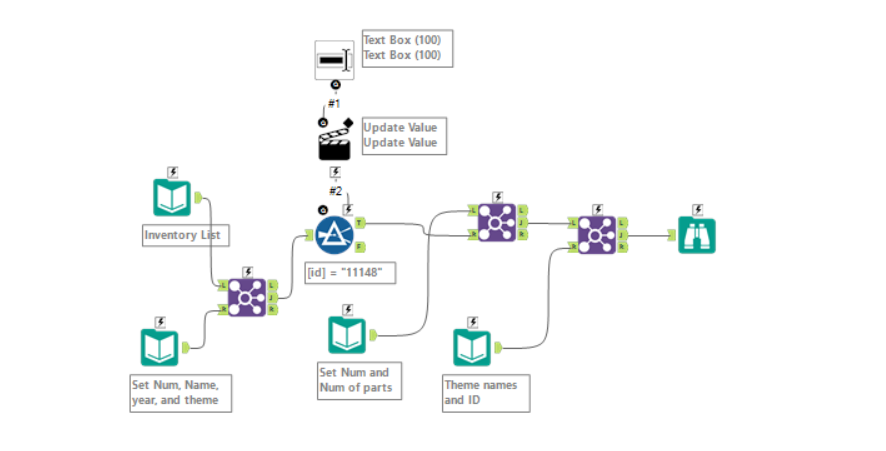
The next step is to add the interface tools to the workflow. First choose what type of interface tool you want to use. Since we are changing and id I recommend a drop-drop tool or a type in tool. For this example, I will use a type in tool. (The Drop-down tool is more complex in execution.)

The next step is to drag the black circle underneath the tool to the lightning bolt on the filter tool.

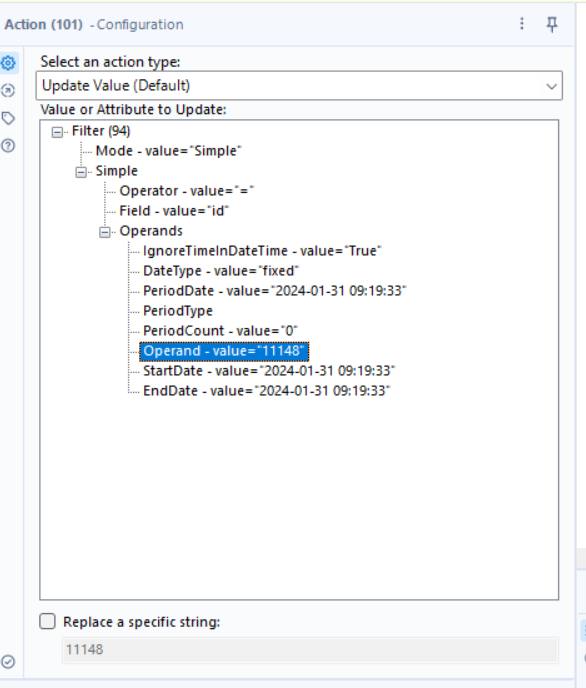
When you do this, Alteryx will automatically create an action tool, which is where most of the configuration is done. When we click on the action tool, we will see the configuration window on the right.

Within this pane, click the plus button next to "Simple," followed by the plus sign next to "Operands" to access the complete settings of the filter tool. You'll observe that the field being examined is [ID], filtered using an equal sign, and the original [ID] entered is 11148. To change the ID number, click on that section within the filter settings, which will highlight it in blue.

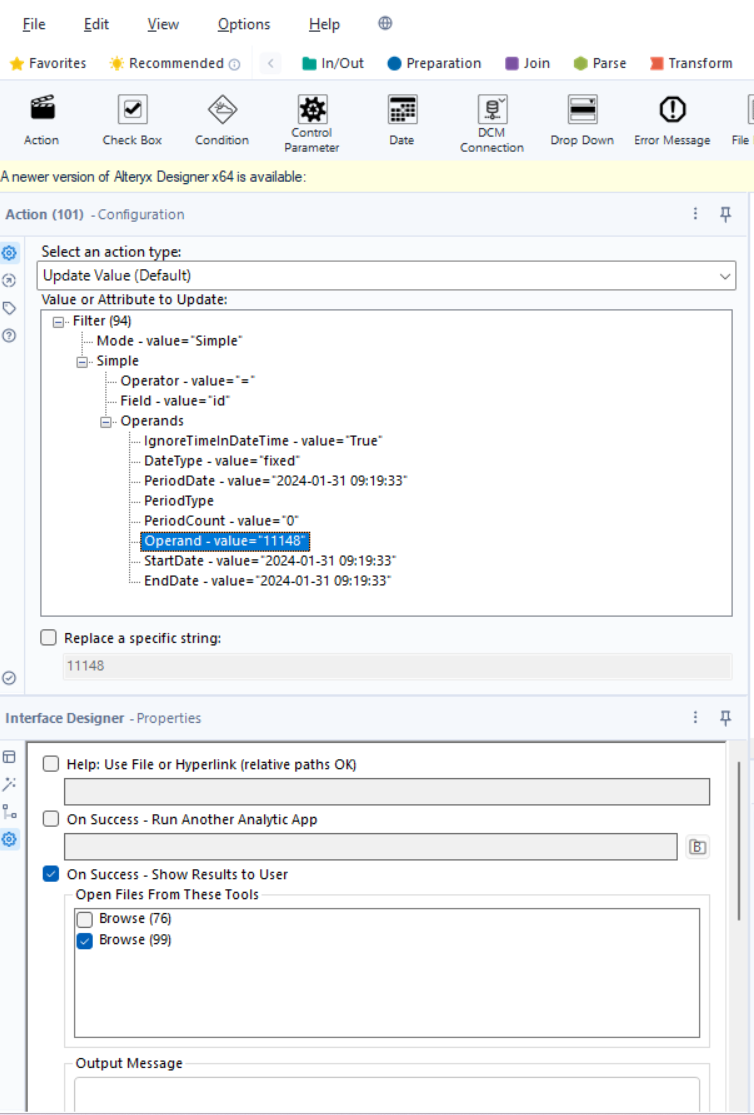
Subsequently, connect the app to the browse/output tool at the end of the workflow. To do so, access the Interface Designer by hovering over the View tab and selecting "View Interface Designer." Then, navigate to the interface designer and click on the gear icon to access its properties. Under "On Success," designate the browse tool located at the end of your workflow.

Now to view your app click the wand next to the run button.
