


Before diving into the fundamentals of dbt, it’s important to set yourself up with the right tools. Start by selecting your data platform and creating the necessary accounts to access the free data sources in the practice exercises.
Prerequisites
First, you will need to create a Google Account.
Next, we need a dbt Cloud Account. The dbt website (getdbt.com) will guide you through creating an account through a free trial. Note that the paid version of dbt is for team licenses; there is an entirely free version for individual developers.
Once your dbt Cloud account is created and you are signed in, click on your name in the bottom left corner and go to Profile.

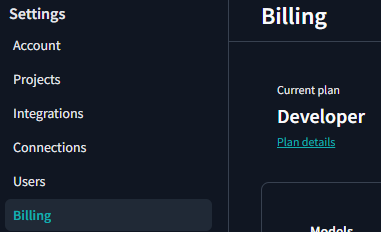
Navigate to 'Billing' and click on 'Plan details'. Here is where you can change your plan from Team to Developer to gain access to the full free version.
dbt Cloud supports connections to a wide range of data platforms, giving you flexibility in your work. While the dbt Fundamentals course walks you through connecting to Snowflake, this blog post will guide you through setting up a connection between dbt Cloud and BigQuery instead—so you can follow along using Google’s cloud data warehouse.
The last account required for this setup is a Google Cloud account (cloud.google.com). A button in the top right corner next to your profile picture says 'Start Free'. Click on that to activate your Google Cloud account.
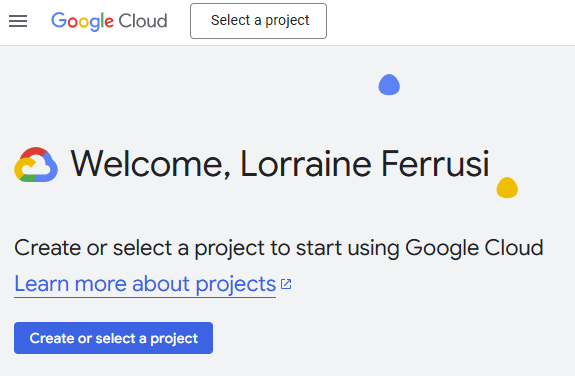
Once everything is set up, it is time to create a new project in Google Cloud. You can do this by clicking the 'Create or select a project' button in the welcome message or the 'Select a project' dropdown in the top-left corner next to the Google Cloud logo.
Click 'New Project' and enter a name for your project. If you're using a business Google account, you may see additional location and organization options, so go ahead and choose the appropriate information. If you're using a personal Google account, simply leave the Location set to 'No organization'.


You can track the progress of your project creation by opening the notifications dropdown in the top-right corner. Once the project is ready, click 'Select Project' to continue.

Open the navigation menu on the left-hand of the screen by clicking on the three-stripe menu next to the Google Cloud logo. Click on BigQuery to open the Studio.

Step 1: Setting up a BiqQuery project
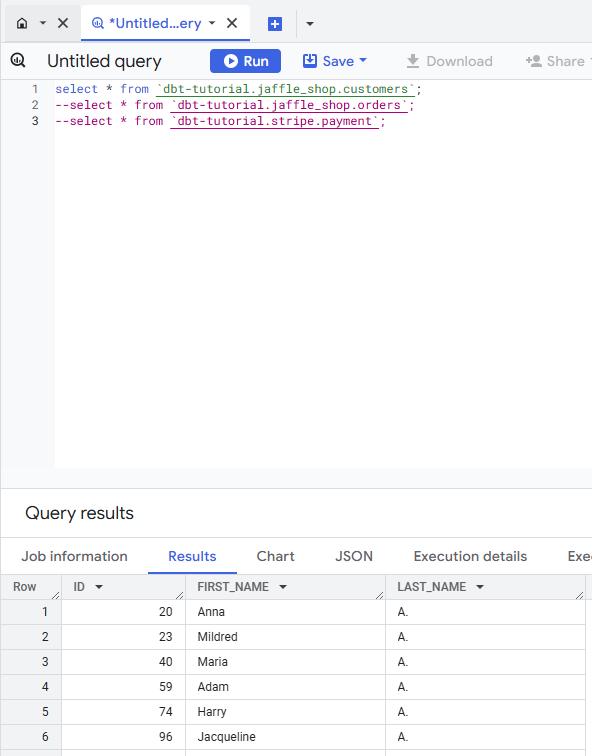
The Google Cloud project you just created should now appear in the Explorer tab. Click on 'SQL query' to open a new query editor, where you can run a few simple queries to confirm that you can access the data.

Run the following queries individually to see the tables in the 'Results' tab.
select * from `dbt-tutorial.jaffle_shop.customers`;
select * from `dbt-tutorial.jaffle_shop.orders`;
select * from `dbt-tutorial.stripe.payment`;
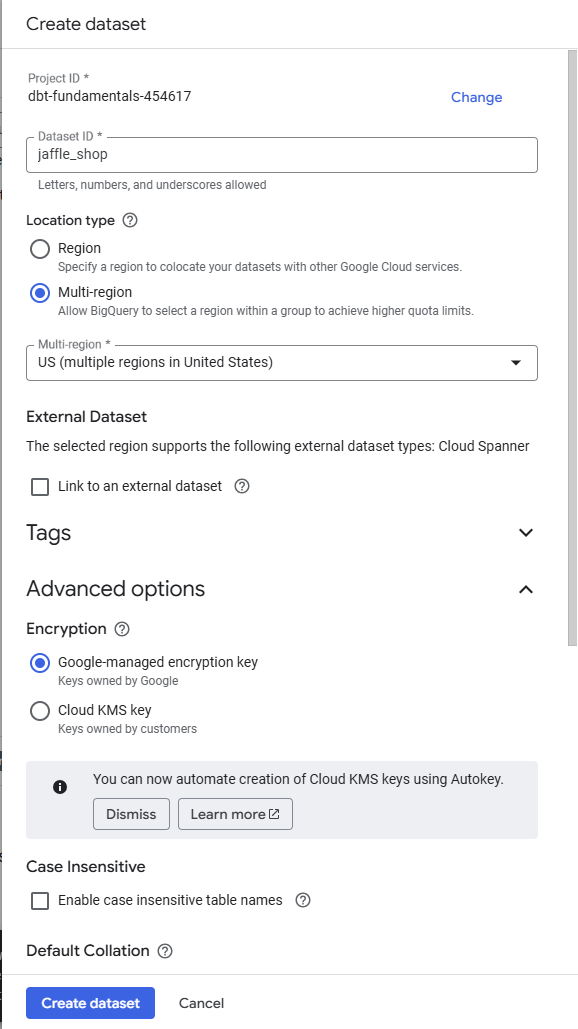
Next, you will create two datasets within your project—one for jaffle_shop and another for stripe. To do this, click the three-dot menu next to your project name in the Explorer tab, then select 'Create dataset'.

Use the screenshot below to fill in the information. Only change the 'Dataset ID' and leave the rest of the options on their default settings. Click 'Create dataset' when you are done.
You’ll know the datasets were created successfully when you click the dropdown arrow next to your project name and see jaffle_shop and stripe listed beneath it.

To allow dbt Cloud to connect to your BigQuery warehouse, you will need to generate a keyfile. A keyfile is a JSON file that contains your service account credentials — it acts like a secure pass that lets dbt access your Google Cloud resources on your behalf.
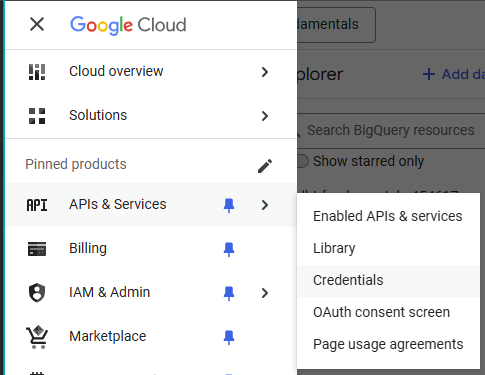
Open the navigation menu on the left-hand of the screen by clicking on the three-stripe menu next to the Google Cloud logo. Click on 'APIs & Services' and then on 'Credentials'.
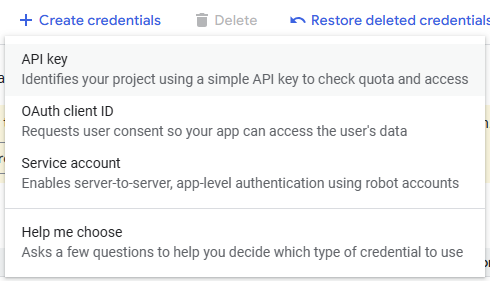
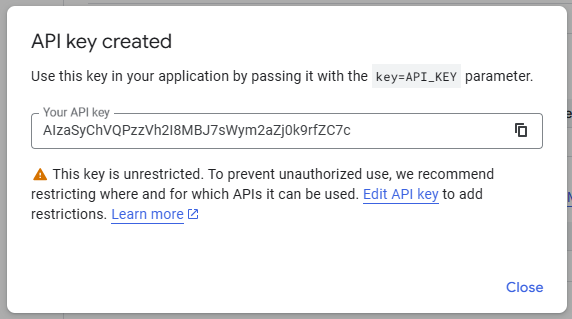
At the top of the Google Cloud Console, click the '+ Create credentials' button and select 'API key' from the dropdown. Google Cloud will generate a unique API key for your project—be sure to copy this key and store it somewhere safe, as you’ll need it later to authenticate access.
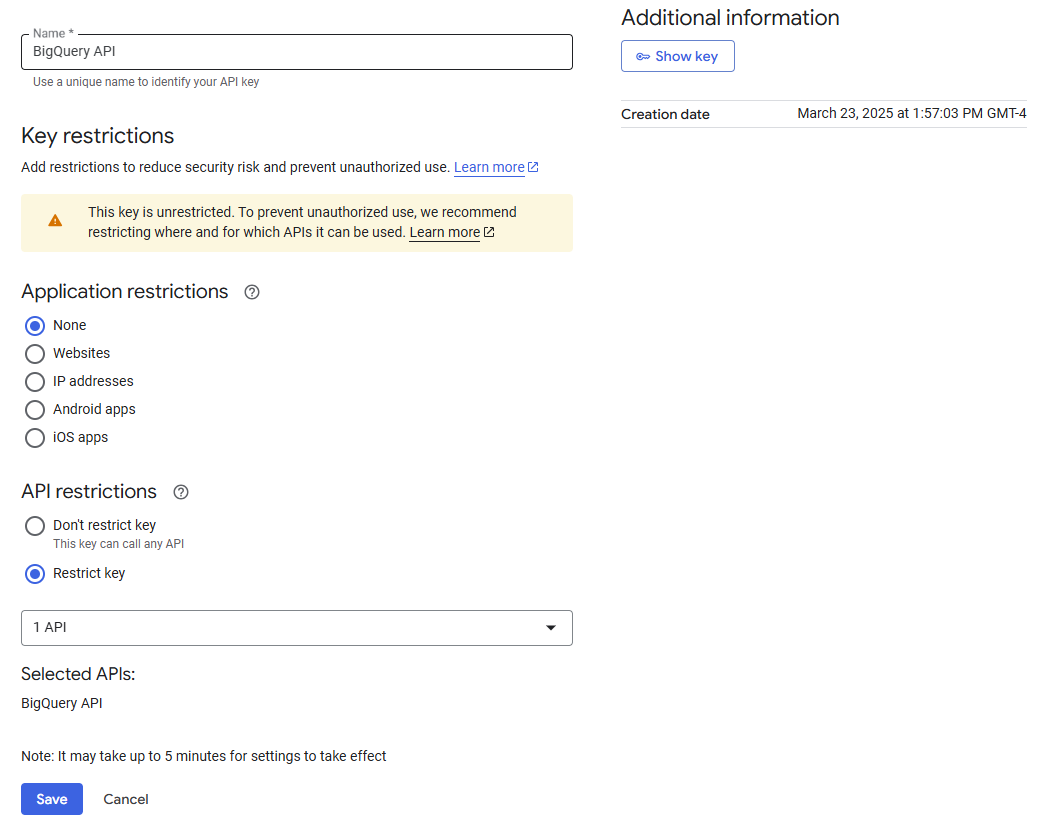
Click on 'Edit API key' to give it a more descriptive name—this will help you stay organized, especially if you create multiple keys in the future. While you are there, restrict the key’s usage by enabling access only to the BigQuery API for added security.
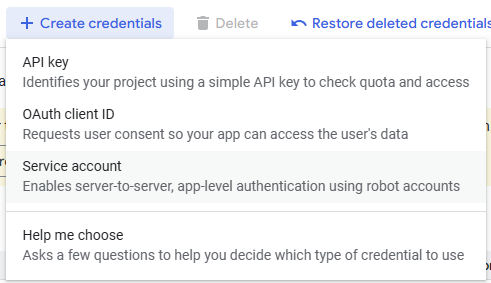
Next, you need to create a Service Account. At the top of the Google Cloud Console, click the '+ Create credentials' button and select 'Service account' from the dropdown.
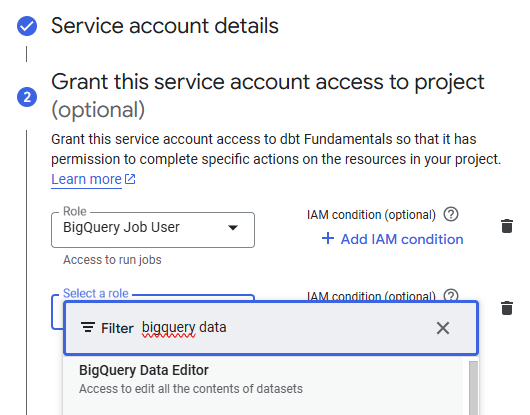
Fill in the required information as shown in the screenshot below. To grant the service account the proper access to work with dbt, assign it the 'BigQuery Job User' and 'BigQuery Data Editor' roles. These permissions allow dbt to run queries and modify data within your BigQuery environment.

Your service account should now appear on the Credentials homepage. Click 'Edit service account' to open the settings page where you will be able to generate the keyfile.

Navigate to the Keys tab, then click 'Add key' and select 'Create new key'. In the pop-up window, choose the JSON key type and click 'Create'. A File Explorer window will open—be sure to save the JSON file somewhere safe and easy to find, as you will need it later when setting up the connection in dbt Cloud.

Step 2: dbt Cloud
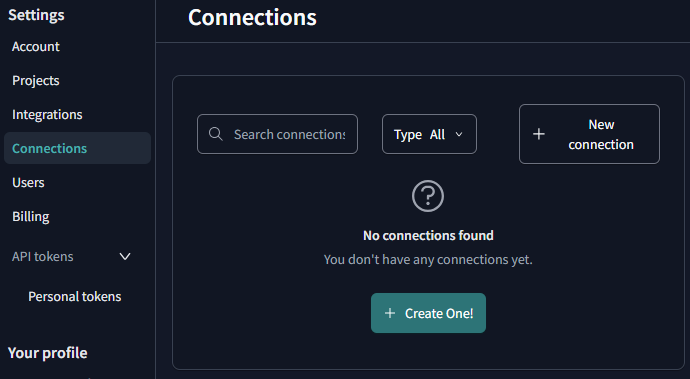
Head over to the dbt Cloud website, then click on your profile icon in the bottom-left corner of the screen. Select 'Account Settings' from the menu, go to the Connections tab and click on '+ Create One!' to start setting up a new connection.

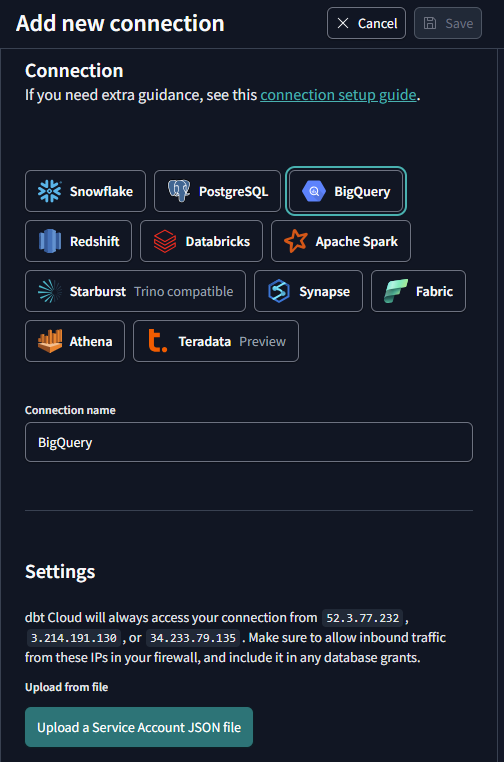
To set up your connection, click on BigQuery for the warehouse and then click 'Next'. In the settings, select 'Upload a Service Account JSON File' and choose the JSON file you downloaded when generating your BigQuery credentials. Once uploaded, dbt Cloud will automatically fill in all the required fields for you.
Click 'Test Connection' to verify that dbt Cloud can successfully access your BigQuery account. If the test passes, click 'Next' to continue. If the test fails, you may need to revisit the steps and regenerate your BigQuery credentials to resolve the issue.
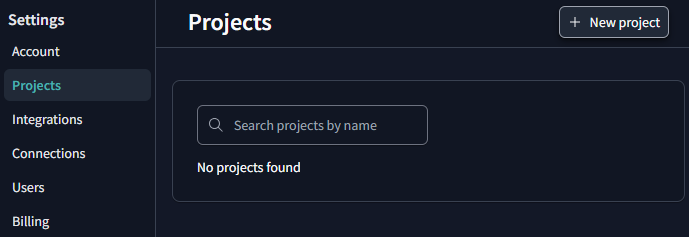
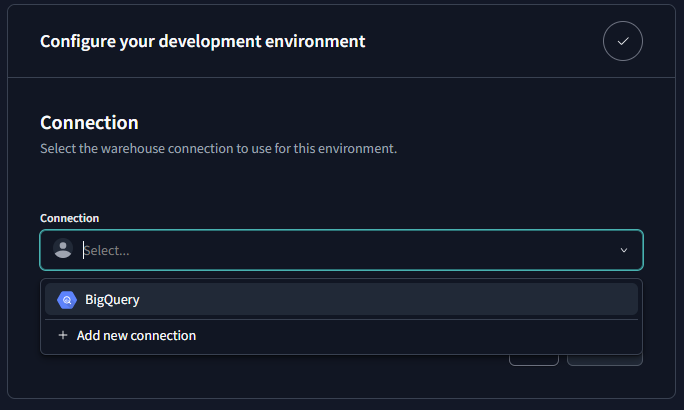
Now you are ready to create a new project! Head to the 'Projects' tab and click '+ New Project'. To configure your development environment, select BigQuery under Connections.
For more details on setting up this connection, be sure to check out the Quickstart Guide provided by dbt. And don’t miss the next blog in this series, where we take a deeper dive into the dbt Fundamentals course and explore its core concepts. Happy coding!