


One of the key things I have learnt from now getting started within my journey to engineering, and by extent coding, is the principle of version control and why it is very important and how Git & GitHub plays a pivotal role in this.
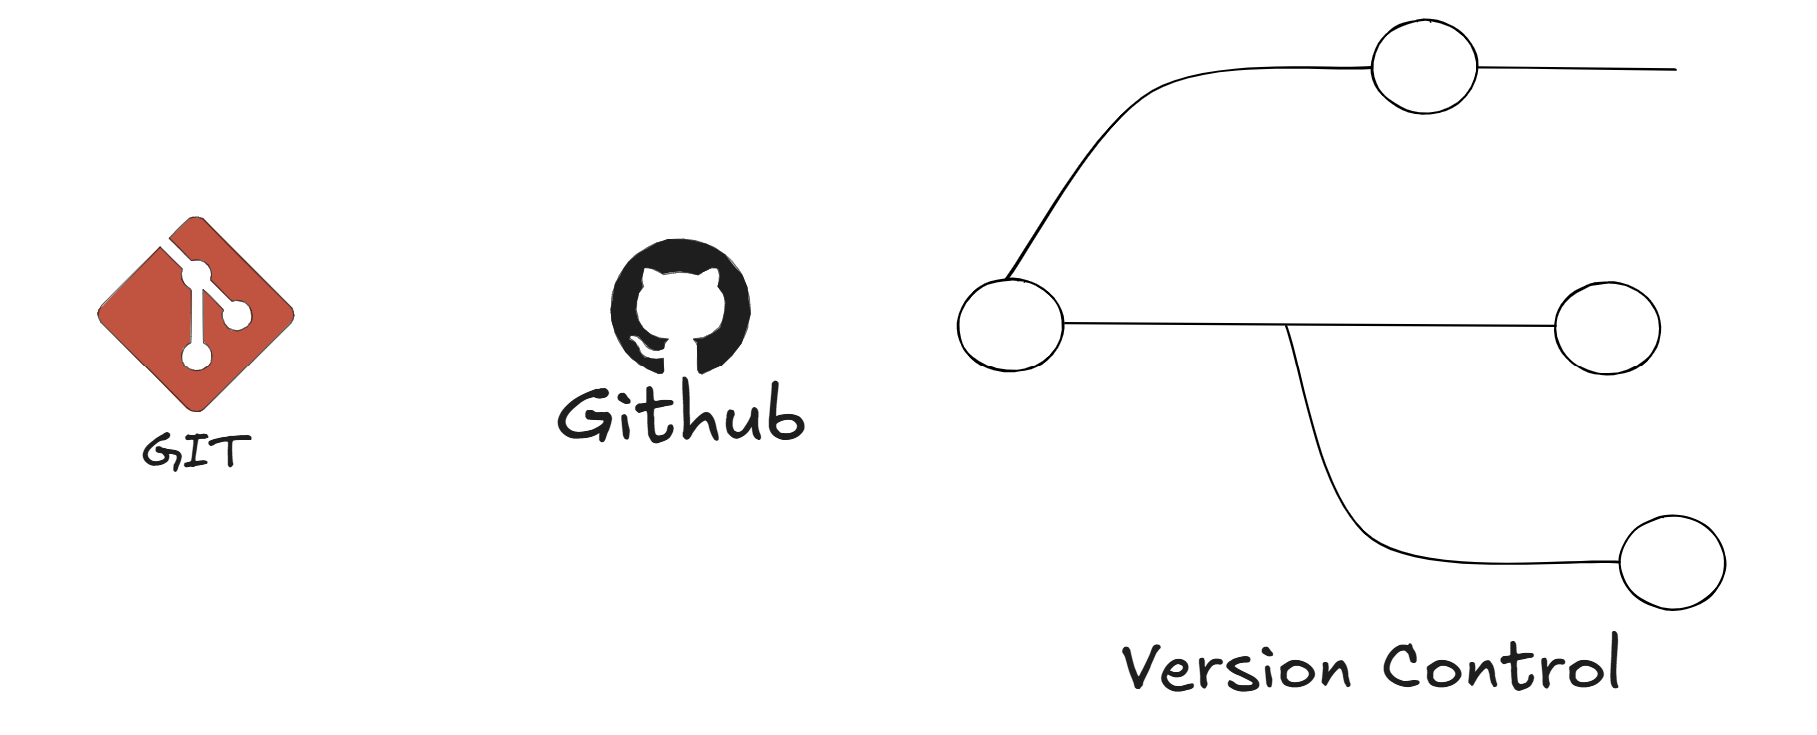
Intro to Version Control
Version control essentially allows software/data teams to keep track of software project history. In a commercial setting, there would be multiple developers working on a single project and if something happened to the main/production code (i.e. a code merge from several developers causing bugs) then we can revert to a previous version. It also facilitates continuous and efficient development as developers can work on separate & different features without affecting the main code.
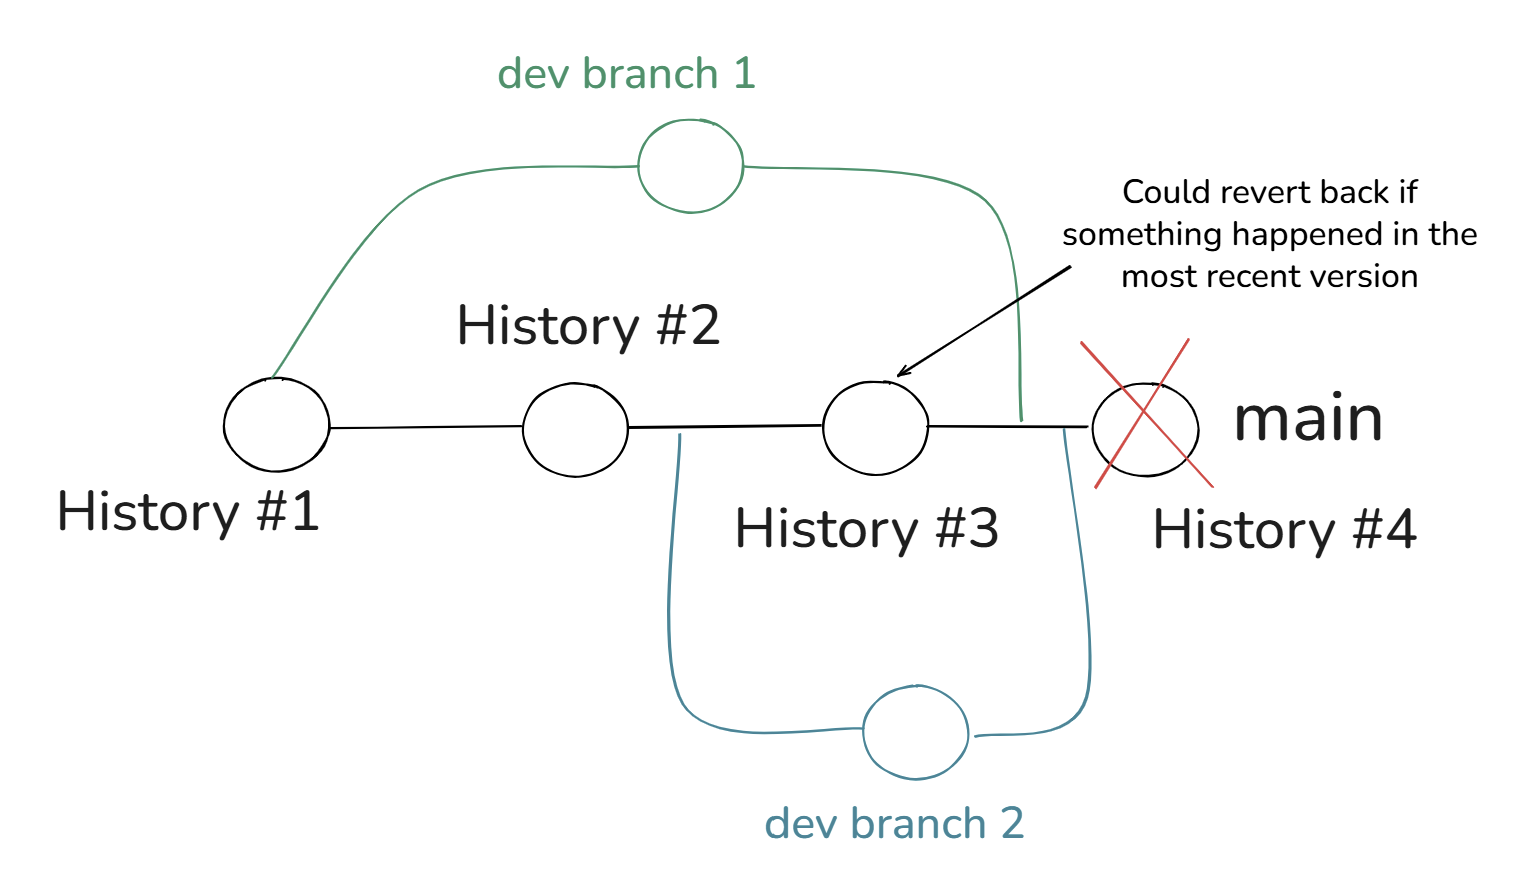
As highlighted already it is generally best practice to not work on the main branch and instead make a separate branch to work on and implement features x, y, z, etc. and then push that into the main branch. This allows a stable main branch whilst being able to make developments without ever disrupting the main branch.
Git vs GitHub
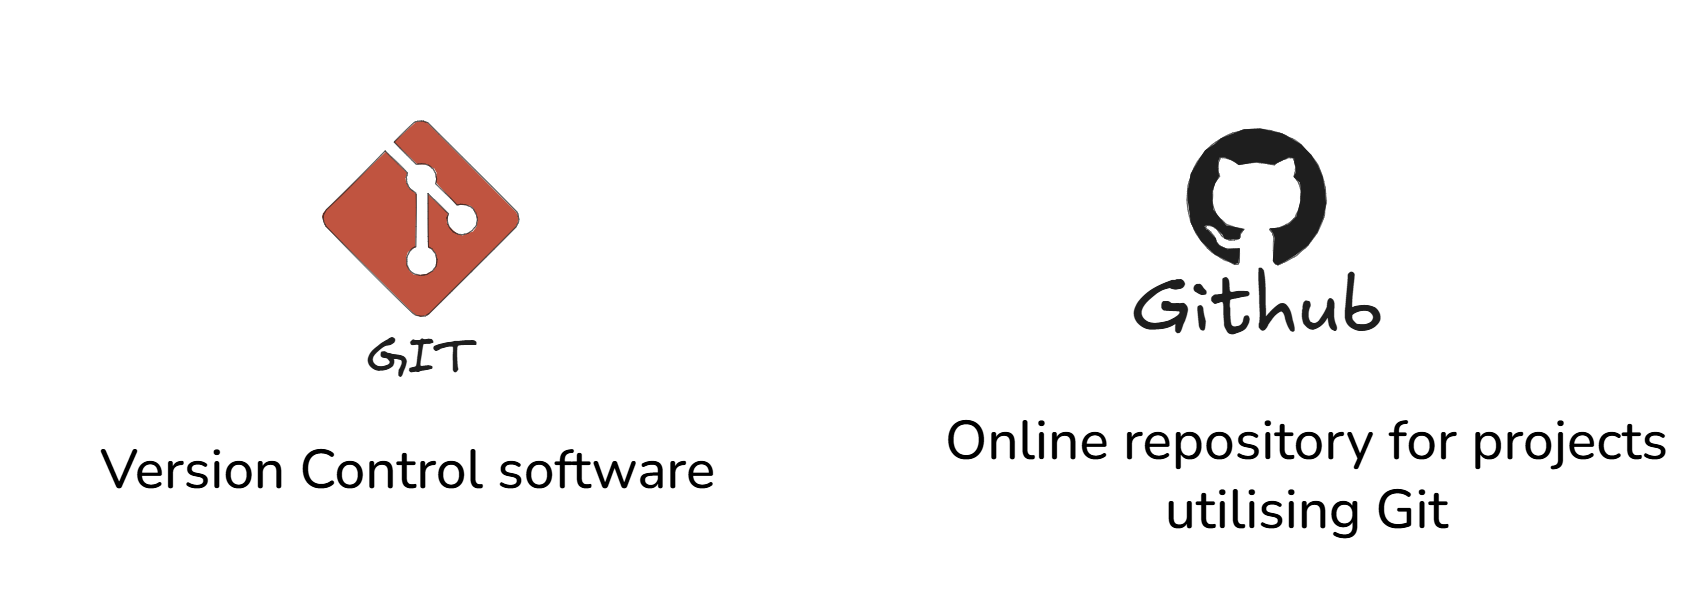
As shown in the following figure below, there is a key distinction between Git and GitHub. Git is the principle of version control mentioned earlier being an open-source software that lets you track changes within your code. GitHub, on the other hand, is the cloud-based hosting platform for your projects that allows collaboration with other developers.
GitHub Repo Configurations
Some key things to consider when setting up a GitHub repo, based from personal experience, would be to enable a README file and a .gitignore file. A README is where it would house the documentation for the project and repo. Like all good projects, good documentation follows suit. The .gitignore, on the other hand, doesn't upload anything that is specified inside it such as data (e.g. if I put in '\data', it means don't upload to GitHub anything within my 'data' directory). It is essential for keeping any credentials/private keys hidden when publishing your project online.

Basic Github Process
The general idea of pushing and uploading your code can be outlined below:
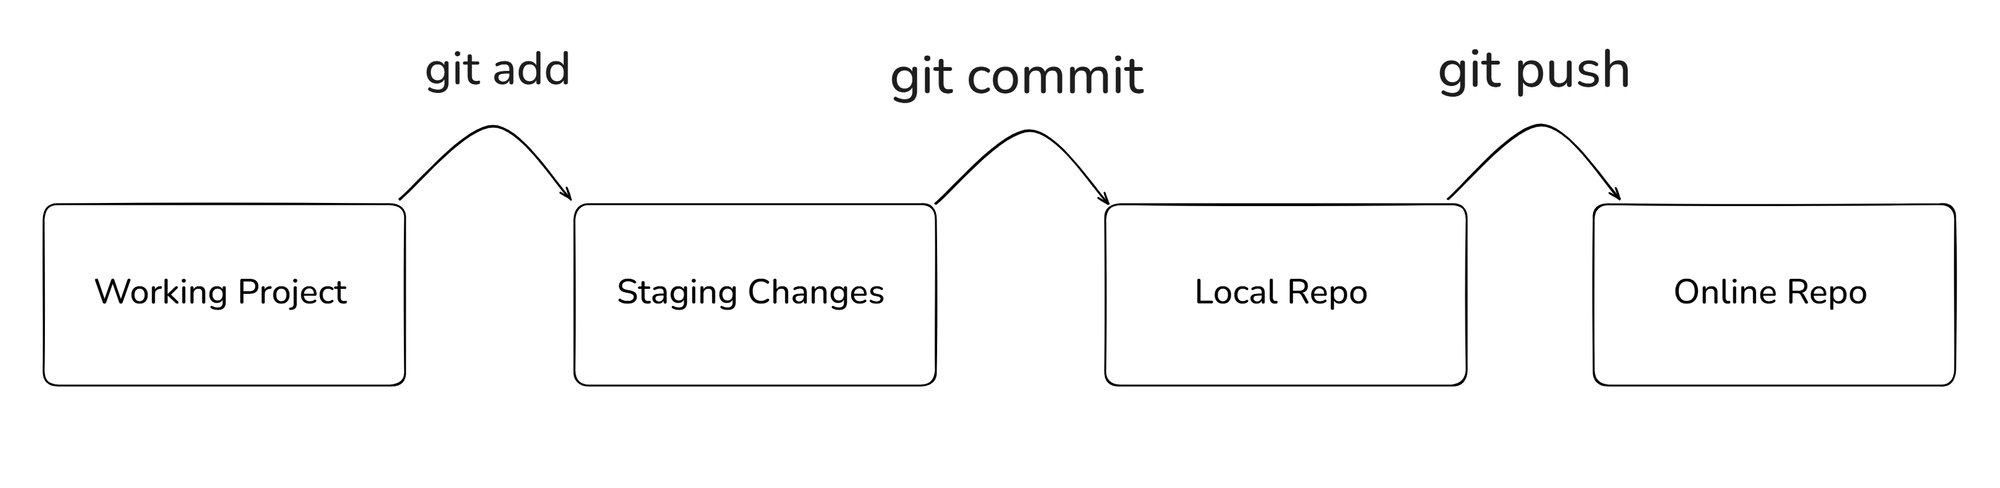
Once you've made some code and you want to start pushing it your online repo, it is simply a 3 step command process typed out in your terminal. First the git add simply stages the changes you've made and want to push. There are two ways of writing this:
git add <filename> or git add .
You can simply stage the one file you added/made changes to or if you made changes across multiple files then "git add ." would be more appropriate.
Then to add those changes to your local repo you would then use the following command:
git commit -m "<insert comment>"
It is key to add a comment to what changes you've made on a high-level as it adds to the whole project history aspect of git/version control but you cannot commit without adding a comment.
Then to push the changes from your local repo/machine to your online GitHub repo, you then would use this last command:
git push <branch-name>
What it does is the changes you've made from your separate branch can now be pushed into the main branch. At the end there would be a pull request on GitHub to merge the code from your branch to main.