


This is a two part series titled “Reverse Geocoding with Power BI”. I will be teaching on how to reverse geocode in Power BI using two different APIs: Google Maps and Bing Maps.
We will start with the Google Maps API and part 2 will discuss Bing Maps.
Requirements:
- Power BI Desktop (using Power Query)
- A Google Cloud account (For Google Maps) OR A Microsoft Account (For Bing Maps)
- https://developers.google.com/maps OR https://www.bingmapsportal.com
- A dataset with Latitude and Longitude Columns
- First, you will need to generate an API Key with your Google account in order to access the Google Maps
- In order to do this you would need to open the link (See above)
Google Maps

Sign in or create an account with Google and press the Console Button on the top right.
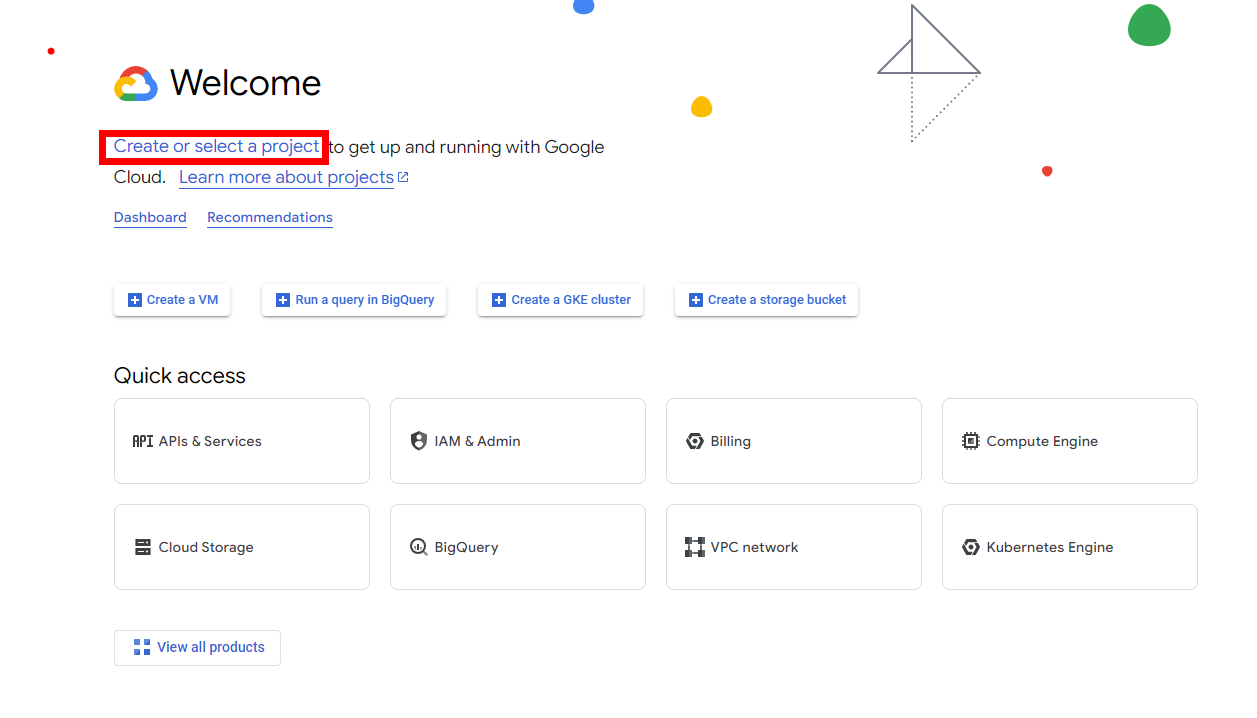
Click “Create or select a project” and Select “NEW PROJECT”

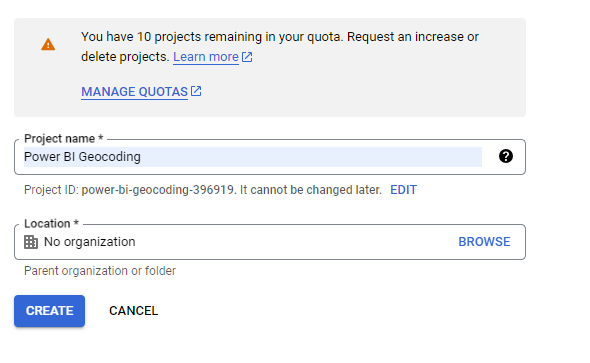
Name your project however you want, select “No organization” for location, and hit “CREATE”.
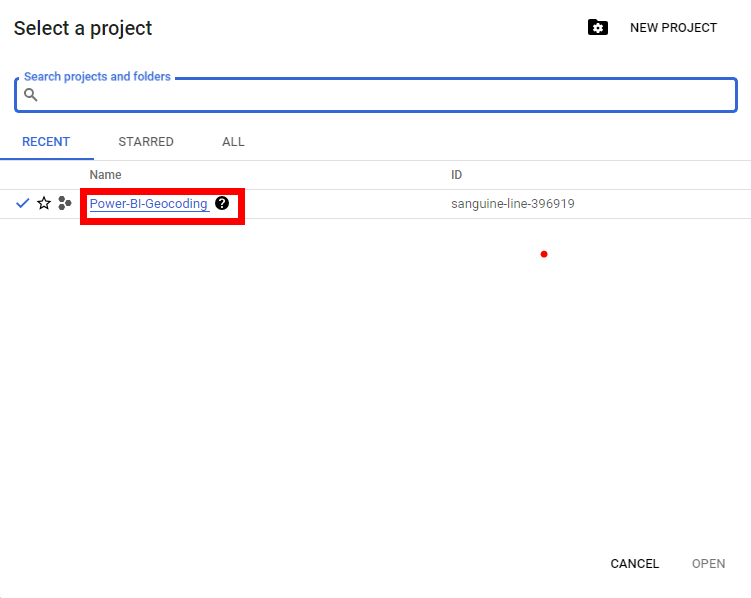
Click on “Select a Project” on the top left screen and select your newly created project.
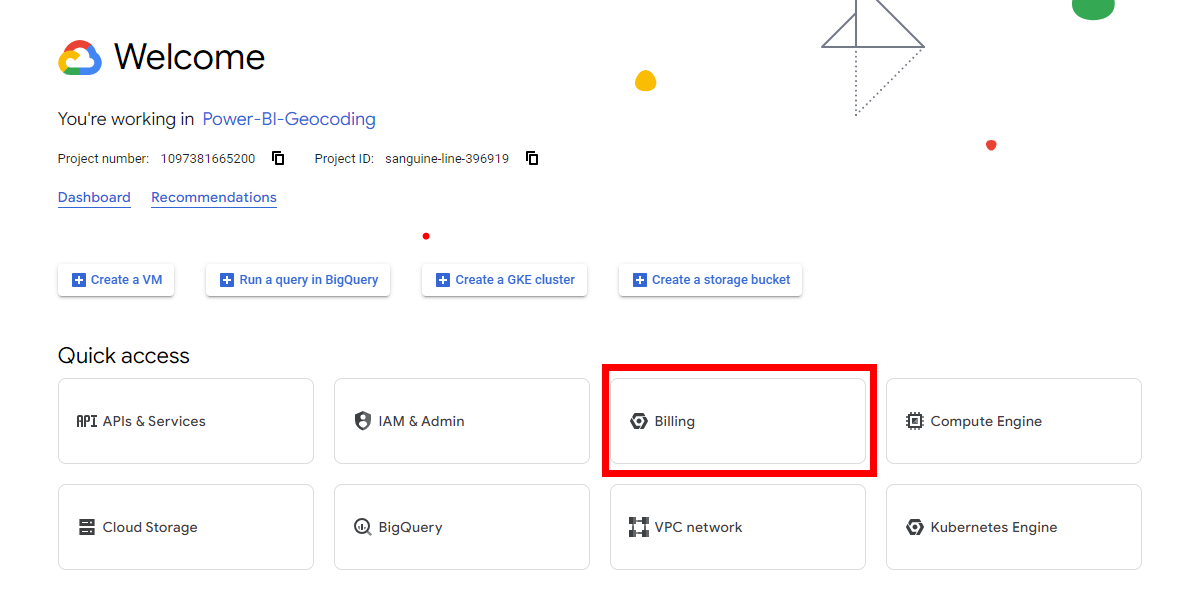
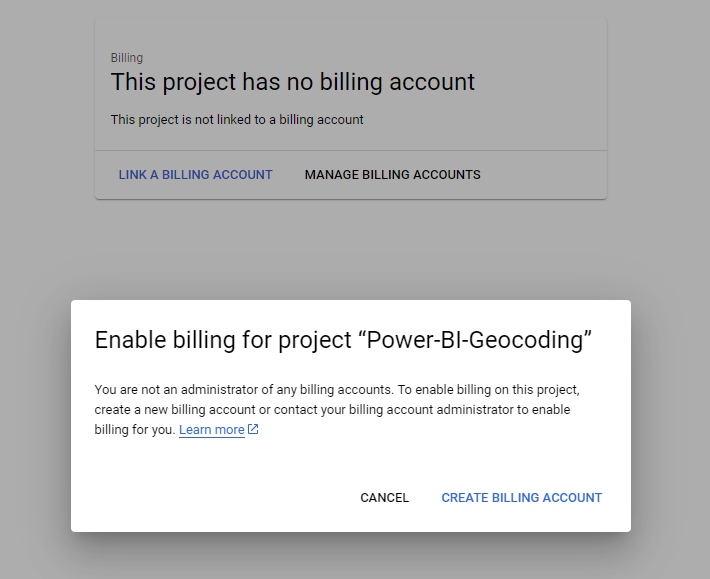
Next, you will need to set up a billing account in order for your project to function. Don’t worry, they won’t charge you as long as you don’t hit their monthly quota.
Click on “Billing”.
Select “LINK A BILLING ACCOUNT” and choose “CREATE BILLING ACCOUNT”
After creating a billing account, select the menu icon on the top left represented by the 3 horizontal bars, choose “API & Services”, and click on “Credentials”.

In Credentials, select “+ CREATE CREDENTIALS” on the top and click “API Key” to create one.

Once you create your key, make sure you have access to that key since we will need it later!
ALSO, it is important that you restrict your key so any other users don’t use it or you might be charged for it!
Next you want to enable the Geocoding API in order for Power Bi to have access.
Select “Enabled APIs & Services” and choose “+ ENABLE APIS AND SERVICES”
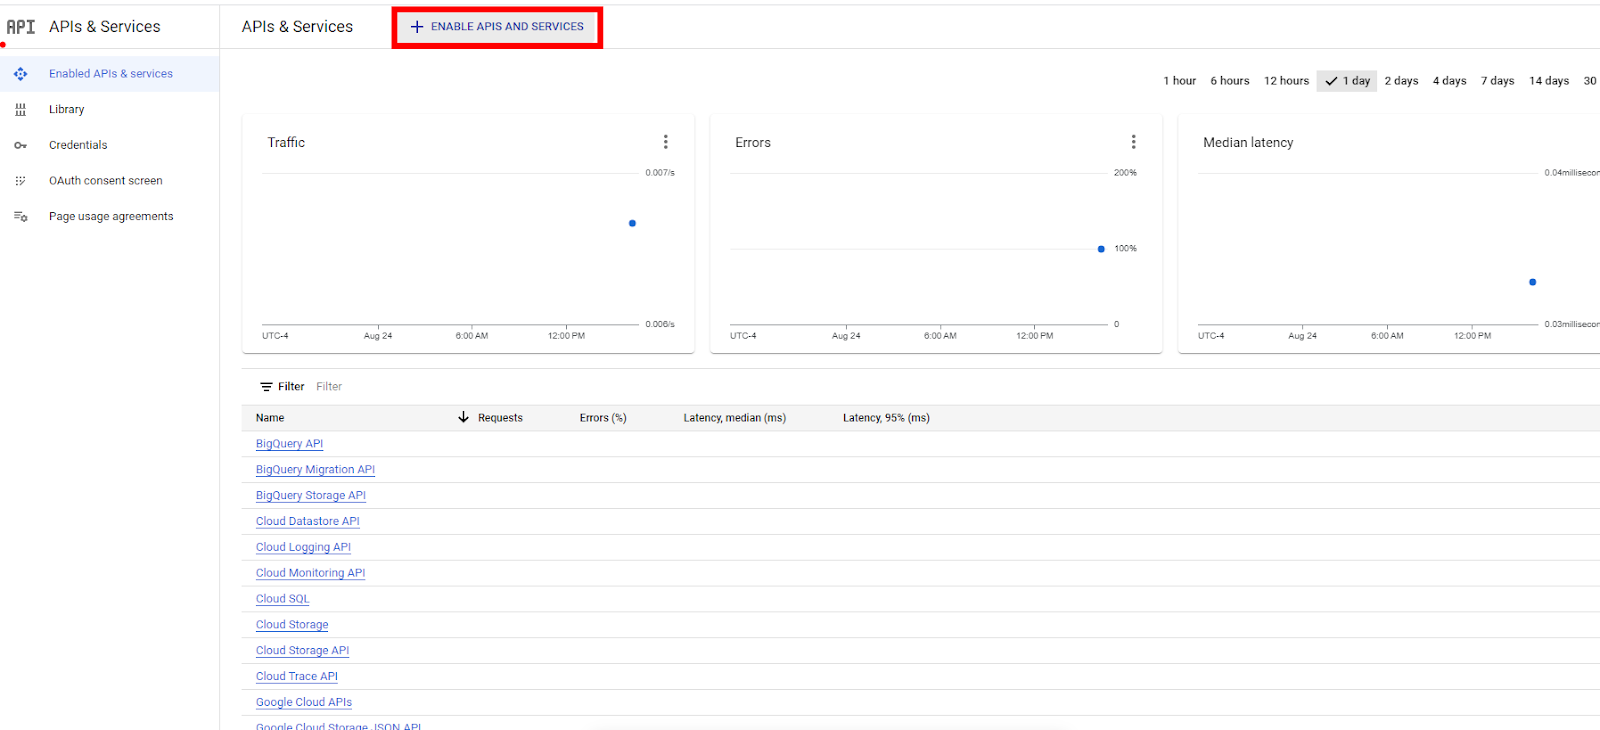
Type in “Geocoding API” in the search bar, select the Geocoding API option to enable it.


Afterward, select “MANAGE” to return to the Google Maps Platform

You should be on the API & Services page of the Google Maps Platform and now we will need to enable most of the other APIs presented. Select “ENABLE” for all of the APIs associated with the Google Maps Platform.

Now you should have the Google Maps API Key and have enabled all of the necessary APIs. Next we will connect to Power BI Desktop.

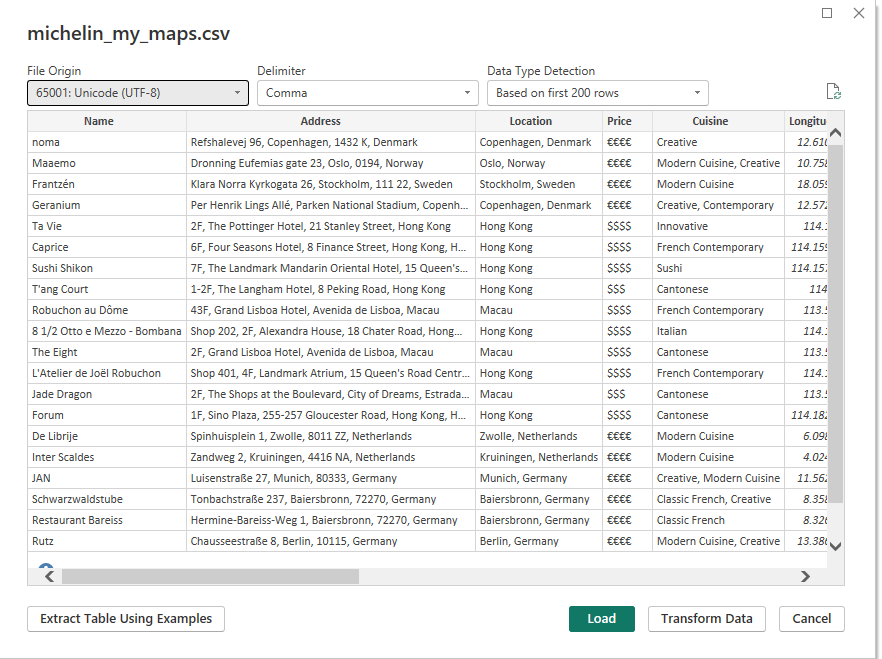
On Power Bi Desktop, select “Get data” and connect to the dataset that contains the necessary latitude and longitude columns
Once the data is loaded, select “Transform Data”.
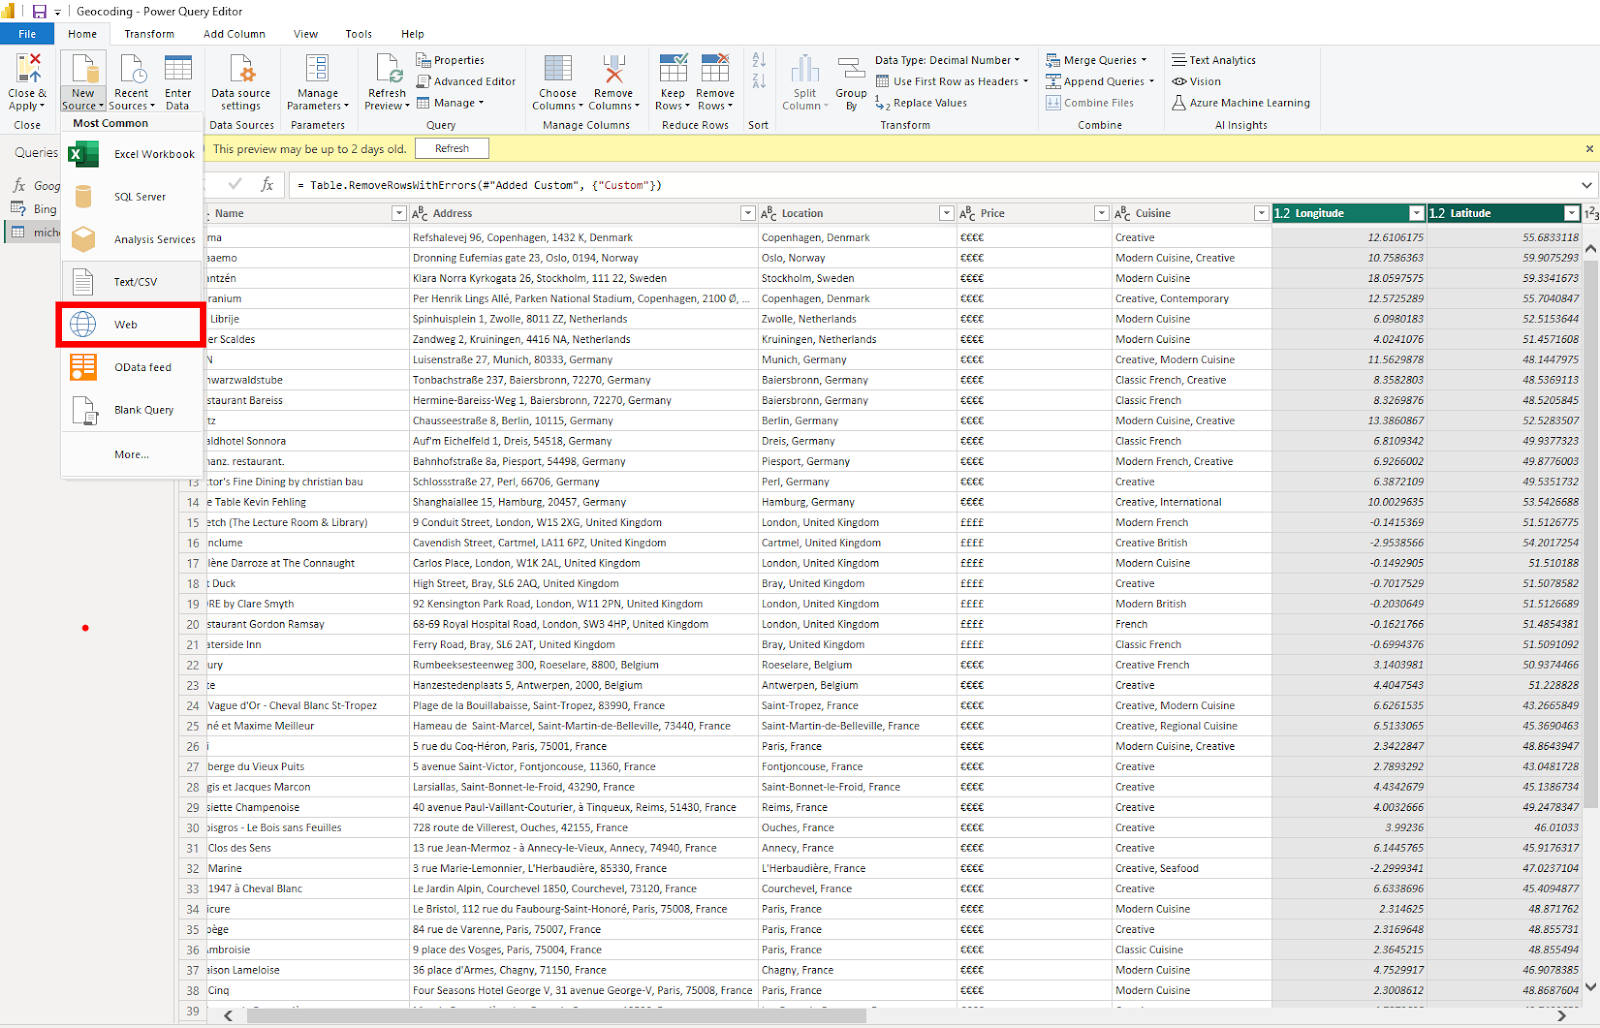
Now that you loaded your data into Power Query, to get started with connecting to the Google Maps API, select “New Source” and choose “Web”.

Copy the following sample URL and insert it onto the URL box in PowerBI:
Google Maps:
https://maps.googleapis.com/maps/api/geocode/json?latlng=40.714224,-73.961452&key=
YOUR_API_KEY
Make sure to replace YOUR_API_KEY with your personal created key!!
You should have a similar screen as below


As you can see in the Query Settings, multiple steps have been done already based on the URL we used. For the tutorial we want to have a clean slate. To achieve this, remove all previous steps until you reach “Expanded results.”(Click on the X icon next to the step to remove it) After this your table should look like this:

Next, delete all columns except “results” (CTRL + Click on unneeded columns and press delete on your keyboard or right click and select “Remove”)

Afterwards, select the diverging arrows to the right of the results column.
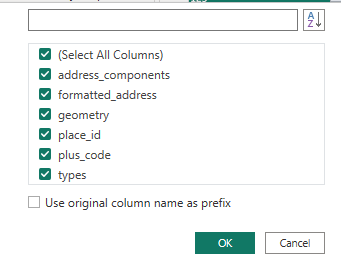
Select only the “formatted_address” and “types” fields and make sure to uncheck the “Use original column name as prefix”.

Select the Diverging arrow and press “Expand to New Rows”.


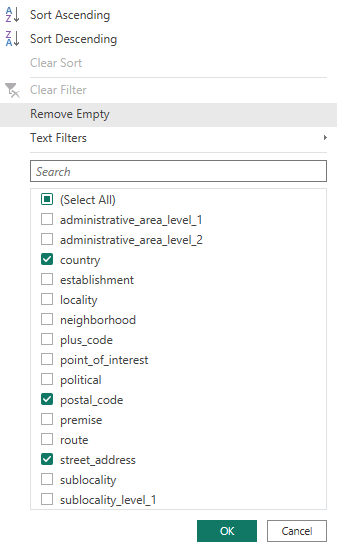
Next, press the down arrow next to types to filter out types. The choice of types here depends on what fields you want to keep, but for the purposes of the tutorial we only want the “street_address”, “postal_code”, and “country” types.

Next we want to transpose the columns, on the Transform tab, select “Transpose”.


Next we want to have row 2 as the header. To do this select ”Reverse Rows” and then choose “Use First Rows as Headers”.


After this we can rename the query and save the query. (through the disk icon on the top left) Afterwards, return to the Home tab.
The next bit is harder to explain, but I will try to break it down as simply as possible. Right now, our API is currently gathering the necessary information based on a single latitude and longitude point. However, we now want to configure the API to take the latitude and longitude from our dataset. For that to happen, we want to configure the M code itself. To access the M code we will select the “Advanced Editor” on the Home tab.


What we will do in the Advanced editor is relatively simple and should be easy to follow along. We are basically going to convert the query into a function on Power BI, which is where we will use our query on each latitude and longitude record of our dataset. The steps are as follows:
- Create a custom function within the Advanced Editor.
- Create input parameters for the latitude and longitude.
- Modify the Source step to use the said input parameters instead of the sample coordinate
Let's start with the first step. In the Advanced Editor we are going to create a new function above the query steps.
First, add some space from the initial query function and write down the following function:
Let
geo_code = (lat as text, lng as text) =>

This essentially adds a parameter in our function that we will configure to use the latitude and longitude records from our dataset.
The second step is to modify the source step to use our parameter instead of the coordinates from the sample URL.
On where the line starts with “Source” there is text that signifies the latitude and longitude used from the Sample URL, we want to instead modify this to use our parameter.
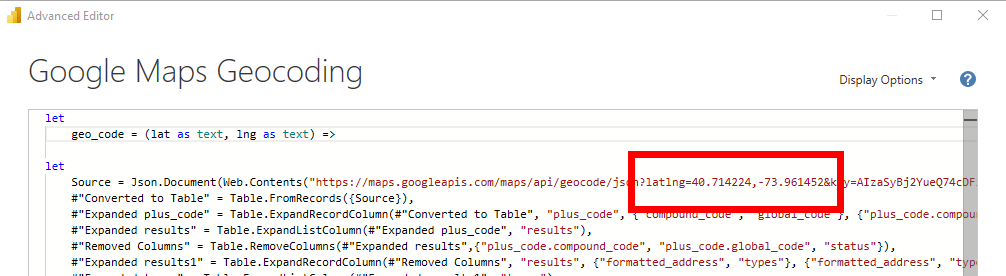
Before “&key” and after “latlng=” we want to replace what is there with the following text:
“&lat&”,”&lng&”
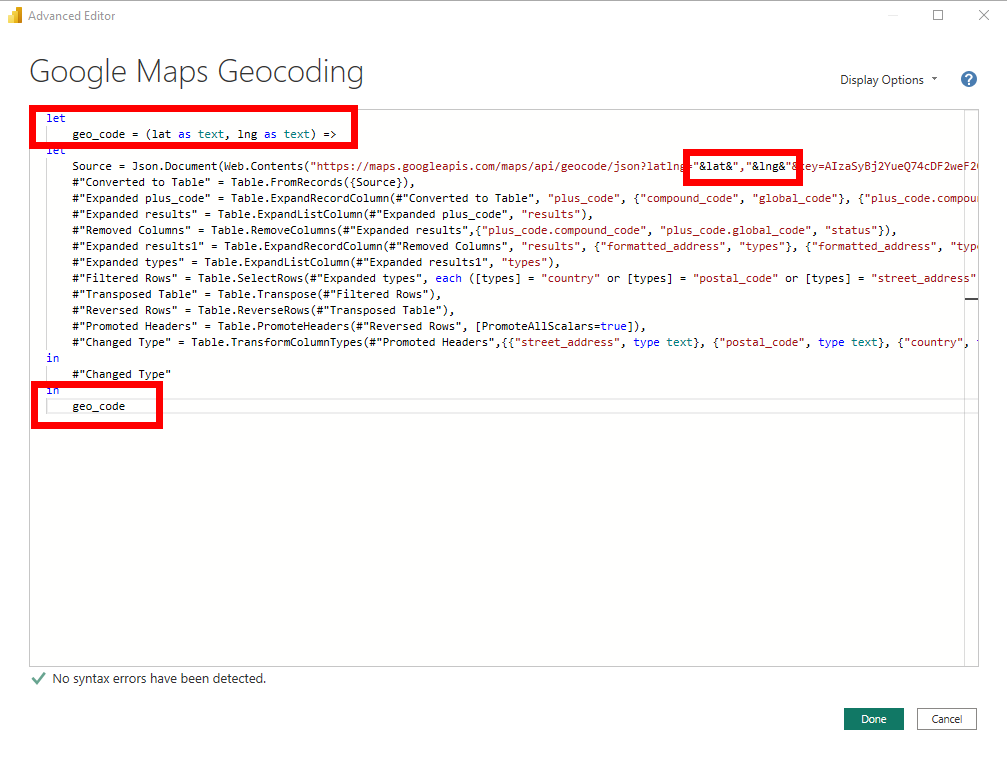
It should look like this afterward.

Lastly, we want to modify our output so that our parameters can function correctly. This is done simply by typing bits in the end of the M code.
Type the following at the end of the code:
in
geo_code
The final result should look like this:
Next, we will go to our dataset that contains the latitude and longitude coordinates and add a new “Custom Column”.

Create a custom function as follows:

Important note: You need to make sure that you correctly reference the function by its name. My function’s name is called “Google Maps Geocoding”. You can always rename your function as well. Also, if the latitude and longitude columns from your dataset are in a string/text format then you can omit the “Number.ToText()” function and simply use the required columns.
Next, you will get a message about data privacy

Set your desired privacy level and select Save.
For instance: if this dataset would be used within a company, set it to “Organizational”. If used for testing purposes, “Private” might be preferred.


Selecting the diverging arrows will expand the addresses for each Latitude and Longitude record! Use your new information how you see fit.
Final Important Note: When you apply and close power query, it may take a while to load into Power BI desktop, this is because Power BI needs to bring in the information from Google Maps for each individual record.
Hopefully this can help with data gathering for your Power BI Project!
If you haven’t, check out my Reverse Geocoding tutorial using Bing Maps! I will be posting that blog too at a later date!