


What is a parameter?
A parameter is a user defined value that can be used in calculations to control the visualisations of the data. It creates an interactive control for the user, so when you change the parameter value, the view updates instantly.
When would you use a parameter?
Switching between metrics
- For example, you might want to switch between sales, profit and quantity
- This helps to save space on a dashboard, and lets the user explore without having multiple charts
What if analysis
- For example, you could use a parameter to move the sales target to see what happens is it is 5,000
- This helps with decision making, as well as making the dashboards interactive
Custom filtering logic
- For example, you could see only products that are above a chosen threshold
- This allows the user to control the rule, making the chart more flexible than with standard filters
How do parameters differ from filters?
Filters:
- Remove data from the view
- Can select multiple values
- Directly filter the data in the view
- Used to focus on subsets of data
Parameters:
- Change how the data is used, not what data is shown
- Always single select
- Not tied directly to the data - needs a calculation to work
- Used to control logic or behaviour in a view
How to create a parameter in tableau desktop:
Example: create a bar chart colouring sum of sales by whether they were above or below sales target for sub-category
Step 1: Create the parameter
This is what we use to control the data in the view.
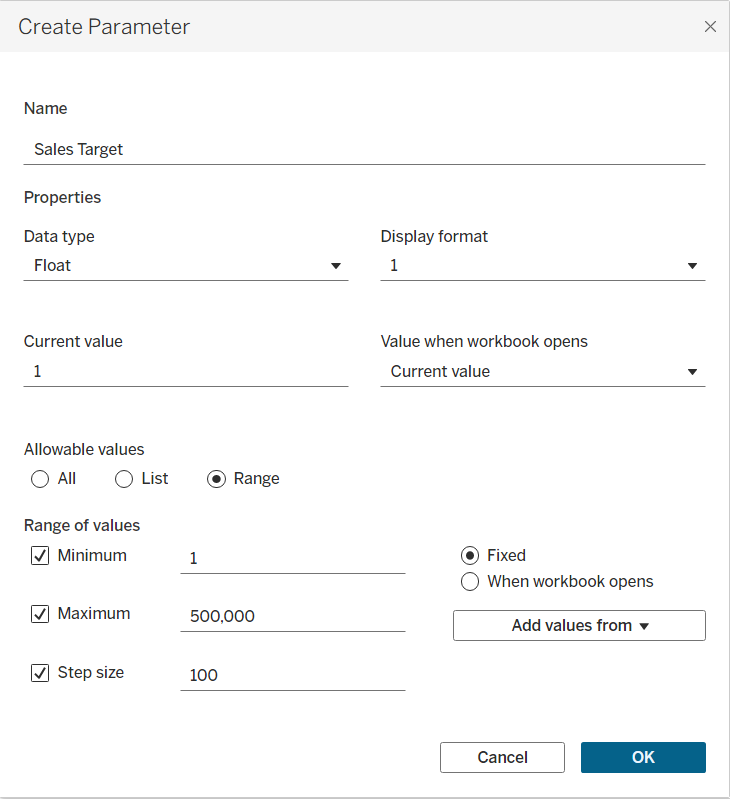
Things to consider:
- The maximum range of the data
- The data type (string, float, date etc)
- Allowable values (if typing string values manually, ensure they are spelled the exact same as in the data set)
Once the parameter is created, find it under the parameters section of the data pane, right click on it and select ‘show parameter’.
Step 2: Create a calculated field
This is what we use to activate the parameter. Currently, the parameter exists but it doesn’t have a way to interact with the data, so we need to create one.
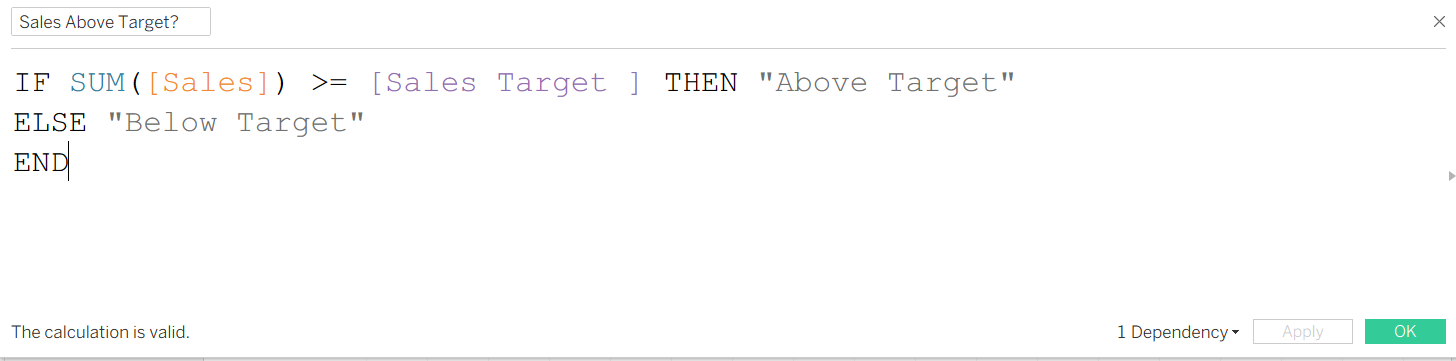
Things to consider:
- The purple ‘sales target’ is relating to our parameter
- So the calculation is saying: if our total sales are higher than the value selected on my sales target parameter, then the total sales are above target. Otherwise, they are below target.
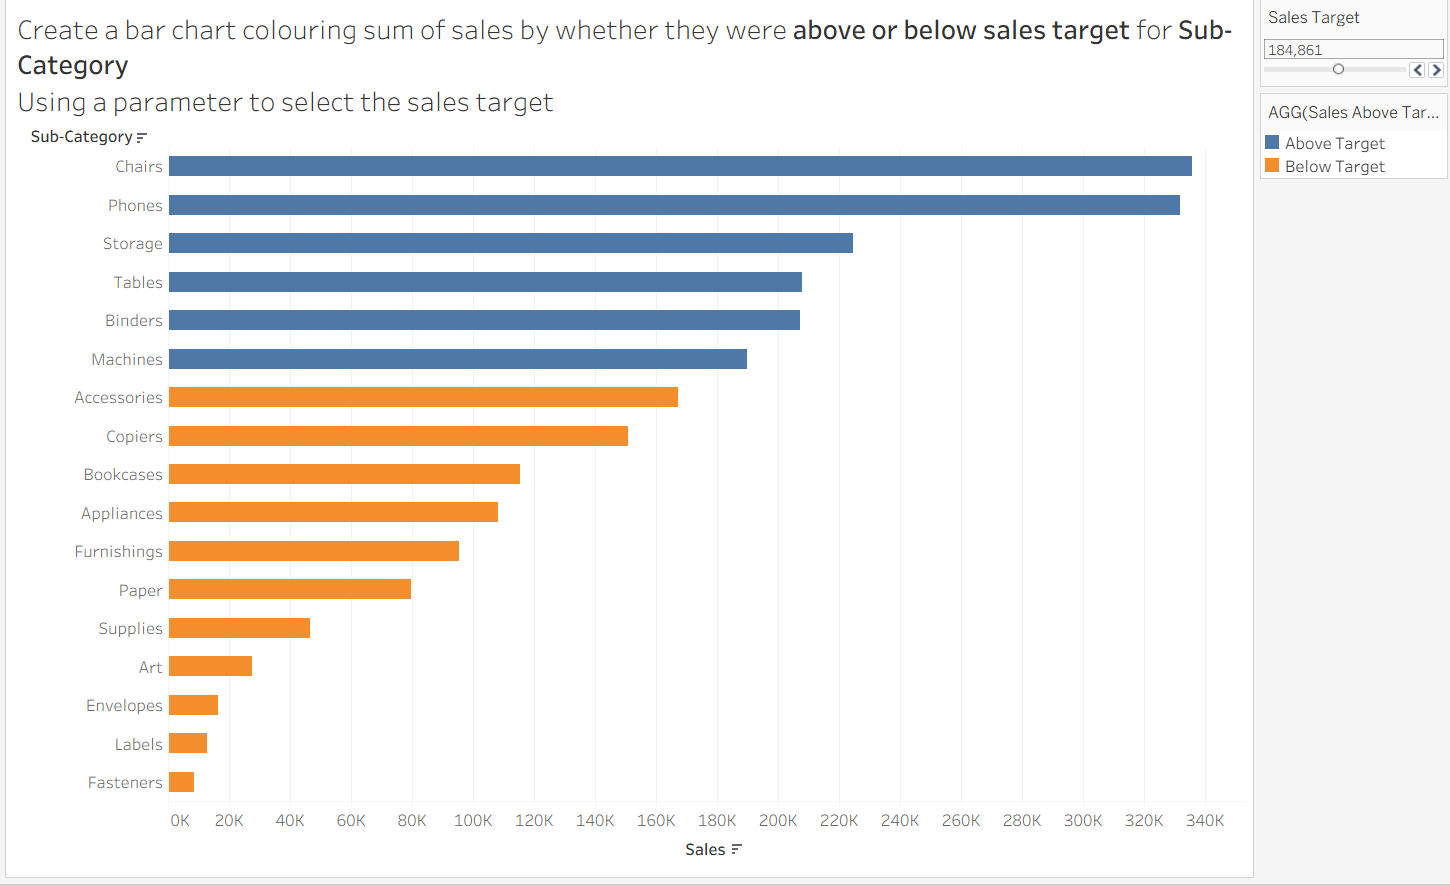
Step 3: Get Building
Put Sum (Sales) onto columns, and sub-category onto rows.
Drag your calculated field (Sales Above Target?) onto colour.
Make sure your parameter is showing. Now, when you drag the slider along to choose a value in the sales target parameter, the colour of your bars should change colour, based on whether they are above or below target. Finally, sort in descending order.
You have successfully built your sales target parameter. Now you are able to determine what your sales target is, and see which sub-categories are above or below your target, based on the colour of the bars.
This is how it should look in tableau:
Step 4: Spot the Catch
There is one small catch with the colours of the bars which you may or may not have noticed.
If you drag the sales target all the way to the maximum, all your sub categories will now be below target, but the colouring of the bars will have switched to blue, which was originally the ‘above target’ colour.
This is simply due to the default colouring of tableau. If you click on the calculated field and select edit colours, you can change them from the default tableau colours, and this will fix the issue.
Parameters are a really useful tableau tool, that allow you to ask questions of your data without having to create a load of unnecessary / repetitive charts. There is a lot more you can do with parameters - and tableau public has loads of great examples if you want to be inspired!