


Too Many Tabs
The Problem
While supporting a team with publishing to Tableau Cloud, they wanted separate workbooks to feel like a single product. The team already had a strong brand strategy with custom colors and supporting documentation. These visual best practices included a formatted header and internal navigation patterns. With dashboards that all looked the same, a further step to enhancing the cohesiveness of their product suite was seamless navigation between each workbook.
The first solution was a menu with URL Actions to static links. This solution had to be replicated across each product, increasing workbook size and time to develop. Since menus were independent of one another, the actions also added a new tab with every click.
Objectives
-- Limit the number of open tabs
-- Reduce development effort
-- Adapt menu with each new release
Technically, the Tableau Cloud site is a robust portal for all your dashboard pages with tools and features.
However, this enterprise case wanted a minimal view that focused on the dashboard as the tool. They also had the requirement of opening as few tabs as possible.
In the process of building this portal solution, I found that published workbooks can be rendered inside a dashboard with Web Objects and Actions!
Before getting started on this seamless navigation effect, we'll need to make sure viewers are instantly logged into Tableau Cloud. You can continue to use Tableau Cloud's public Single Sign-On or ask your Tableau Admin to enable SAML SSO on a secure Site or TCM.
With the magic of SSO, we can consider these factors to tailor our Portal Navigation:
1) What is the URL Target?
2) Where will the URL action run?
3) How will URLs be entered into the Web Object?
With these answers in mind, you can follow this three-part post to create your own Tableau Cloud Portal.
Part 1: Define Target workbooks and views
We will be displaying the name and hyperlinks of every item we want the user to have access to Tableau's Admin Insights is used to future-proof the menu. If your team shares a site, then you may need to filter the data:
1) Start a flow in Tableau Prep
2) Connect a blank workbook to the Site Content source available in the Admin Insights folder
3) Filter to the relevant Project Folder
4) Select the workbooks and dashboard items along with their hyperlinks
5) (optional) Sort and add a row number to organize the list
At this point your data should be structured something like this:

Part 2: Layout the menu
Let's build a simple navigation menu.
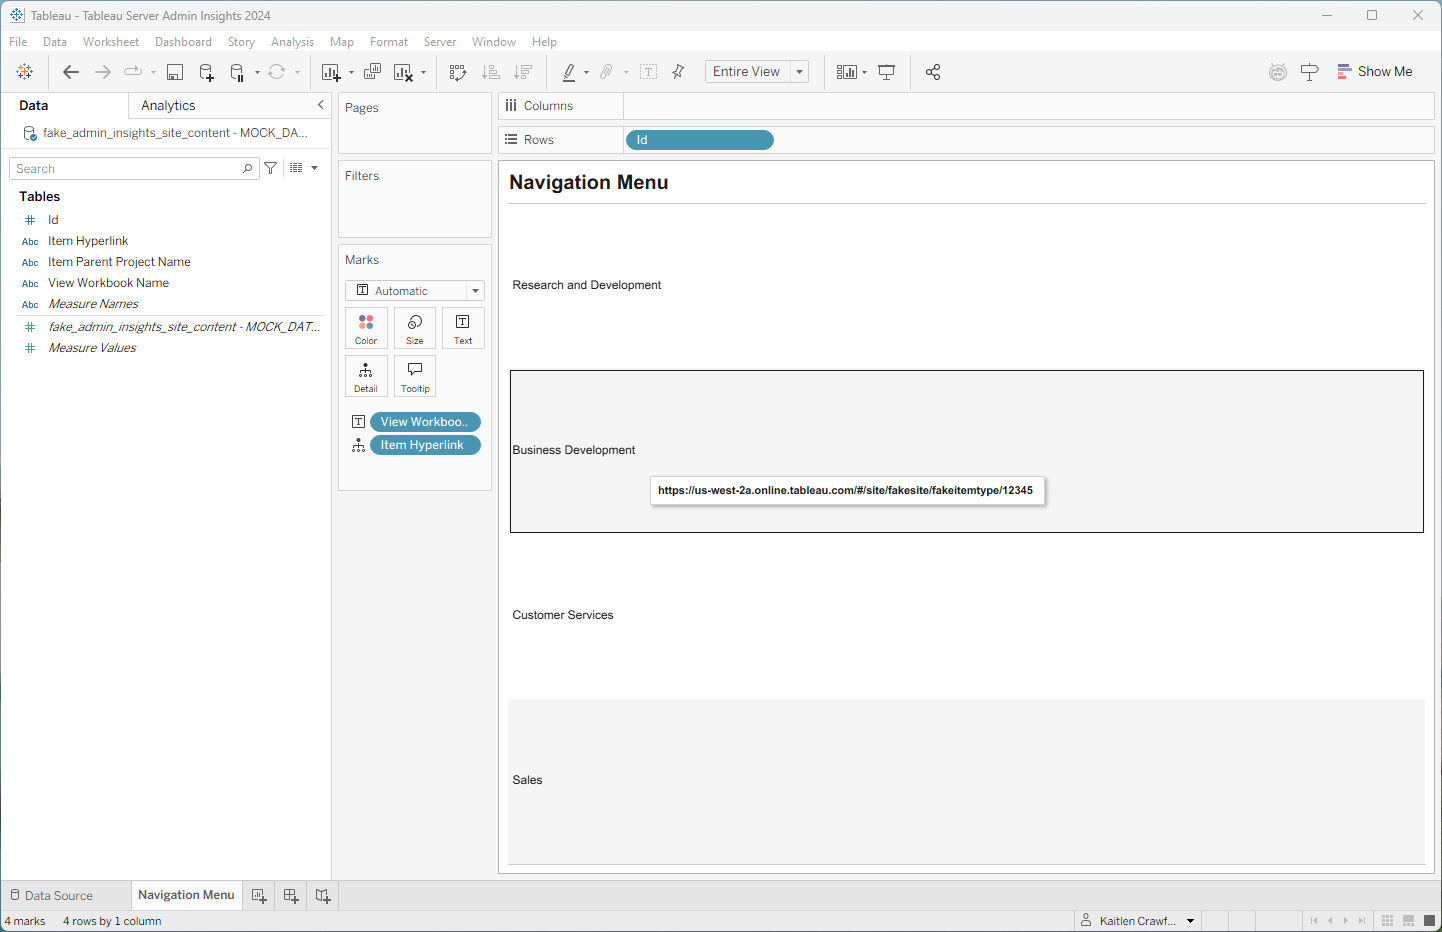
1) Connect Site Content to the workbook
2) Add View Workbook Name to Text
3) Add Item Hyperlink as a detail to reference in the URL Action
Separate and sort the marks by adding the identifier or Workbook name as a hidden row header
You can bring this sheet into a Dashboard and a Web Object fixed to the view. For example, PowerPoint sized dashboards would get rendered in a 1650 x 950 Web Object.
Part 3: Connect the Navigation Menu to the Web Object
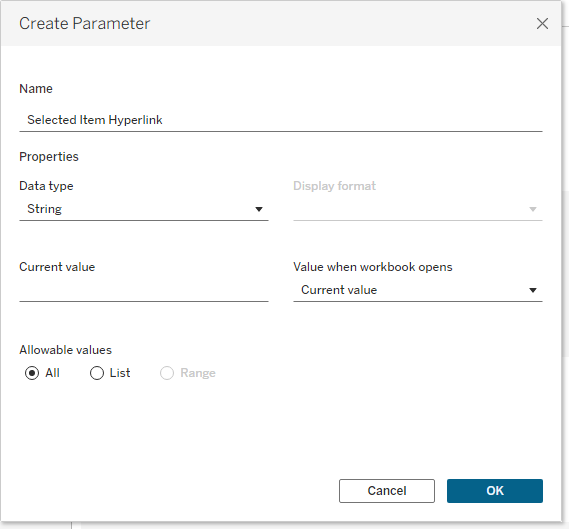
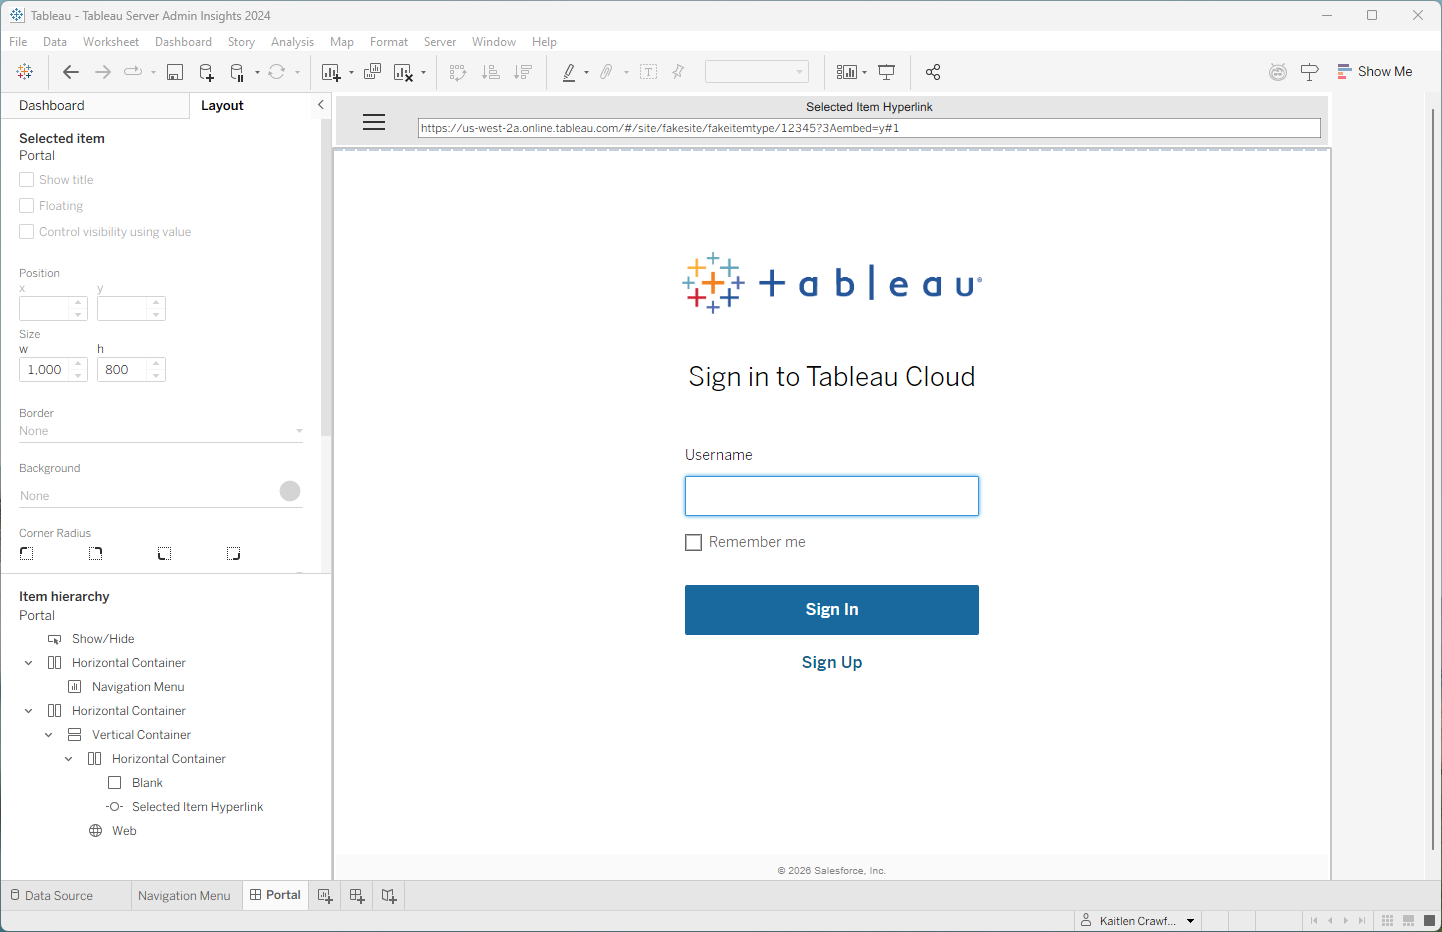
Web Objects can accept parameter values, so we will create one to store URL for the selected workbook.
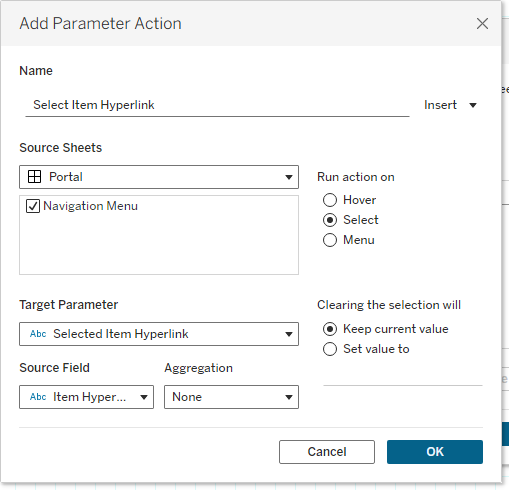
Whenever a menu item is selected, it's hyperlink needs to be passed to the parameter. We can do this with a Parameter Action:
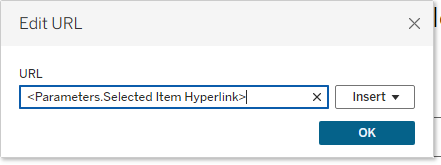
Finally, we'll edit the Web Object's URL to reference the Selected Item Hyperlink Parameter.
If you're building in Tableau Desktop, you will see the Tableau Login page:
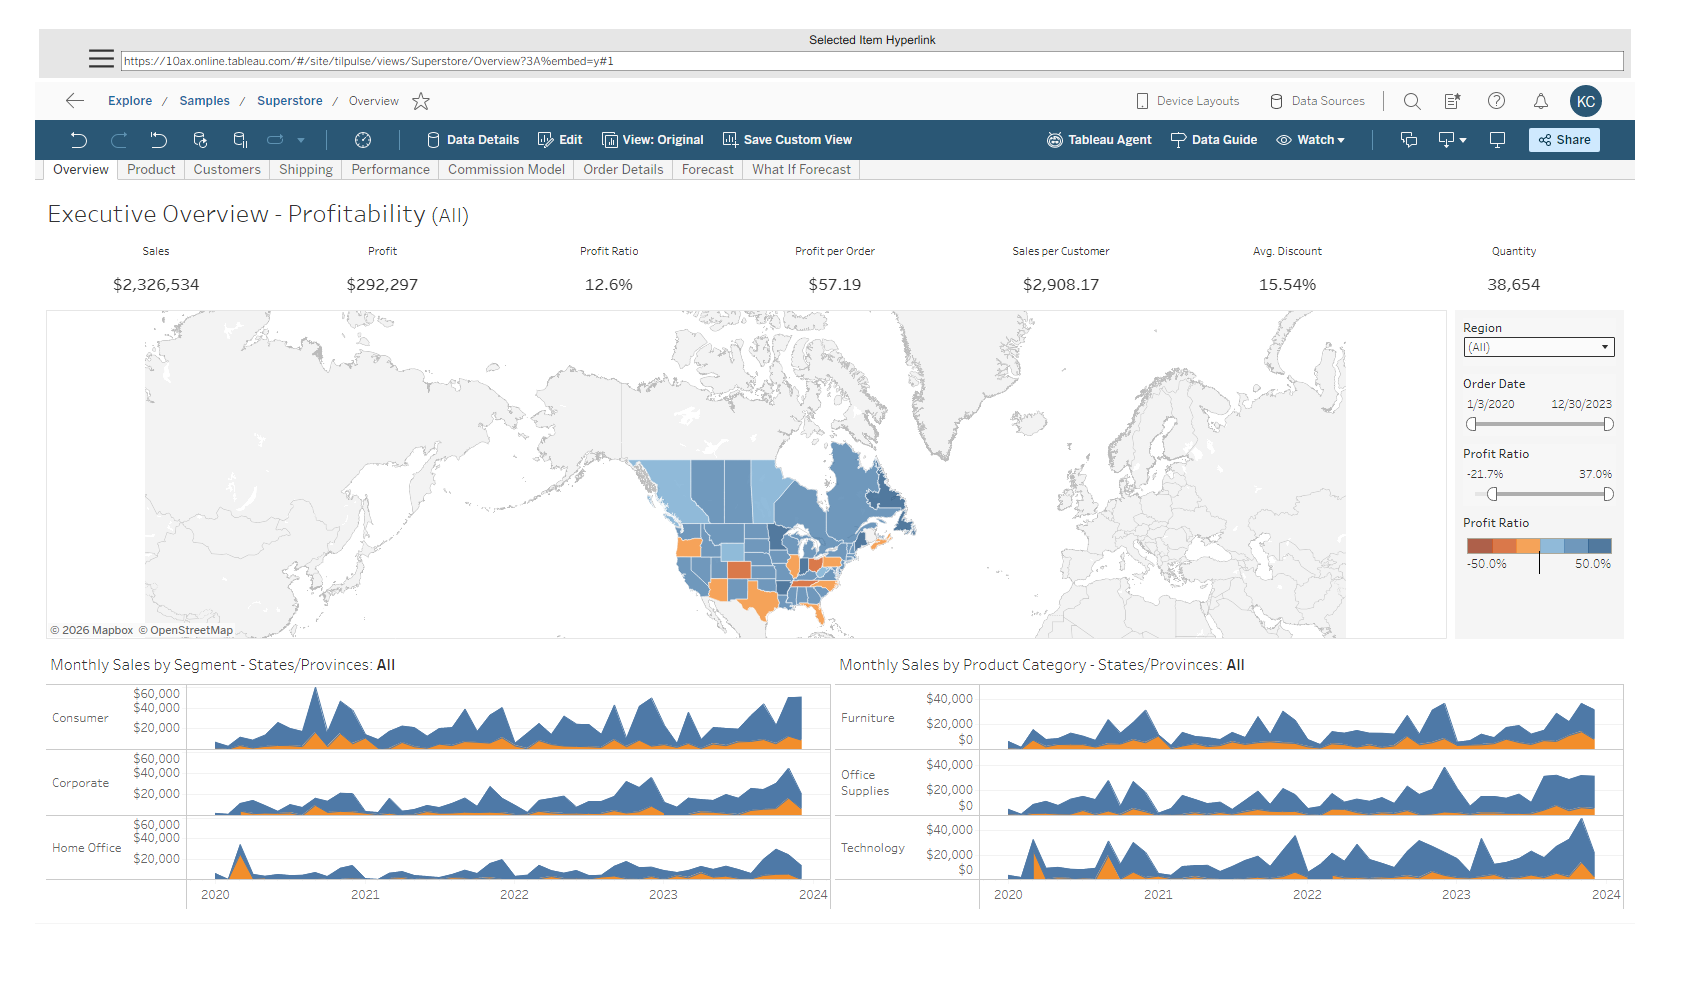
Once you access the portal from the Tableau Cloud site, you should see your dashboard, like this:
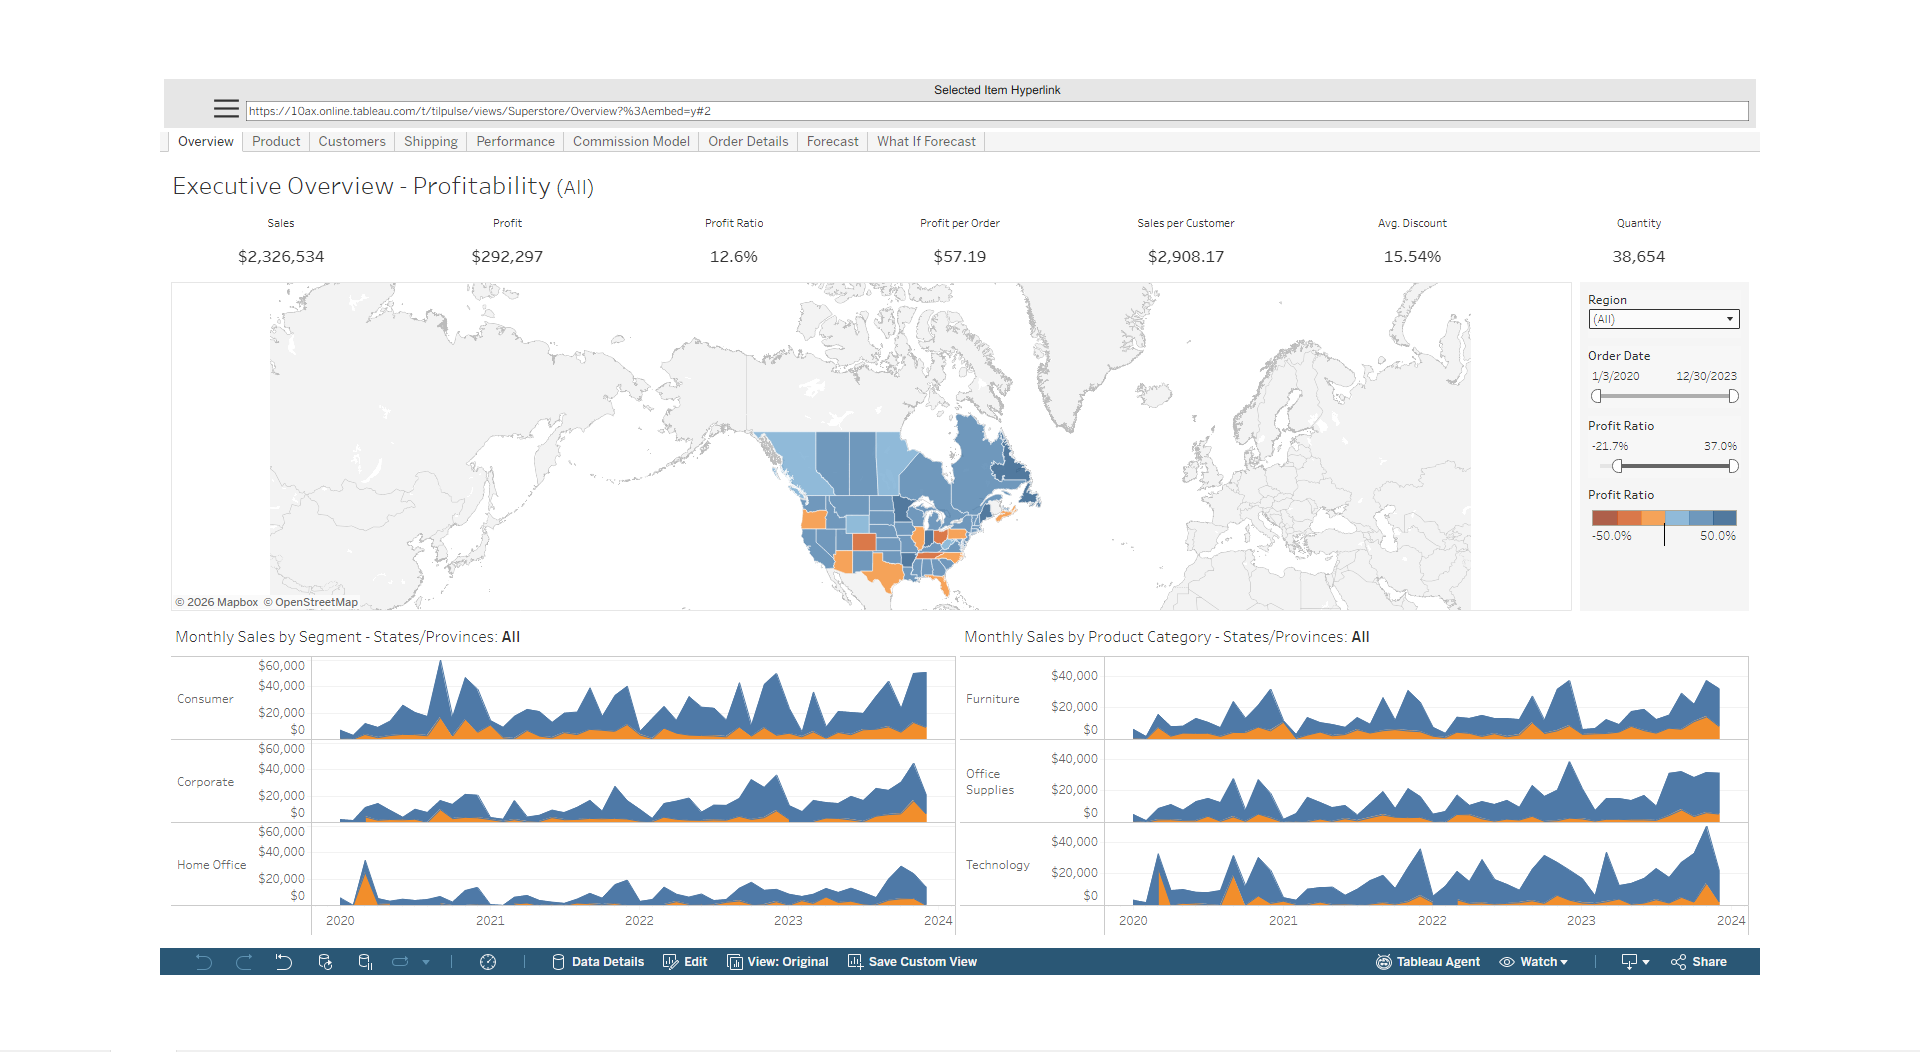
Bonus Challenge: Remove Breadcrumb Navigation
By default, Site Content go to the normal Tableau Cloud Site page view that include an interactive breadcrumb navigation. Viewers could use this to navigate throughout the rest of the site, depending on their permissions.
To minimize the embedded view, we will create this calculated field to replace the current Item Hyperlink in the Navigation Menu and Actions:
[Item Hyperlink] + ?3A%embed=y#1
Your result is a refined toolbar at the bottom of the portal:
Helpful Links
-- URL Actions