


When you start working on a project, you quickly realise that nobody writes code in isolation.
If everyone just edited the same live files, things would break constantly. That’s why we use Git (the version control software on your local machine) and GitHub (the cloud platform where code is stored and shared).
Here is how the workflow actually looks when you're collaborating with a team, along with a quick command cheat sheet.
The Big Picture Workflow
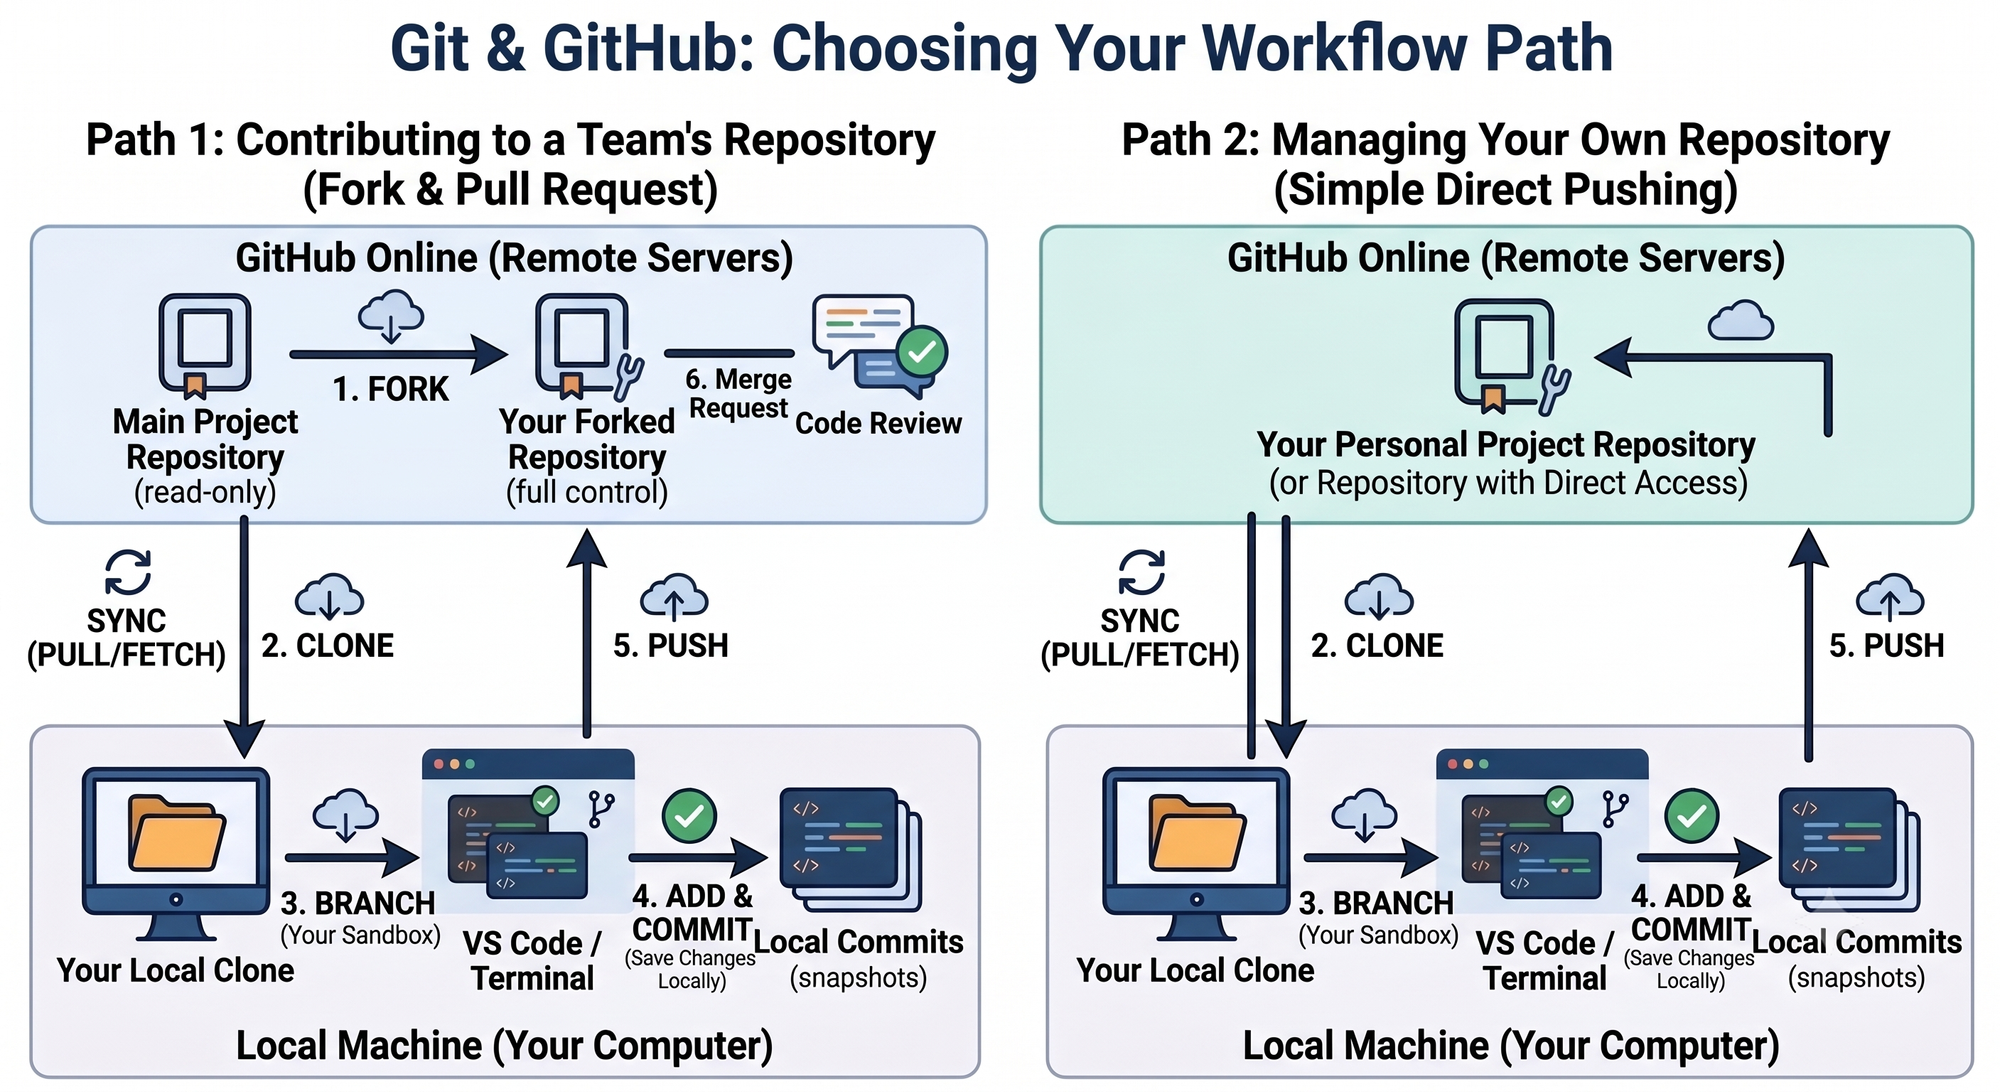
The main goal of Git is to let you build new features without risking the stability of the production code. Depending on your team's security setup, you will usually follow one of two paths to get your code into the main project:
- Option A: Direct Branching: You clone the main repository directly, create a branch for your work, and push that branch back to the main repo to be merged.
- Option B: Forking Workflow: You create a personal copy (fork) of the repo under your own GitHub account, clone that fork, work on a branch, push it to your fork, and then propose a merge back to the main team repo.
Breaking Down the Steps
- The Fork (Optional): If you don't have direct write access to the team's main repository, or if you simply want to copy a repo from somewhere else to your own personal area, you can "fork" it to make a personal copy on GitHub. If you are able to work directly on the original project then you don't need to do this part.
- The Clone: You download the repository (either the Main Repo or Your Fork) from GitHub to your local machine so you can work on it in VS Code or another editor.
- The Branch: Before editing anything, you should create a "branch." This means that you can edit the code and test it in your own working area without breaking what is already there. Any changes you make here won't affect the working production code until you are happy to merge it back in.
- The Commit: Once your edits are done, you "stage" and "commit" them. A commit is just a saved snapshot of your code at that exact moment.
- The Push: You upload your local branch and its commits back up to GitHub.
- The Merge Request (or Pull Request): You submit a request to merge your branch back into the
mainbranch of the Main Project Repository. The team reviews your code, checks for bugs, and safely merges it in.
Git Command Cheat Sheet
While tools like GitHub Desktop are great, knowing how to use Git in your terminal is really handy. Here are some of the core commands:
1. Managing Branches
Never work directly on the main branch. Always spin up a new one:
git switch -c [branch-name]– Creates a new branch and switches you into it immediately.git checkout main– Switches your terminal back to the primary main branch.
2. Saving Your Work Locally
When you finish updating a script or configuration file:
git add .– Stages all of your recent changes, preparing them to be saved.git commit -m 'Your message here'– Saves the staged changes as a snapshot with a clear note (e.g.,git commit -m 'Set up initial files').
3. Syncing with GitHub
To move code between your machine and the cloud:
git push origin [branch-name]– Pushes your local branch up to GitHub.git pull– Pulls down the latest updates from the remote repository so your local files match what the team has been working on.
Summary
Git is ultimately a safety net. By working on your own branches, saving snapshots locally, and pushing them up for peer review before merging back to main, you can experiment and build data pipelines without the risk of breaking live production environments.