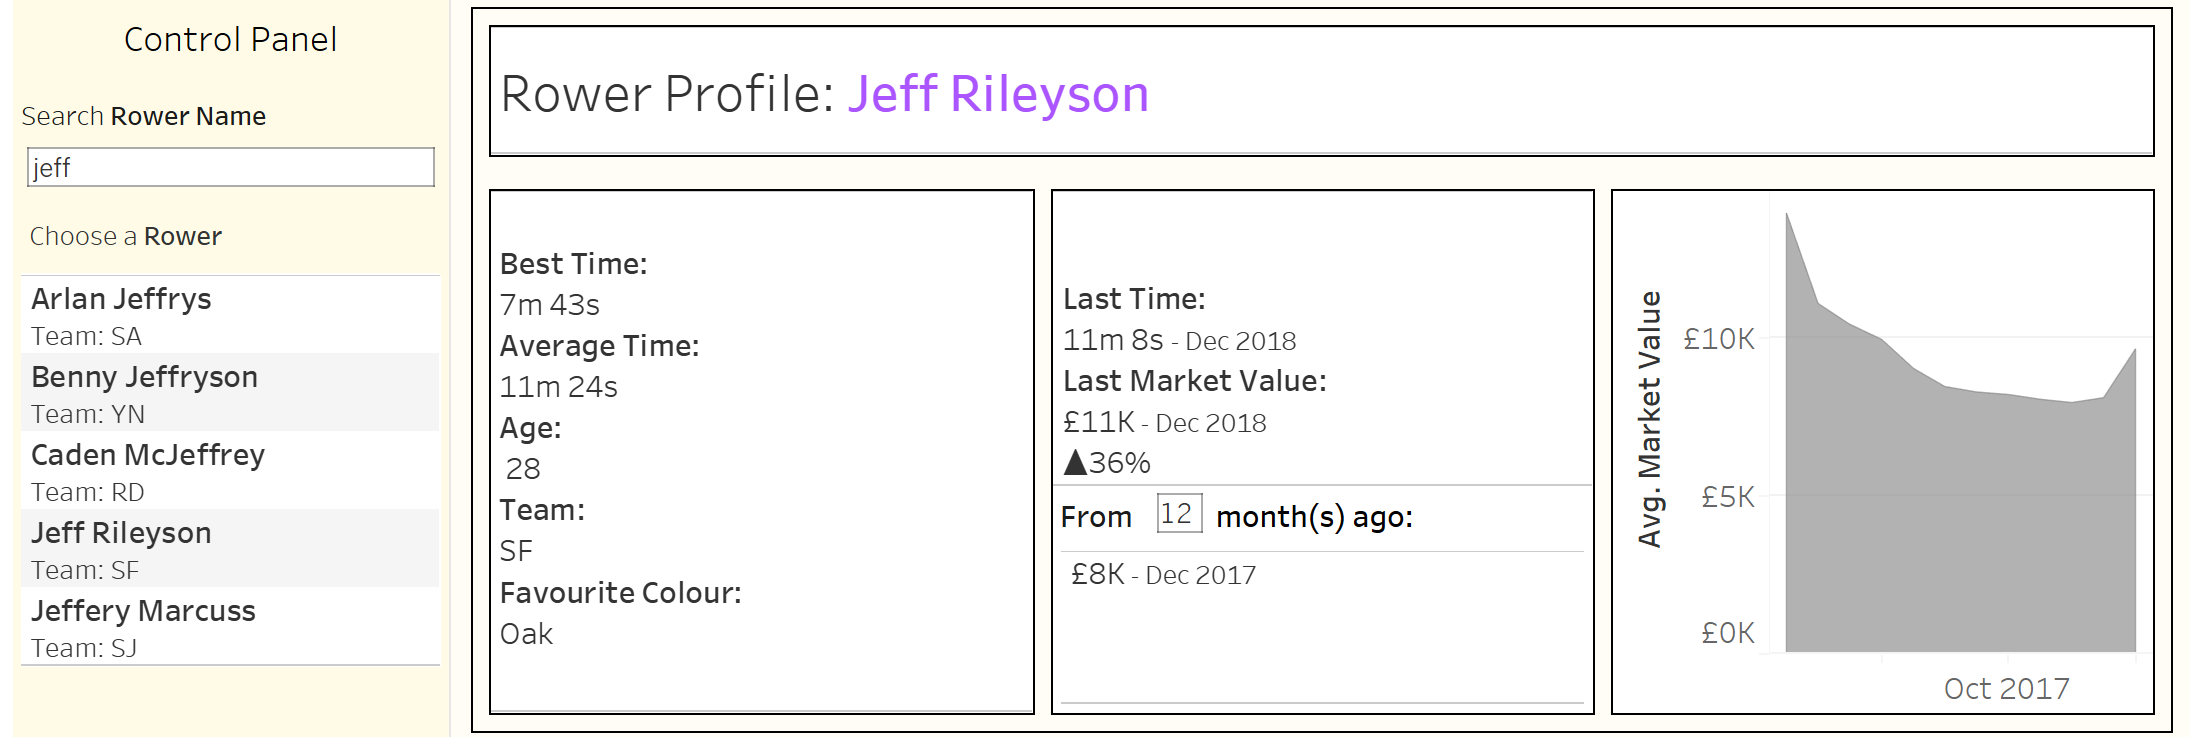
Here is a link to a dashboard which uses this technique.
Parameters are very useful, but the "Show Parameter" menu has a down-side: There is no search bar!
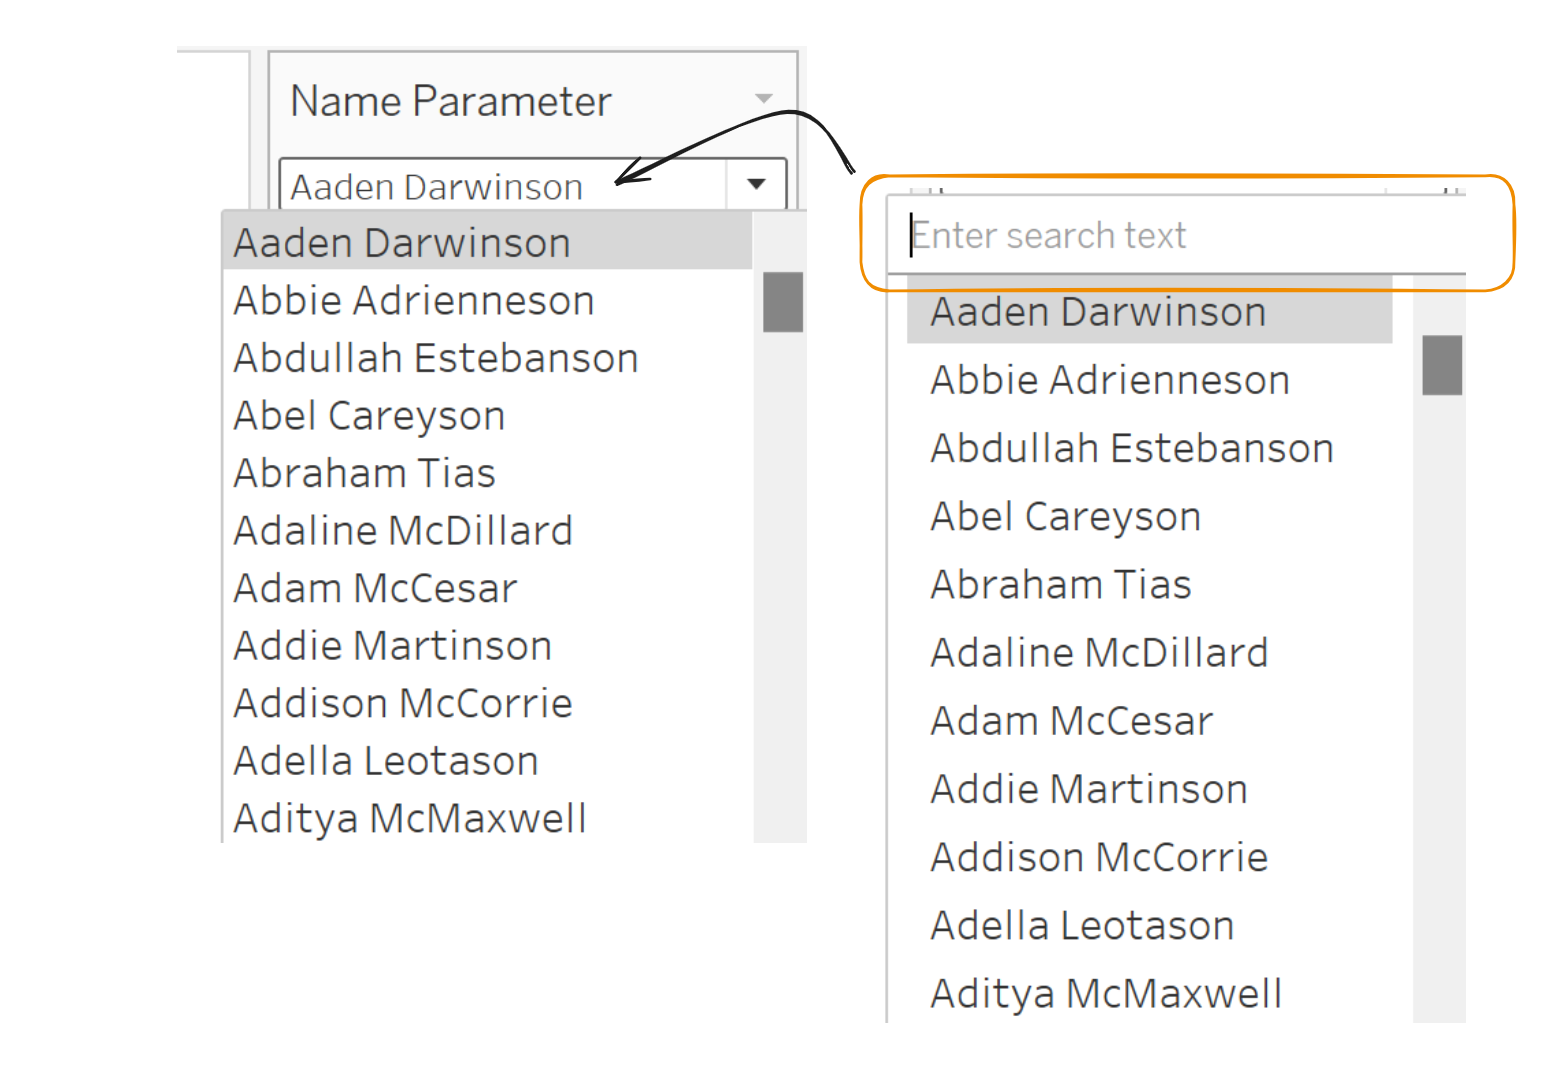
This makes it impossible to navigate when you have many list items. If the parameter is a list based on a field, we will work around this by building a custom menu.
Making a custom menu chart
We will build a table which has all of the information needed, and which is formatted nicely - we will have the luxury of adding extra information to our custom menu.
The use case we will walk through is for a dashboard that I built which relies on a parameter for Name ID. I want the user to select from a list of Names, and not the Name ID.
- Create a worksheet
- Drag the dimension which the parameter is based onto the rows shelf
- Drag the dimension you would like the user to search through onto text in the marks card
- Drag all of the additional information you would like the user to see onto text in the marks card
- Set the fit type to Fit Width
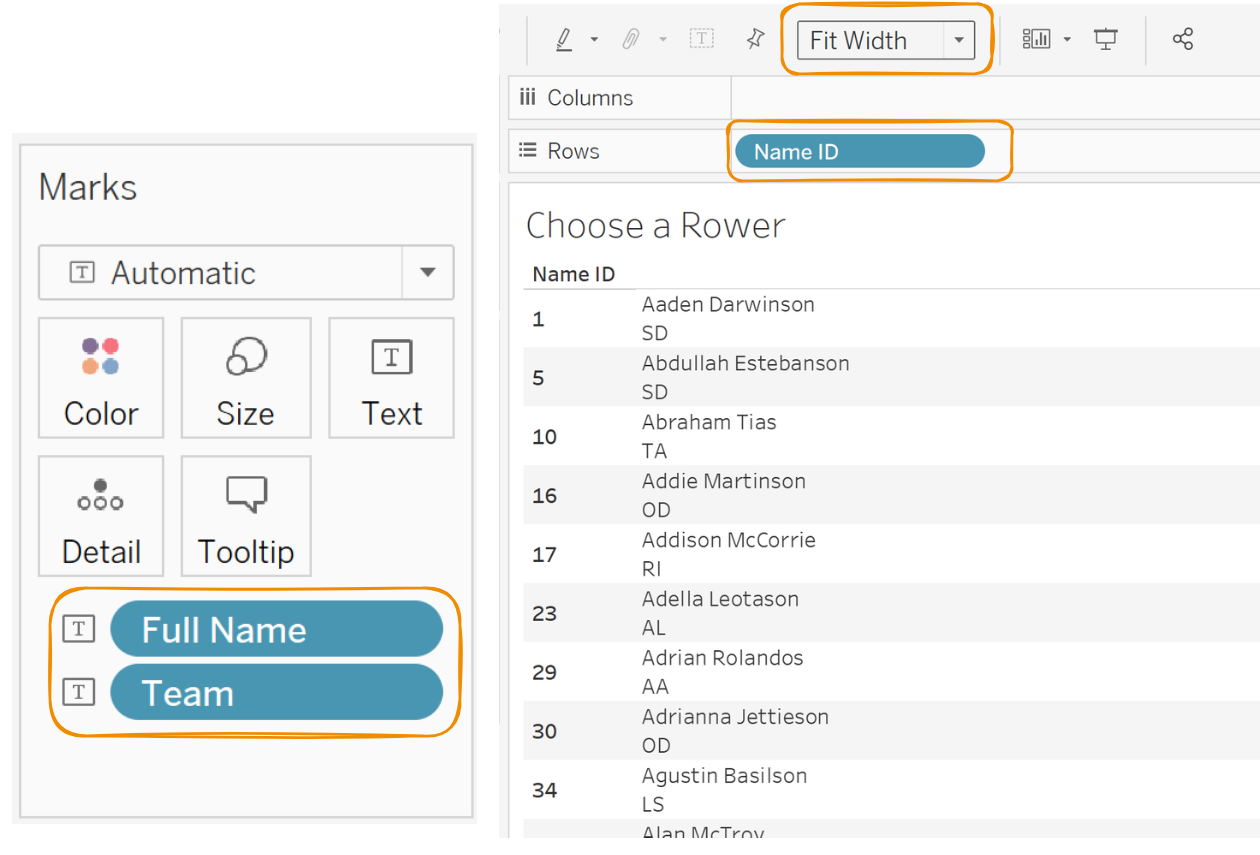
- Click the Text mark and format the text as desired. This is what the user will interact with
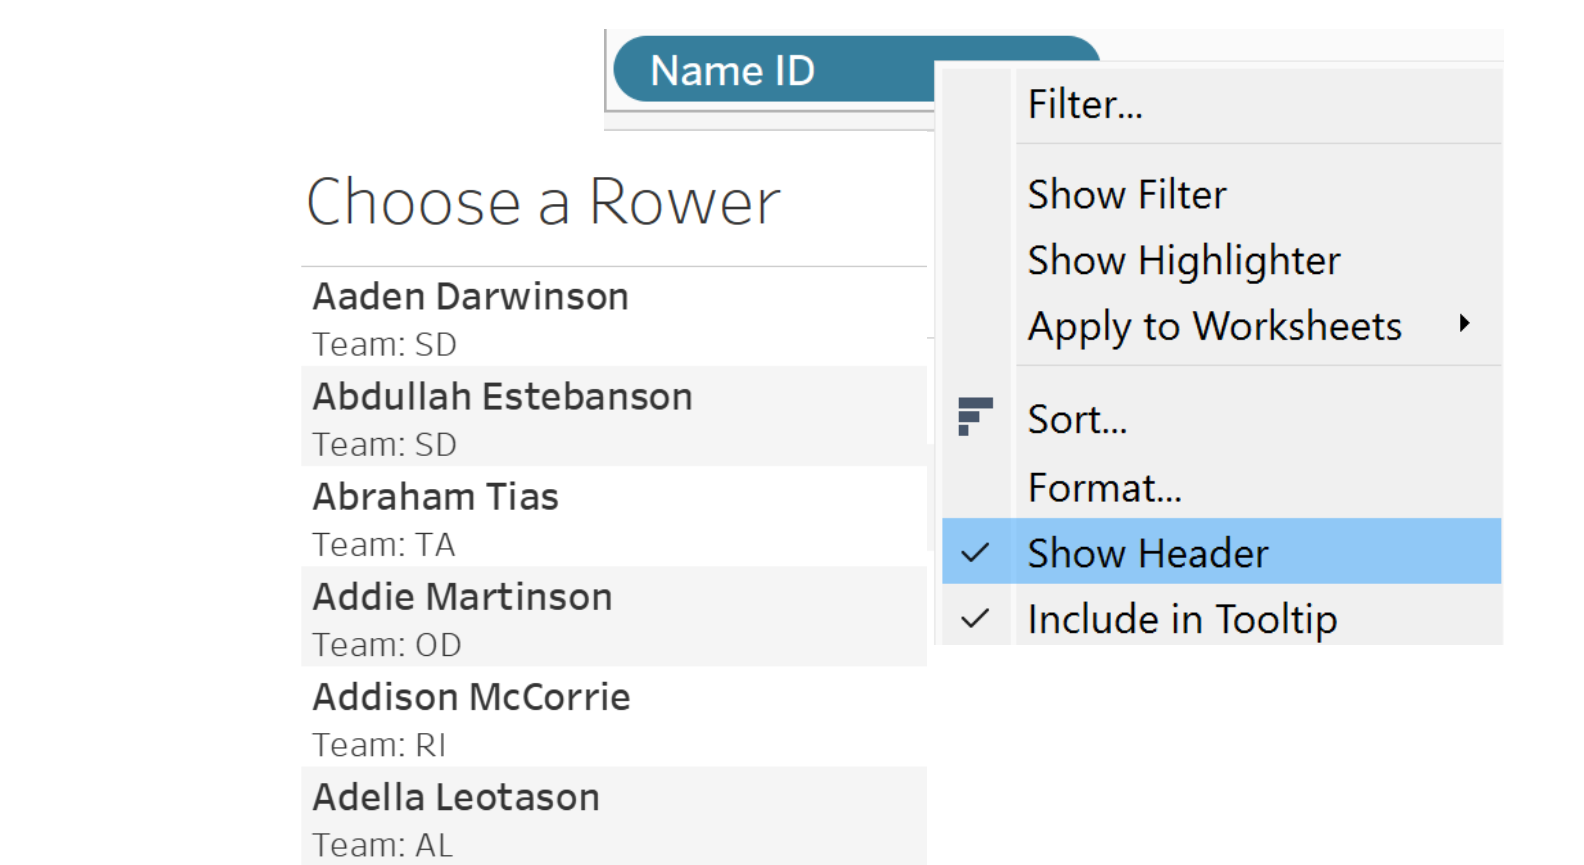
- Right click the dimension on the rows shelf and untick Show Header
- Click the Tooltip mark and untick Show tooltips
Creating the custom search
Now we need to include the custom search functionality. We would like the user to be able to freely type case-insensitive, position-insensitive letters into a search bar, and to have the chart to be filtered accordingly.
- Create a parameter with a name like "Search Names" with data type String and allowable values All
- Create a calculated field with the following calculation (replacing [Search Dimension Name] with the field you want the user to search through, and [Parameter Name] with the name of the created search parameter):
CONTAINS(LOWER([Search Dimension Name]),LOWER([Parameter Name]))
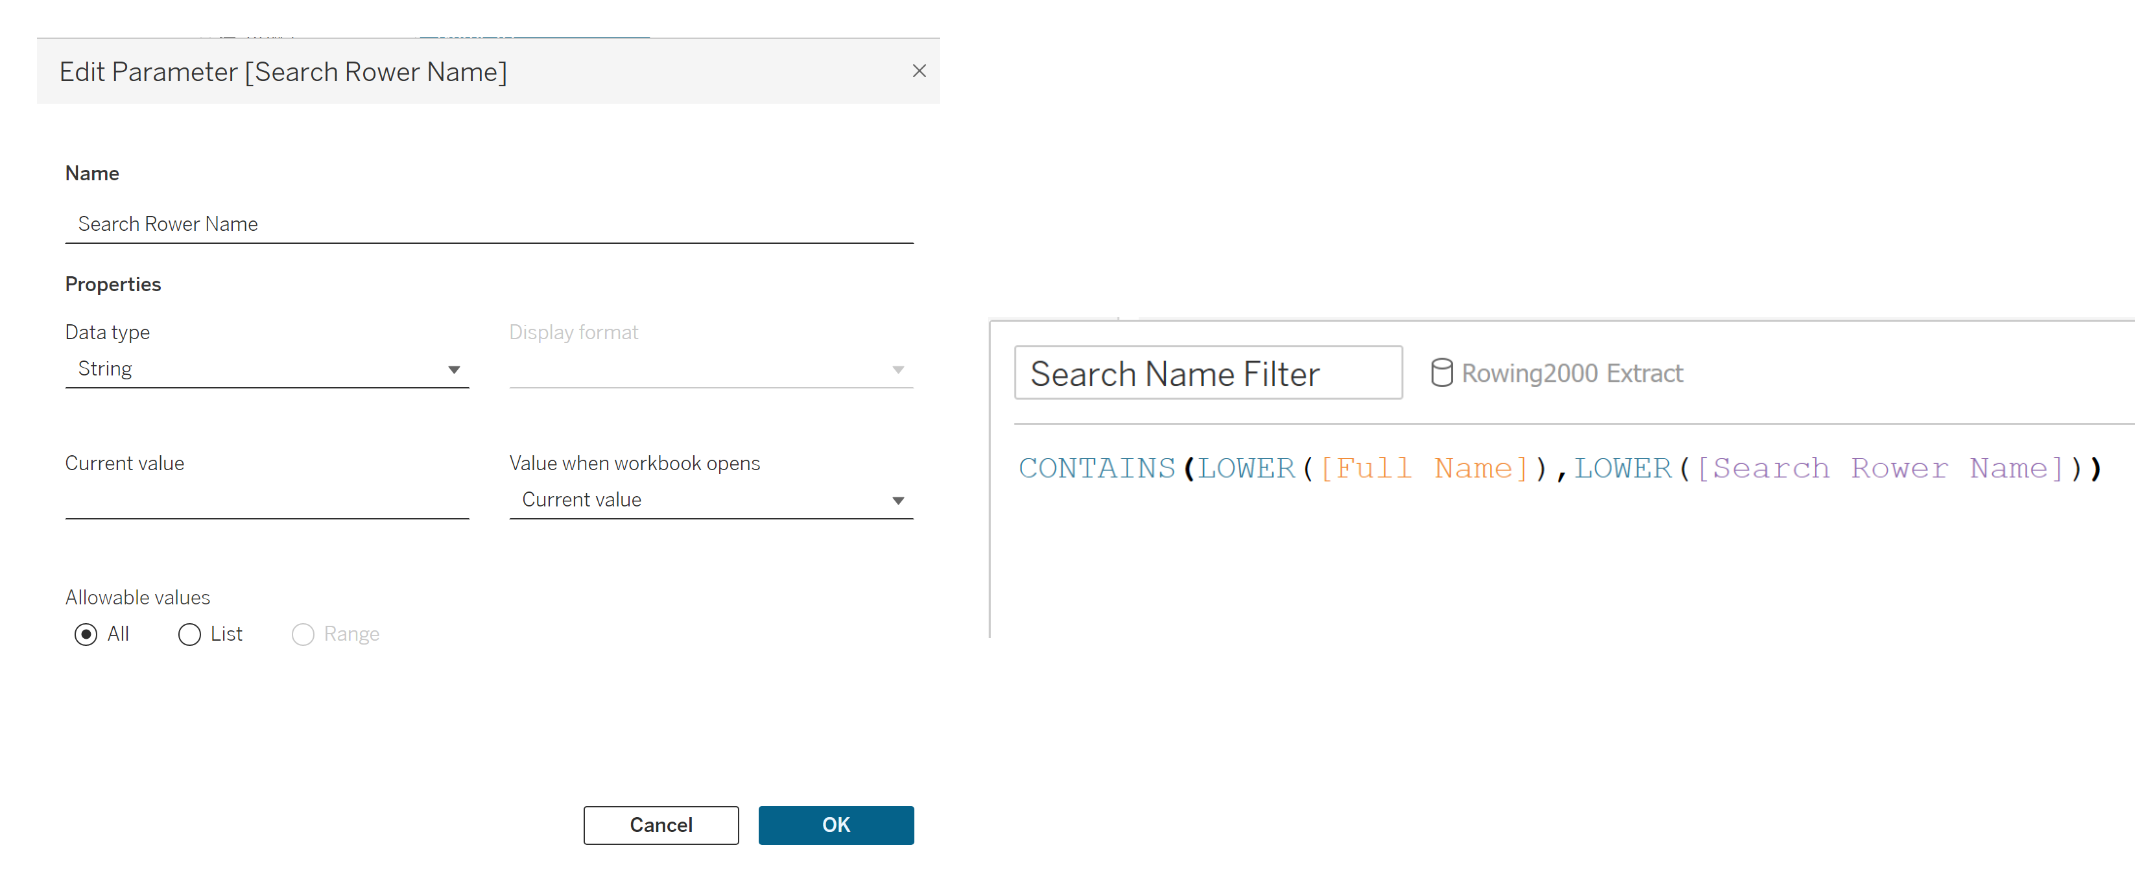
This will return TRUE whenever the typed text is somewhere in the dimension which the user is searching through, without case sensitivity.
- Drag the created calculated field onto the Filters shelf of the menu chart created before and tick True

Adding the charts to your dashboard
Now, everything is set up properly. The final steps are to set up the dashboard actions and formatting.
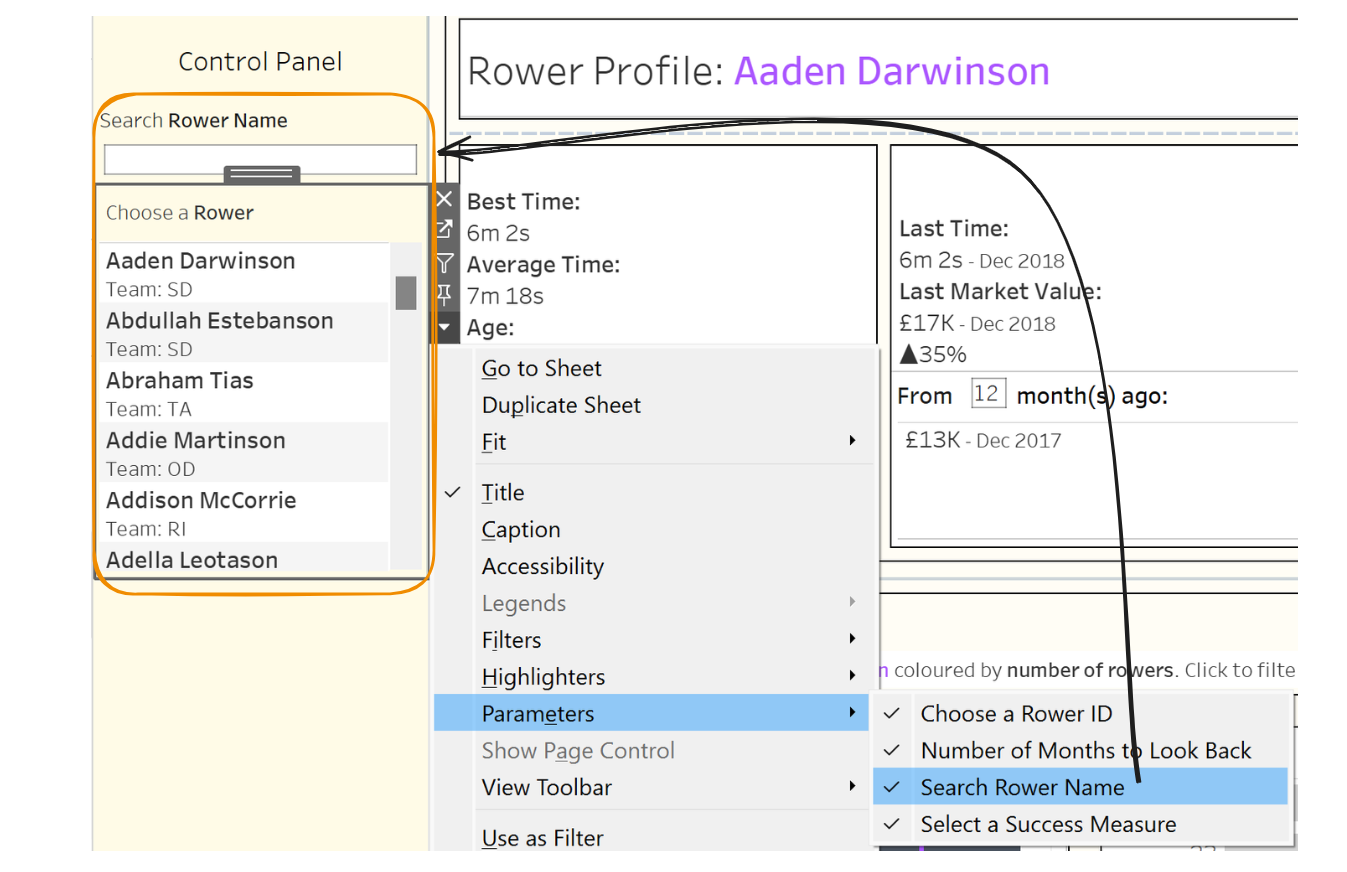
- In your dashboard, add a vertical container where you would like your custom menu to be
- Drag the custom menu into the vertical container
- Click the custom menu chart, navigate to the drop-down menu, then navigate to the parameters drop-down menu and click the parameter you created for searching
- Drag the parameter above the custom menu
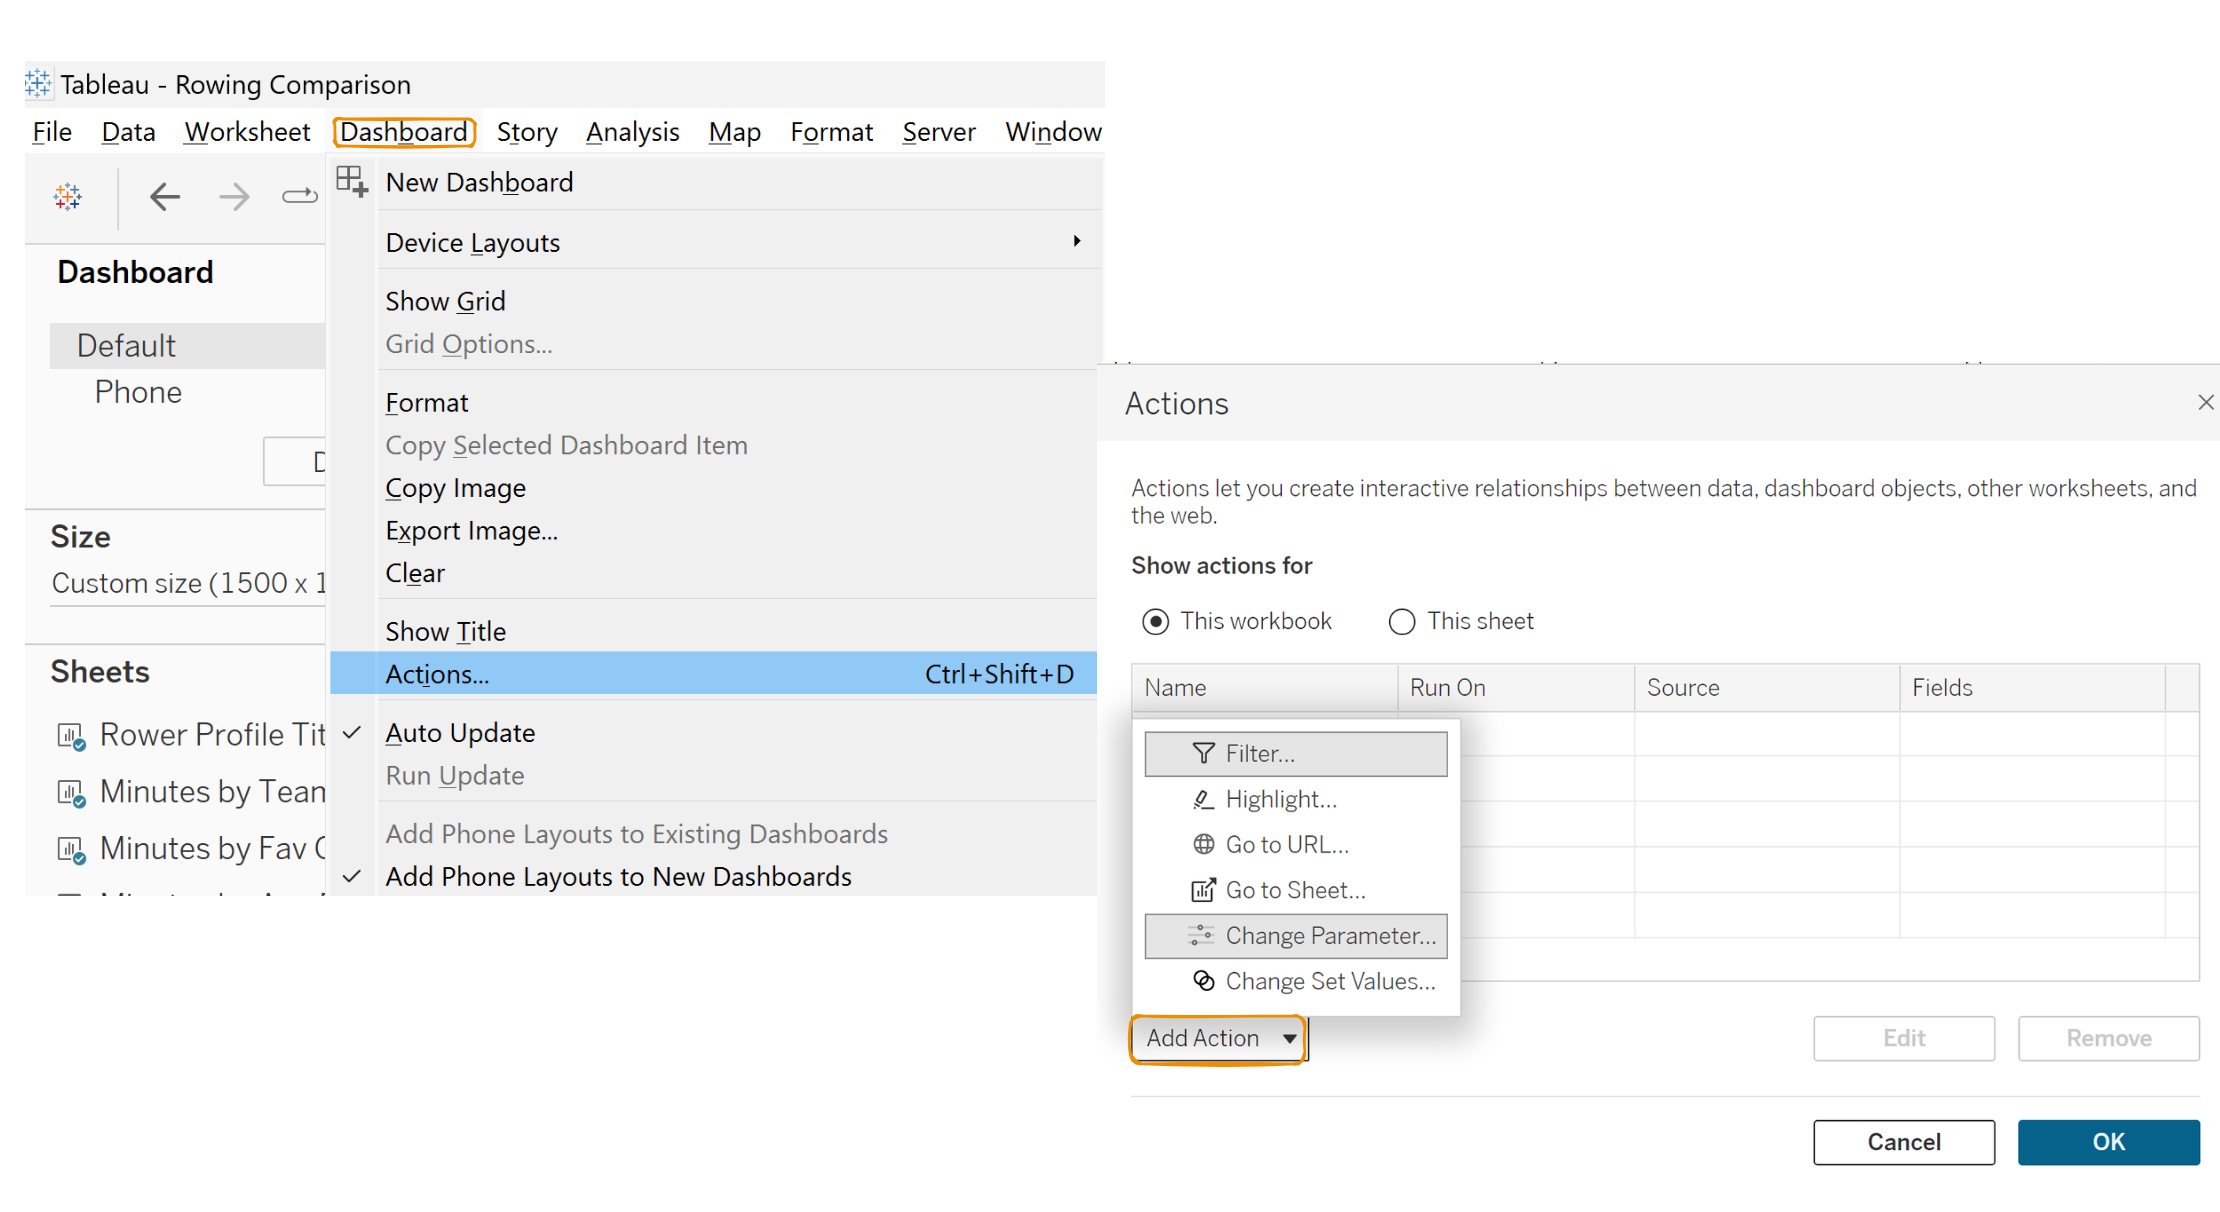
- Click Dashboard in the menu bar, and then click Actions
- In the Actions menu, click Add Action, and then click Change Parameter
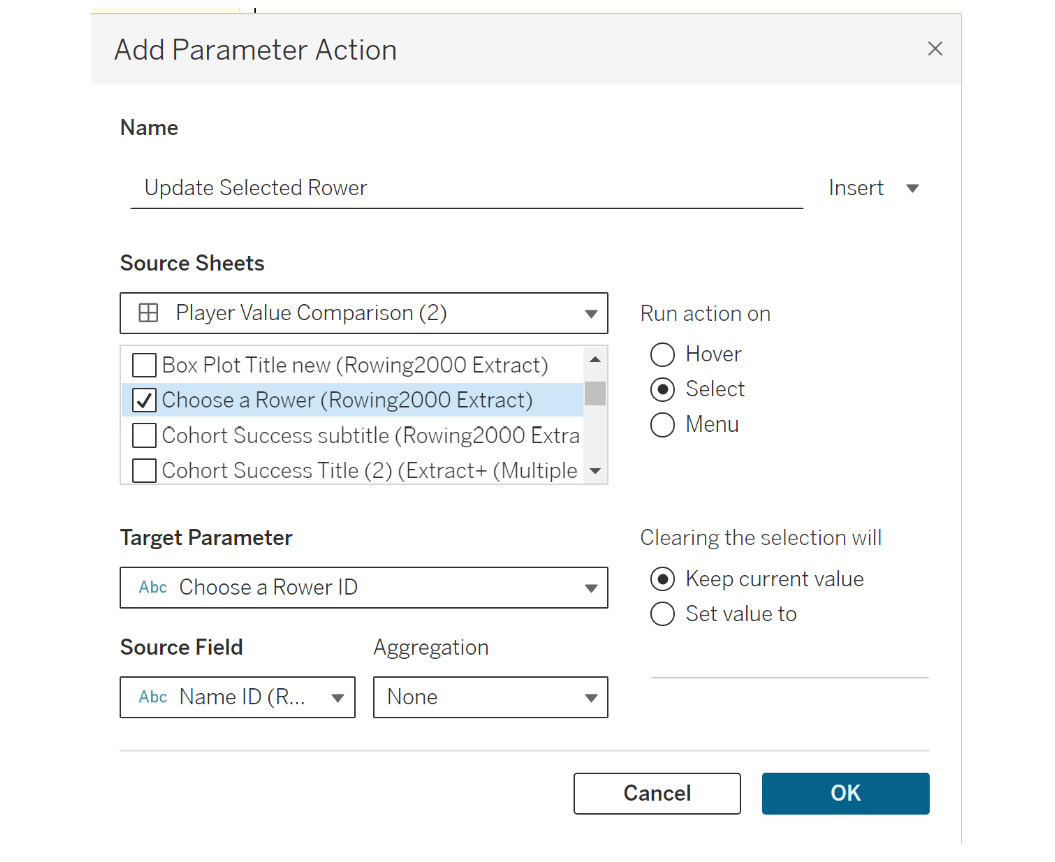
- In the Add Parameter Action Menu, untick all of the source sheets, and then tick only the custom chart
- In the Add Parameter Action Menu, set Target Parameter to the parameter which you want to update from this search menu (in my case, I want to update my Name ID parameter)
- In the Add Parameter Action Menu, set Source Field to whatever field your original parameter was based on (in my case, the dashboard is dynamic based on the Name ID parameter). This will update the original parameter with what is selected from the custom menu.
Final product in use: