


Loading data is the process in which you take extracted data and store it in a destination system typically for use in analytics or machine learning.
While loading can happen at different stages in data pipelines, lowering cloud storage costs has meant that you now typically see it done right after the data is extracted. Once loaded, business logic is applied to the data by way of Transformation. This process is better known ELT (Extract, Load, Transform).
At the time of writing this, some of the most popular tools used to perform ELT processes are AWS S3 and Snowflake:
- S3 is a cloud object storage solution and AWS service. It is used to store recently extracted data. AWS’ security features allows you to store and load data into other platforms in a safe manner.
- Snowflake is a data warehouse/lake platform. It is where extracted data is loaded to and transformed for future use.
Combining these tools is very common in a modern data engineering tech stack and the goal of this blog is to help you configure both tools so you can successfully and securely load data from S3 into a Snowflake.
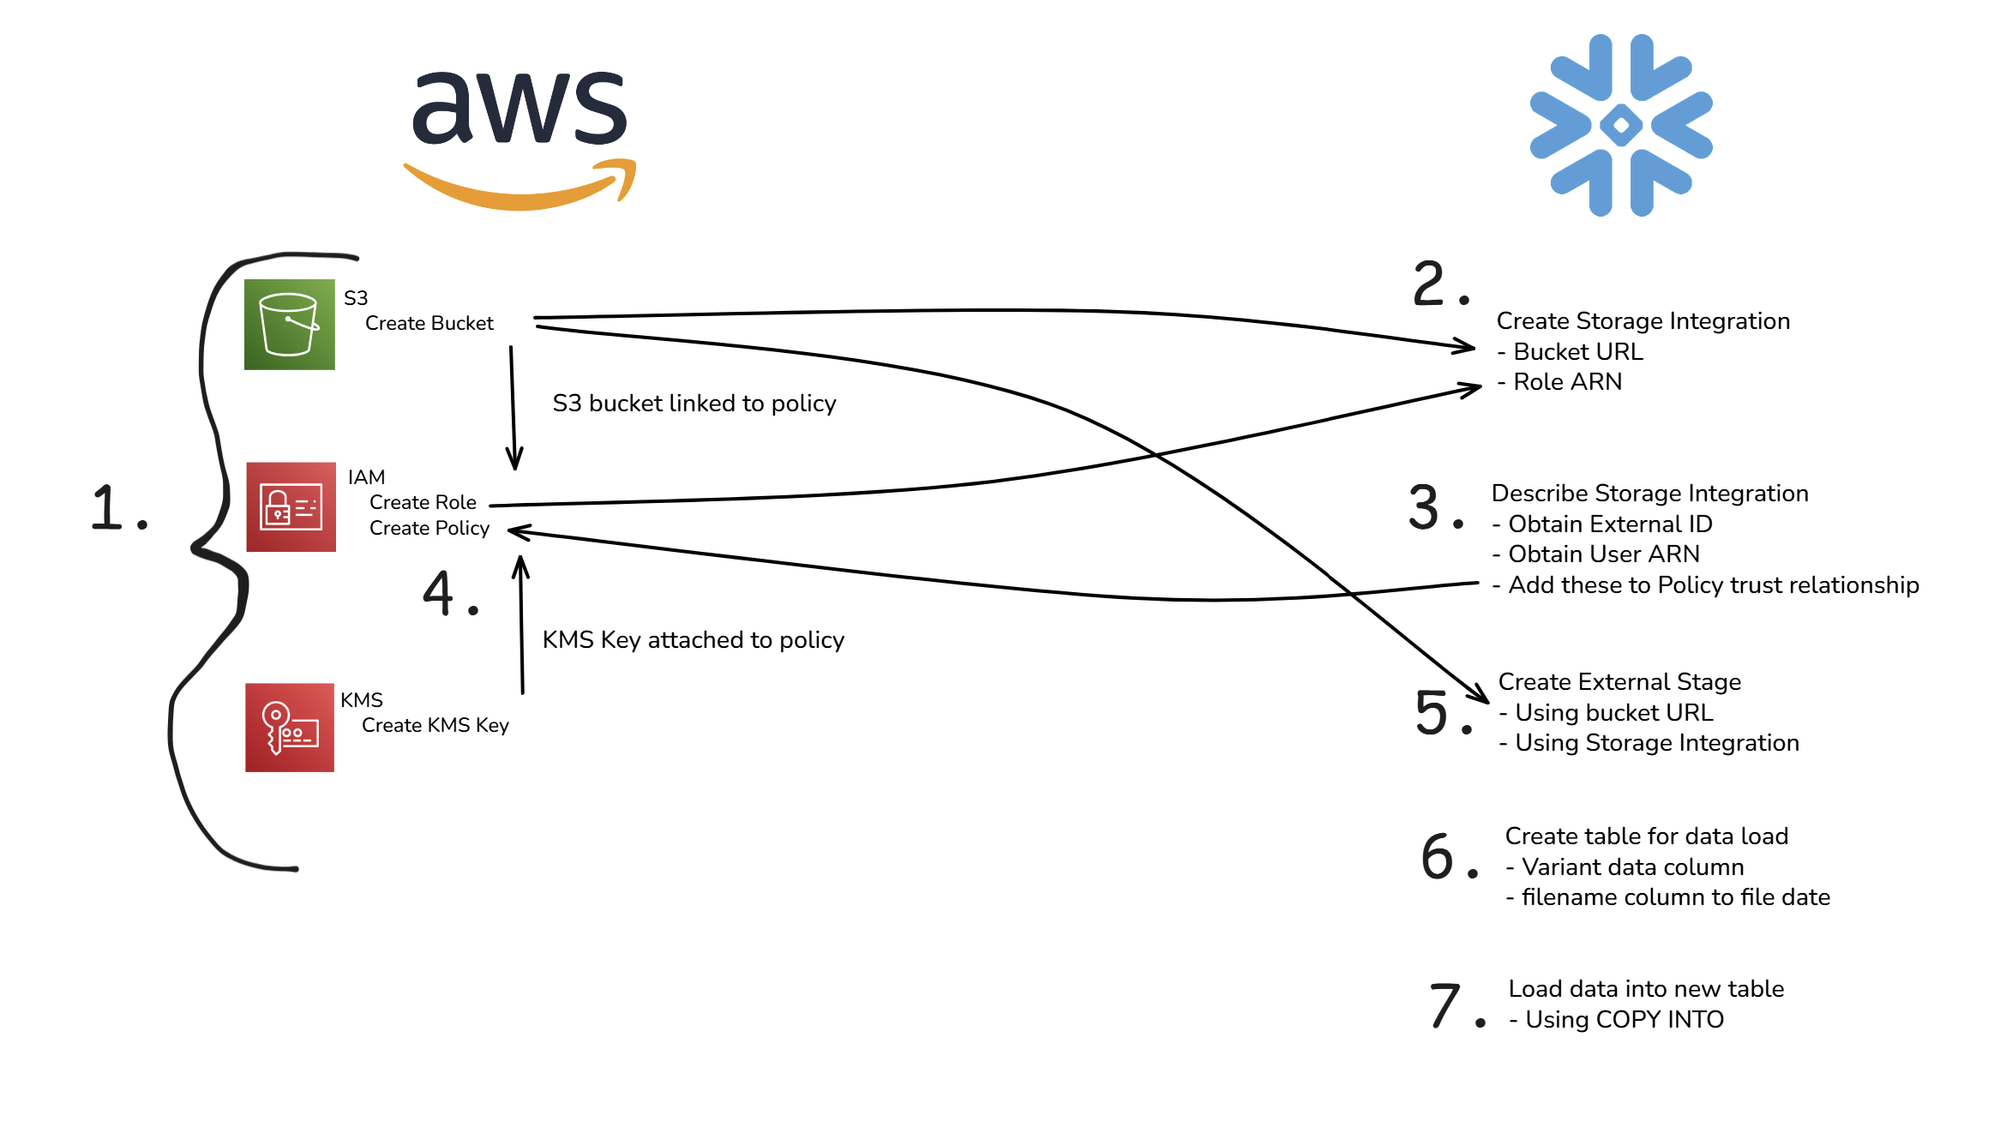
AWS Pre-Requisites
To follow along, you first need to have the following items already set-up. I have separated them from the main process as you may already have these set up.
- S3 Bucket - Create a bucket using AWS’s S3 service. This should contain data that we will load into Snowflake.
- Role - Create a role in AWS’s Identity and Access Management (IAM) service. This role is required for this process, acting almost as a username when creating a secure connection to Snowflake
- Key - Generate a key using AWS’s Key Management Service (KMS) service. You can assign keys to IAM objects to keep them secure via encryption. The keys act as the passwords when creating a secure connection to Snowflake
Once all of the above are created, you can proceed with the main process configuration following the steps below.
AWS Configuration
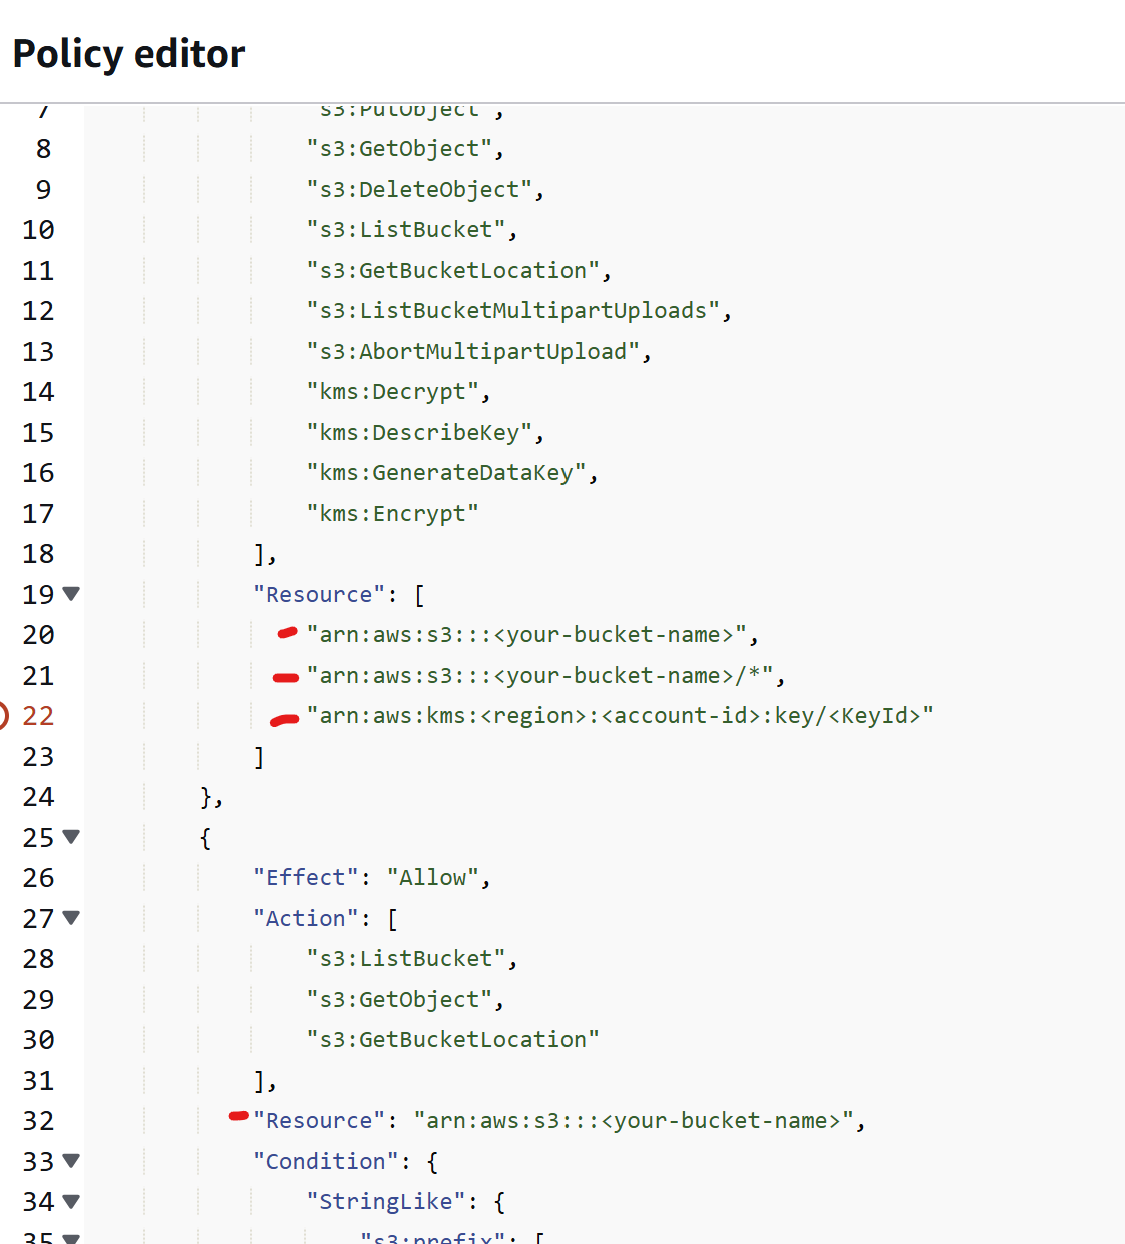
1 - Create AWS Policy
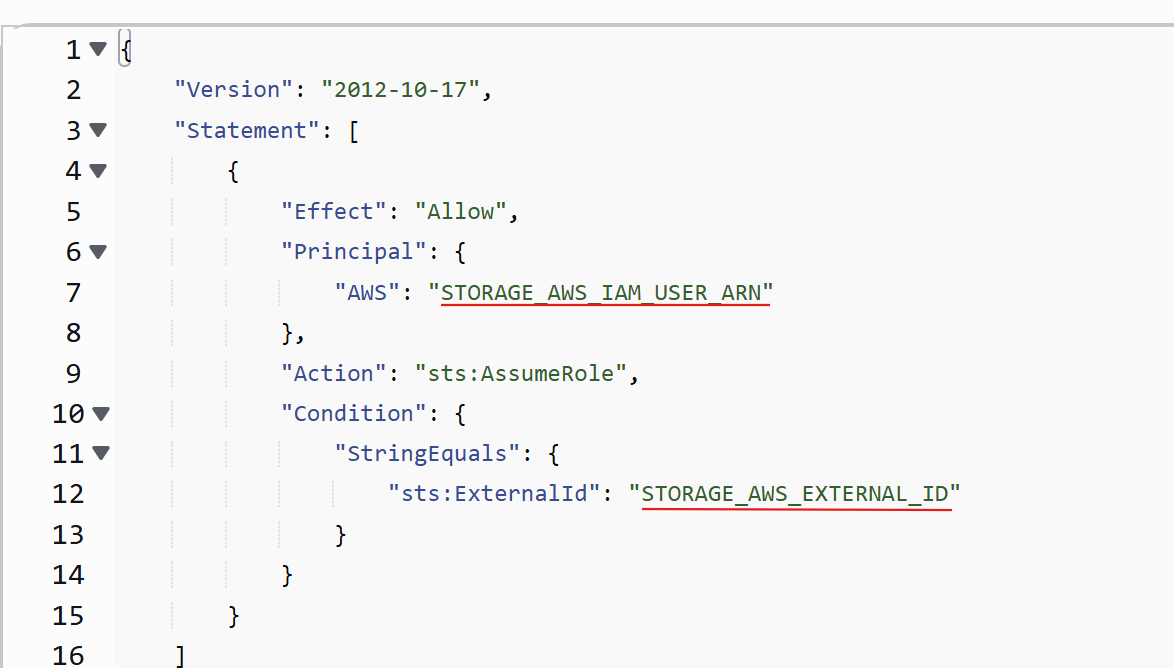
- Create a policy in AWS IAM service. Your existing bucket and key should be linked to this policy using the following JSON configuration. All highlighted lines should contain your relevant details instead of the “<text>”.
Snowflake
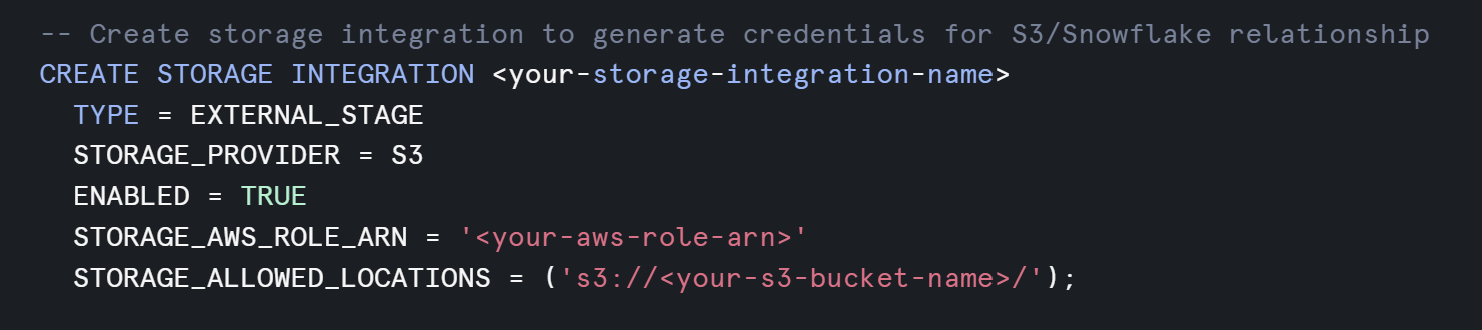
2 - Create a Storage Integration in Snowflake
- In Snowflake, create and run a storage integration script in a SQL worksheet. This generates credentials that you will be able to input into AWS to establish a trusted relationship between the two platforms. In the code below, change any “<text>” to match your relevant information.
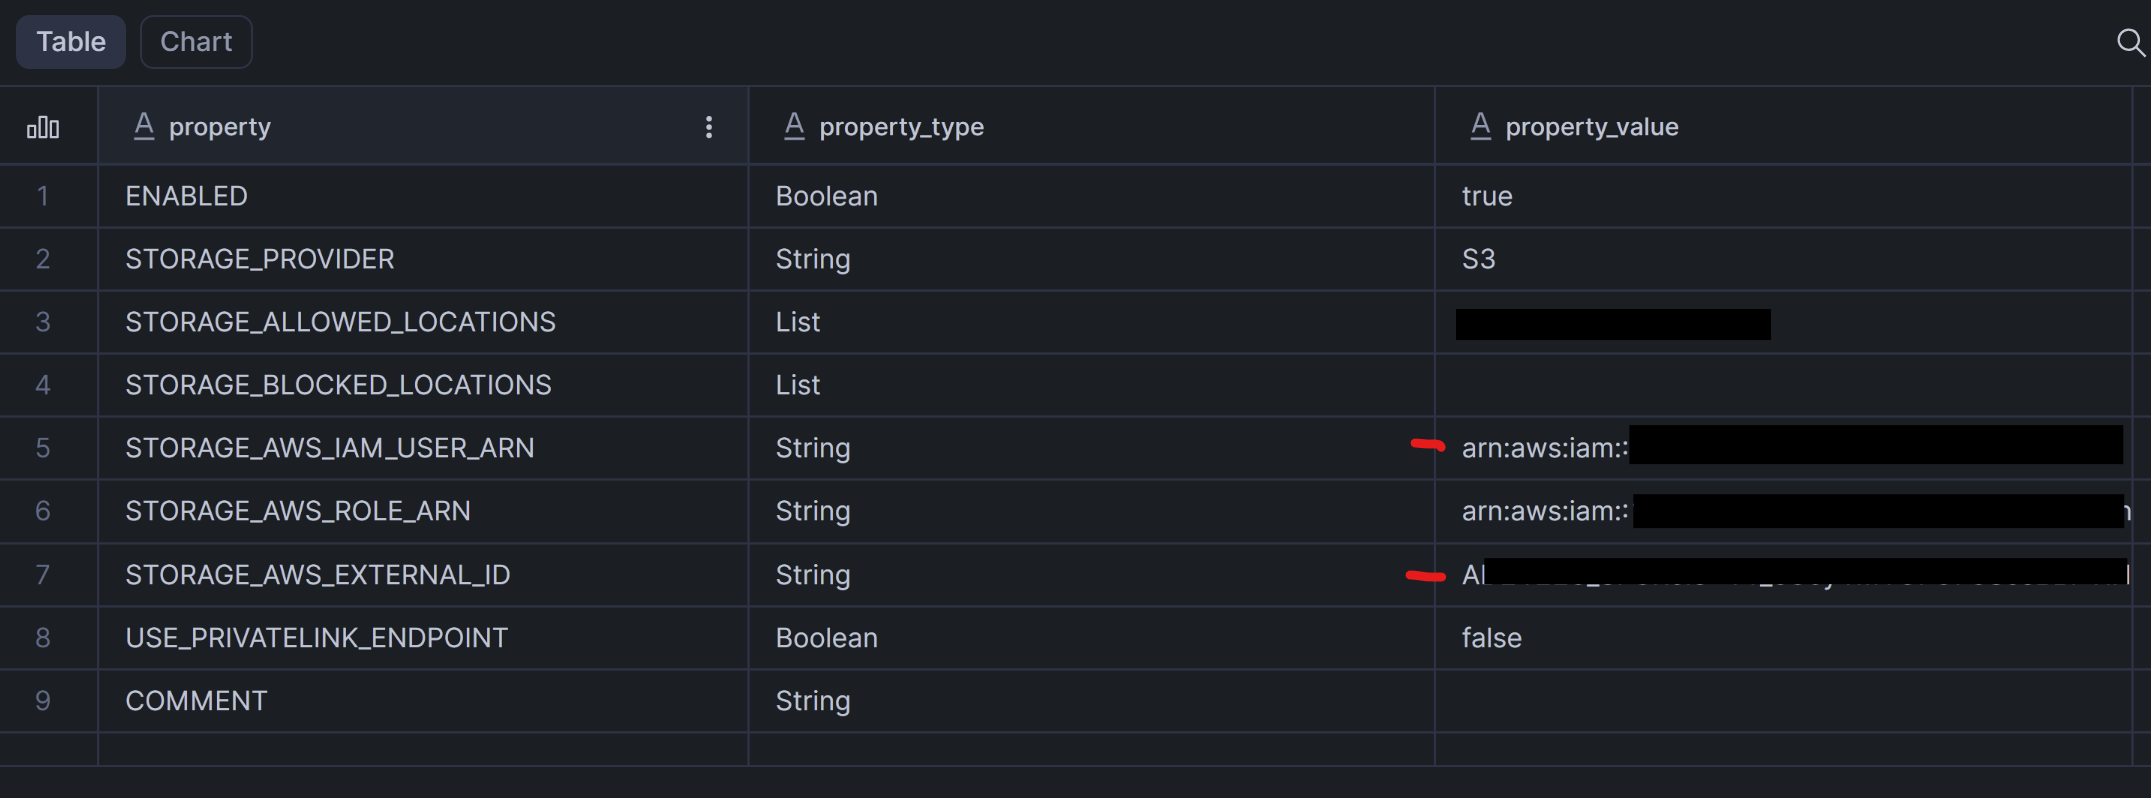
3 - Obtain Storage Integration Details in Snowflake
- View your storage integration details by running the below code with the name of your storage replacing the “<text>” in a Snowflake SQL worksheet.

- Copy the values in the cells marked in red below. These will be pasted into AWS.
- STORAGE_AWS_IAM_USER_ARN
- STORAGE_AWS_EXTERNAL_ID
4 - Create Trusted Relationship in AWS
- a - In AWS, navigate to IAM and Roles. Search for a select your role.
- b - Click on “Trust relationships”.
- c - Click “Edit trust policy”.

- d - Paste your details from the Snowflake Storage Integration into the configuration file and save. Once this is complete, a secure connection between Snowflake and AWS will finalized allowing for the loading of data into external stages.
5 - Create External Stage in Snowflake
- Create a stage by running the below code with the relevant “<text>” replaced with the relevant details.
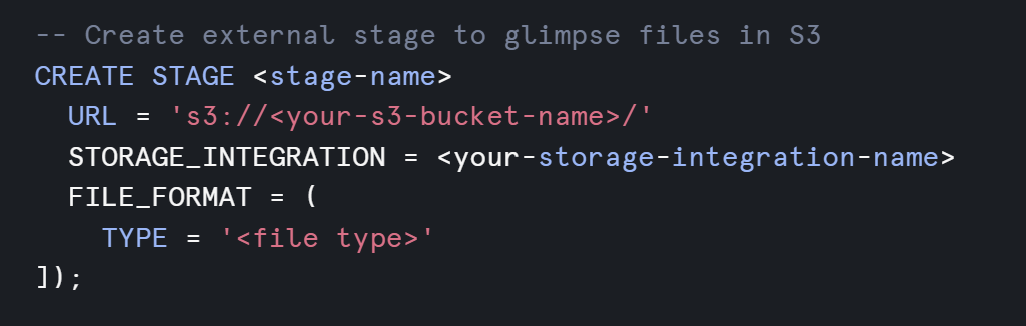
- You can check that the Snowflake/AWS connection by running the below command. It should show you a list of the files in your S3 bucket. This is the usefulness of an external stage. You can view your S3 files within Snowflake.

6 - Create a Table in Snowflake
- Create a table in Snowflake to receive the soon-to-be-loaded data. You can do so by running the below code. In this example, the table will contain entire .json file contents as a variant data type and the filename as a string.

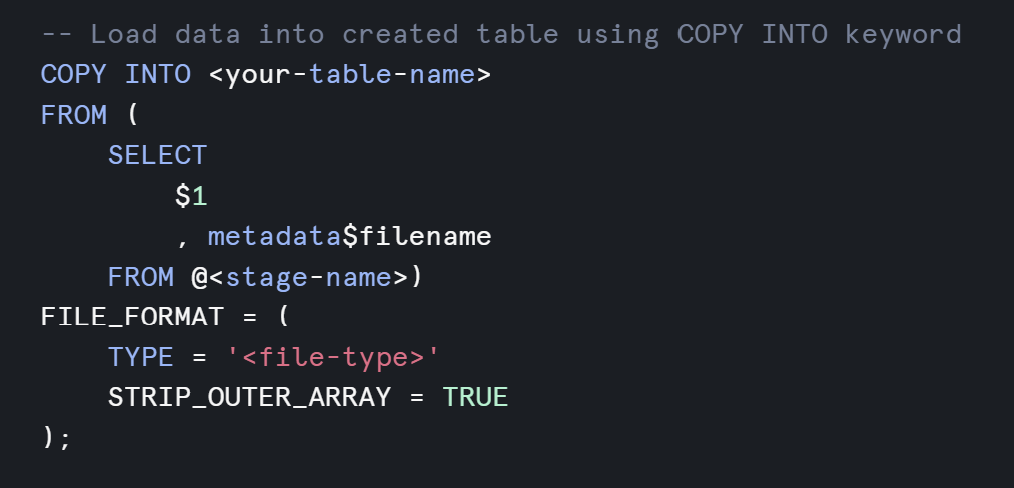
7 - Load your data from S3 into your Snowflake table
- Using the COPY INTO keywords you can load your data into Snowflake. As always, replace any “<text>” with the relevant details and run the below code to do so. When you "select *" from your new table you should see the loaded data.
With newly loaded data, a Data Engineer next steps might be to begin parsing out details from the .json content column and begin planning and building out a data model.