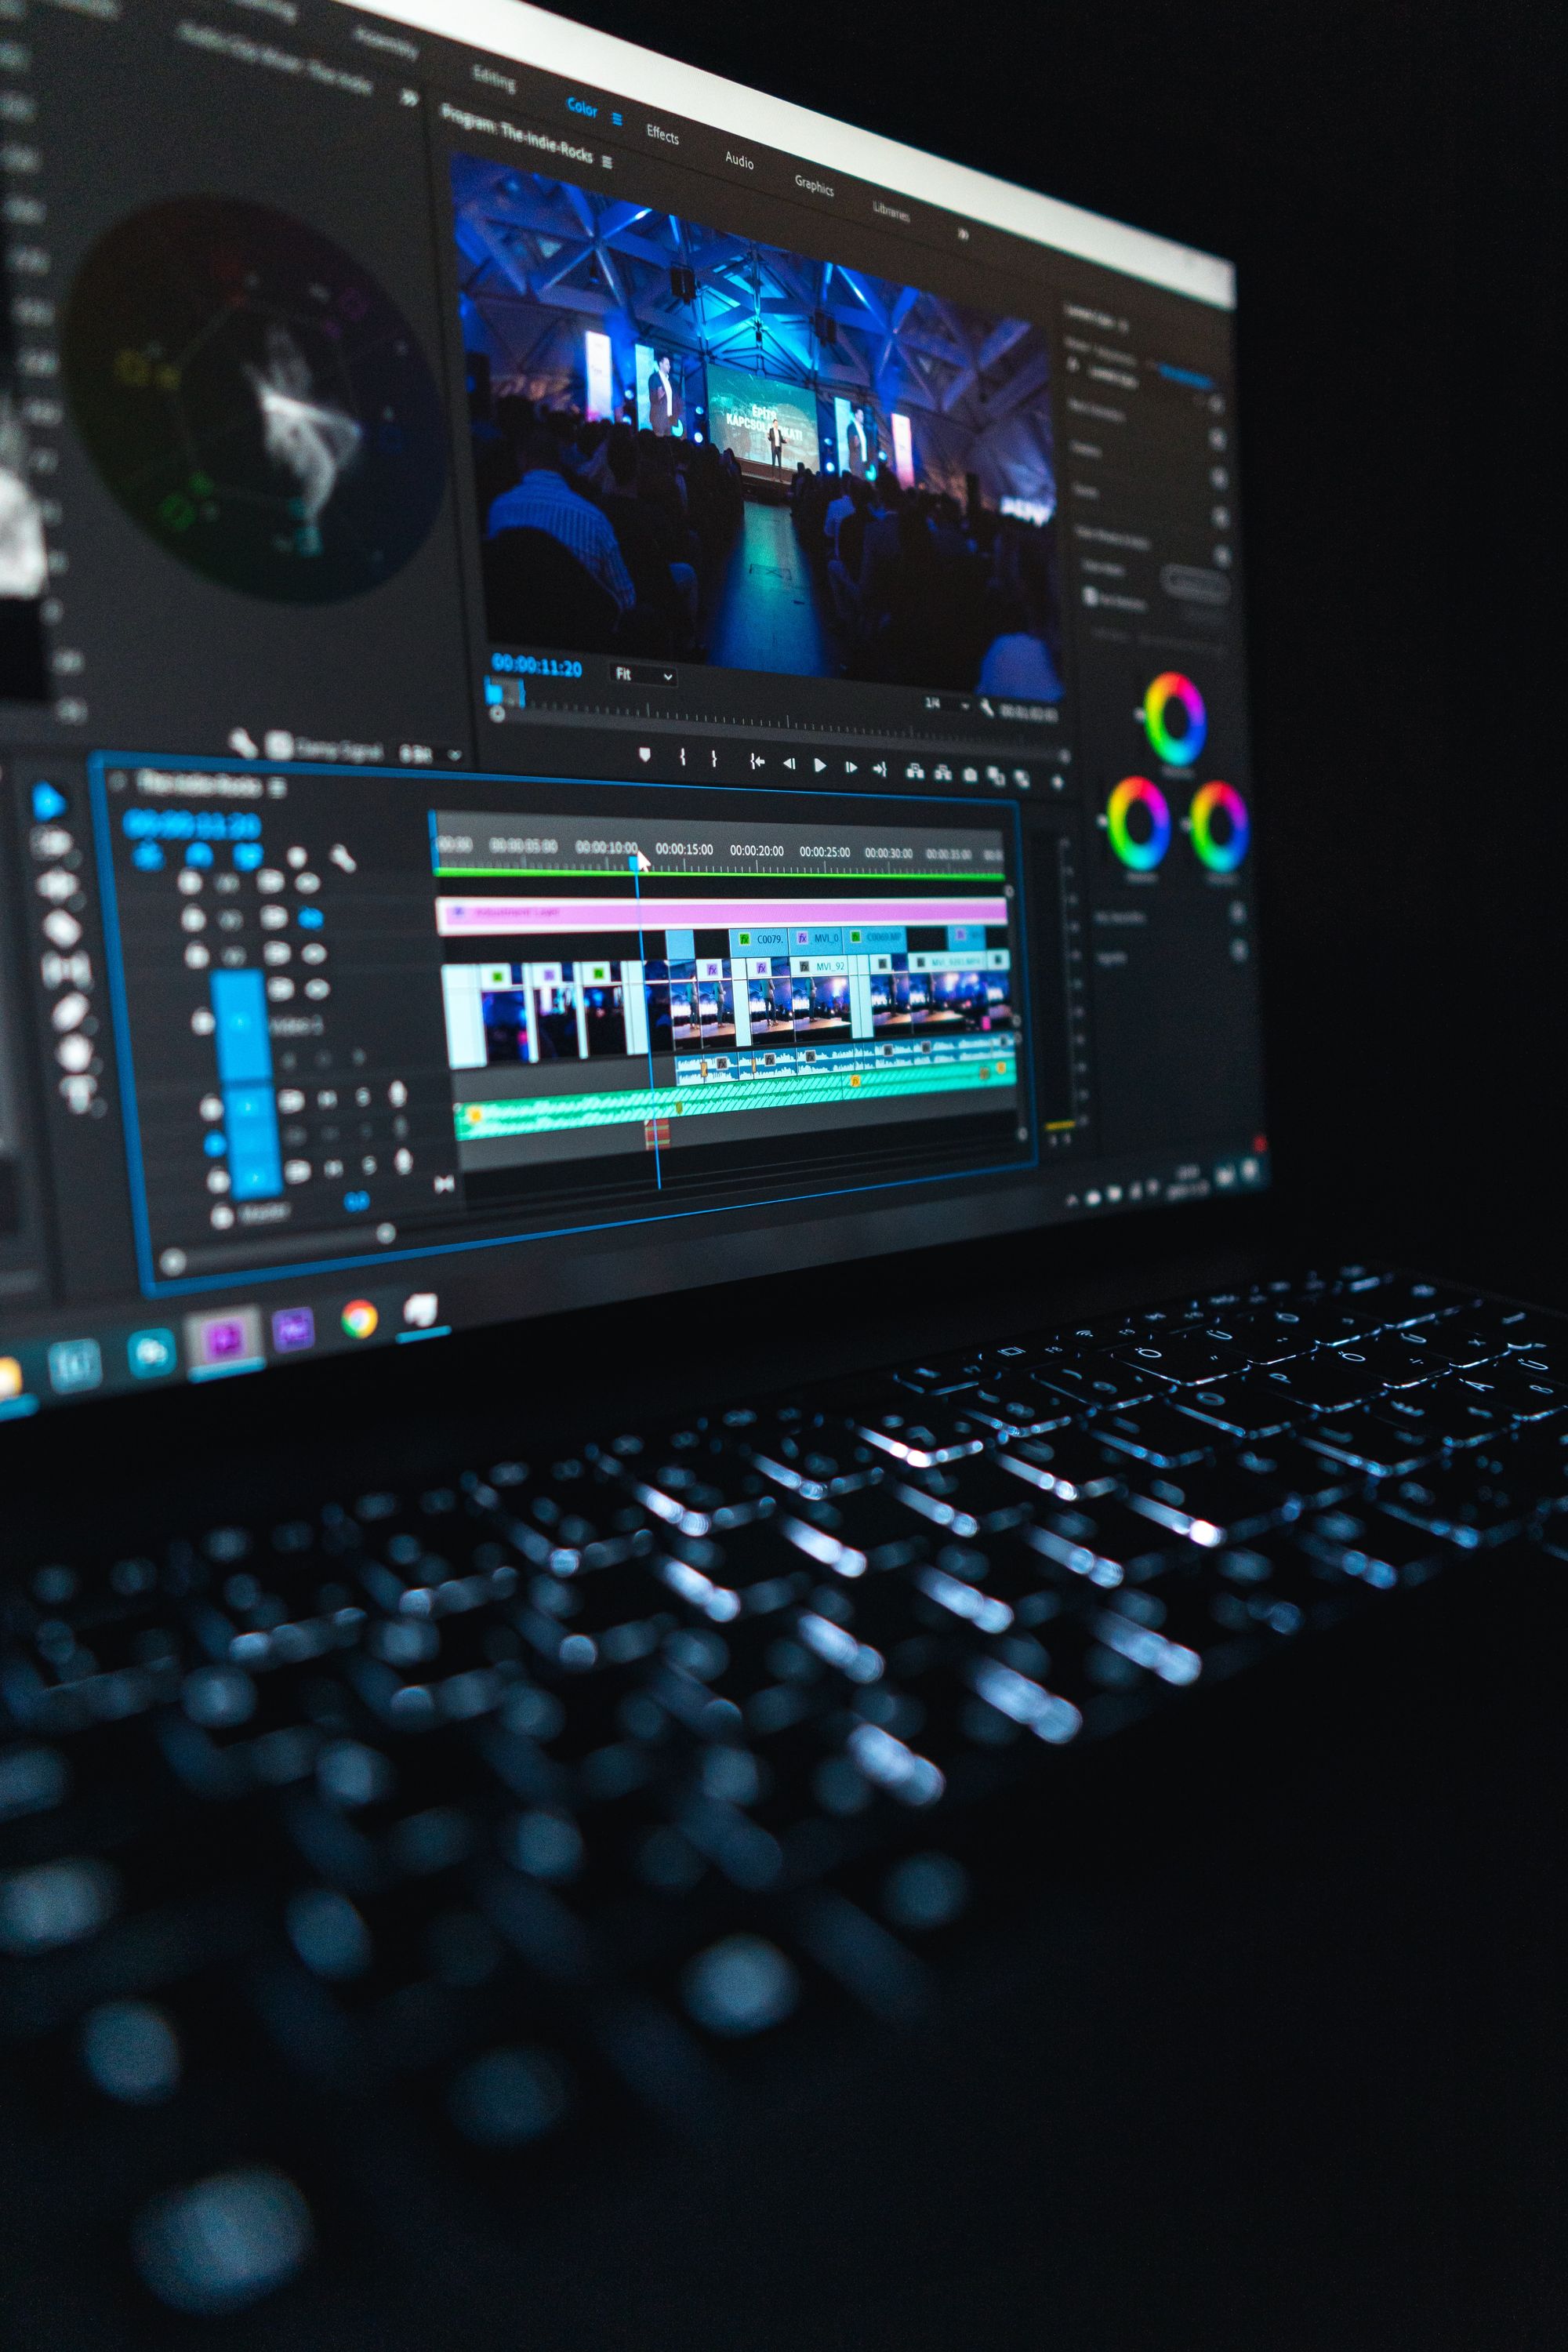
During Data School training, we complete eight client projects - week-long sprints to accomplish a data-driven task for an external, internal, or ersatz stakeholder. For every client project, one of us is assigned as project manager, giving us a chance to learn how to manage consultants, liaise with stakeholders, and deliver the kind of quality the Data School is known for. Usually our tasks are dashboard-focused, but sometimes we're asked to do something more unusual. During my week as project manager, we were asked to produce videos for The Information Lab's main YouTube channel, where every week or so we post a five-minute Alteryx or Tableau How To video. While producing videos we're all proud of, we documented lessons that help with video production to help future TIL content creators, and I'd like to share some of them with you.
Budget Extra Time for Scripting
Some people write quickly and can write up a lesson plan and/or script in almost no time. This is not most data analysts. Figuring out what will sound good, while communicating clearly, and without going over your time limit for video length usually requires far more work than you'd think. Making revisions after rehearsal to fit within the time limit also eats up time - it's harder to be concise than it is to be verbose. Until you have enough experience to make blogs like these irrelevant to you, add lots of scripting time into your schedule.
Always Remember Your Audience
When you're good with data-related tools like Tableau and Alteryx, it can be hard to remember that most viewers will not know all the interface tips and tricks that save you time. Always clearly narrate what you're doing, use proper terminology for interface elements (data pane, canvas, row/column shelf, marks card), and try to avoid shortcuts unless you're willing to take time to explain the shortcut. If you're presenting live, sometimes you'll get feedback from the audience to show what you're doing again; when you're prerecording a video, you may not know that you've lost your audience until you've seen the metrics.
Pace Yourself
Unless we have experience with video production or teaching, it can be hard to know the average number of words per minute needed to effectively and efficiently convey information, especially when the audience can't ask clarifying questions. Find a creator known to have good pacing, and listen to your recording of your script to see if you need to slow down or speed up to match that pace. Senior coaches in the Data School recommended The Data School UK's Maha Hussari as someone who sets a good pace for data analytics videos, and she's who we looked to when pacing our own videos. Remember, learning is an intensive process. Limiting your speed while still getting a lot of information across takes practice, and you'll really benefit from someone showing optimal speed and diction.
Take Advantage of Zoom

The functionality, not the videoconferencing software (though that's helpful for rehearsal). By default the interface in Tableau and Alteryx are optimized for doing work, not for showing people how to do work. In Tableau, clicking inside a calculated field window, holding down Ctrl (or Command), and scrolling up on the mousewheel increases the size of text inside the window. This is very helpful for live and recorded presentations. In Alteryx, you can similarly Ctrl-Mousewheel Up in the canvas to improve the visibility of tools and annotations. However, not every user interface element in either program can be zoomed in on - what's the solution?

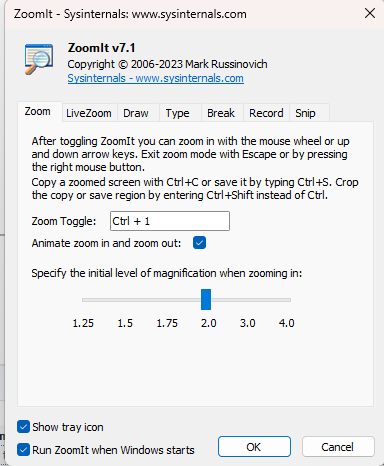
ZoomIt, provided as part of Microsoft's SysInternals collection of tools, offers real-time and screenshot-based zoom capability to Windows computers. On all Windows PCs, you can zoom in on a dynamically-generated screenshot of your activity with a simple keyboard shortcut, with a host of zoom and other configuration options. If you want to annotate, you can use the Draw function, or type on the screen with the Type functionality. On Windows 11 and later PCs, the tool becomes even more powerful, allowing you to zoom in on your desktop dynamically and not just zoom in on a static screenshot (by default, Ctrl-4 is the toggle). This helps you demonstrate how to use different interface elements that don't natively support zoom functionality, and with practice you can guide viewers seamlessly through all the steps of your tutorial.
Change Your Cursor

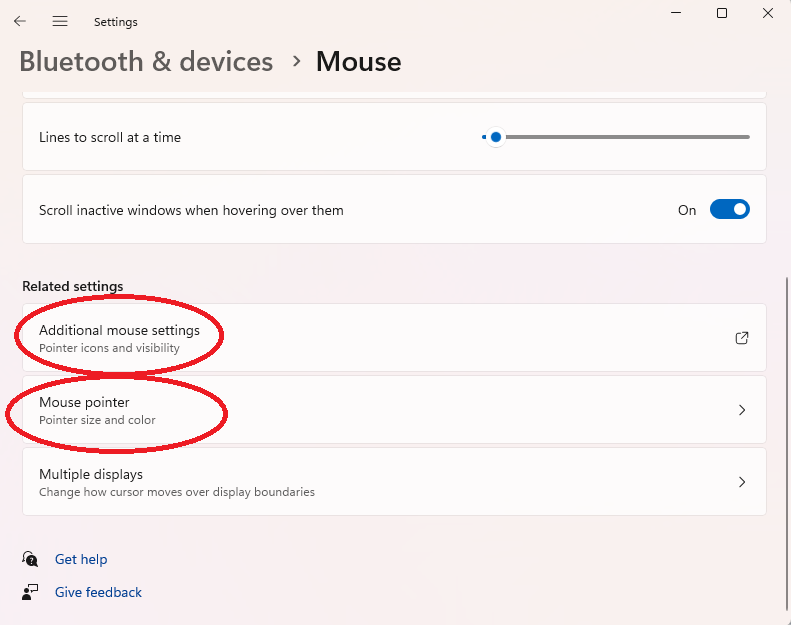
In the dim recesses of the distant past, lecturers would use a physical pointer stick, ruler, or other indicator to help highlight where viewers' attention should go. In our dystopian cyberpunk present we can use our customized cursor. In Windows, you can control important cursor settings in Settings -> Bluetooth and Devices -> Mouse ; you can control pointer size and color in the "Mouse pointer" submenu, and apply additional effects in "Additional mouse settings." In the "Mouse pointer" submenu, I recommend increasing your mouse size, and changing the color to something as visible as you can stand - you'll be using your mouse pointer not just to manipulate objects on screen, but also to highlight.

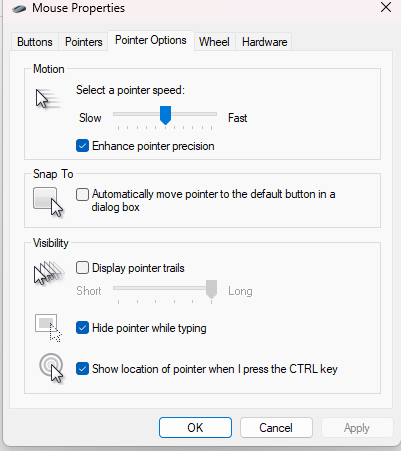
"Additional Mouse Settings" brings up the Mouse Properties window, and here you'll want to change at least two options. First, enable "Show location of pointer when I press the CTRL key." This lets you highlight your cursor on demand - which I recommend doing before major mouse movements when recording. This helps viewers keep track of what you're doing. It's also probably a good idea to switch off the "Hide pointer while typing" option, but this isn't essential. Remember to put yourself in the audience's shoes - they aren't controlling your cursor, so they don't have your muscle memory of where the cursor is at any given time.
Conclusion
These are just some of the lessons DSNY6 learned about how to effectively communicate Tableau and Alteryx concepts through short-to-medium length videos. In a followup, I'll share some additional technical and configuration tips to help with the video production pipeline.
