In this blog post I am hoping to build on Gerda's very helpful Google Calendar API blog post: https://www.thedataschool.co.uk/gerda-staurylaite/how-to-connect-to-google-api-in-alteryx
(1) API SET UP IN BROWSER
Go To console.cloud.google.com
-Create Project
-Go To API'S & SERVICES
-Enable API'S & SERVICES: Google Calendar API
-Go to CREDENTIALS

-Go to CREATE CREDENTIALS
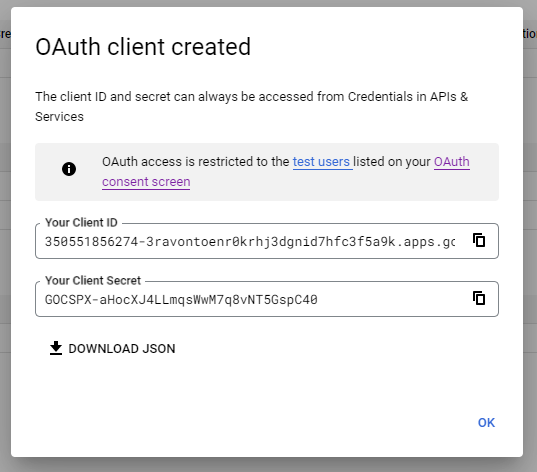
--OAUTH Client ID
--Application Type: Desktop APP
--Create & Now You'll have Client ID and Client Secret
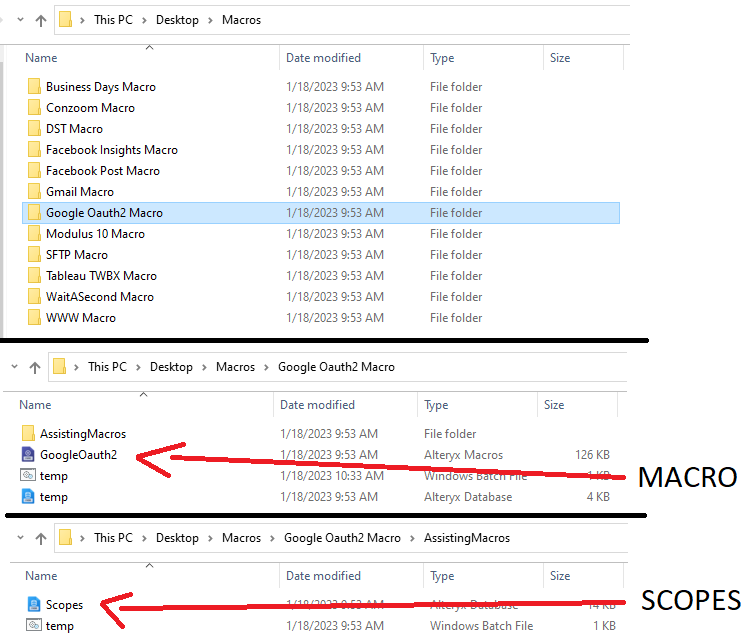
(2) DOWNLOAD MACROS:
You will need to download 2 things
1. Google OAuth2.yxzp
See Gerda's convo post: http://links.app.convo.com/v1/acc-26f67bc7-4b15-4825-e053-760e880a4be5/apps/6/messages/Sdw5lhMibtNWEFvAs1TnCpceul38sa#title=Connecting%252520to%252520a%252520Google%252520API%252520in%252520Alteryx
2. Google API Retrieve (zipped file)
NOTE: download the zipped folder from the comments (linked below)
INVISOMACROS:
http://links.app.convo.com/v1/acc-26f67bc7-4b15-4825-e053-760e880a4be5/apps/6/messages/Sdw5lhMibtNWEFvAs1TnCpceul38sa?comment=l1HFfCw7RLszmdvxBlhZeofdSTKdly&file=557116&file_format=other#title=Gerda%252520Staurylaite%252520%25257C%252520DS%25252033%252520%25257C%252520P1%252520-%252520Close%252520Brothers%25253A%252520%252522invisomacros%252520(1).zip%252522
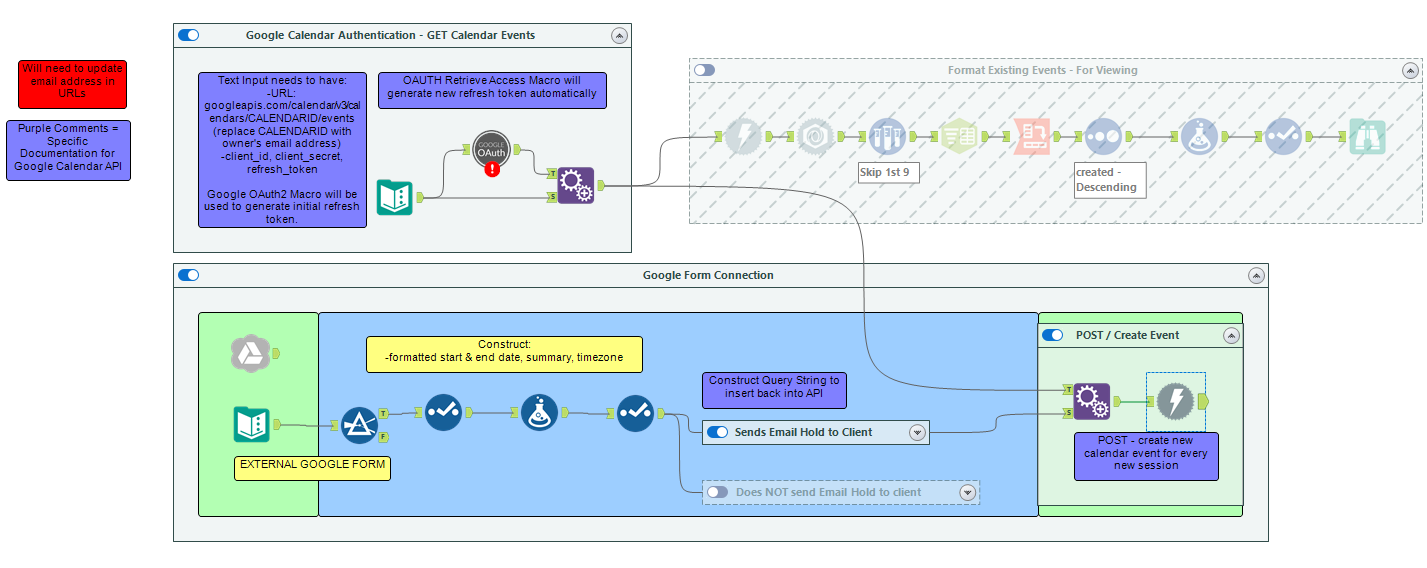
(3) API CONNECTION IN ALTERYX
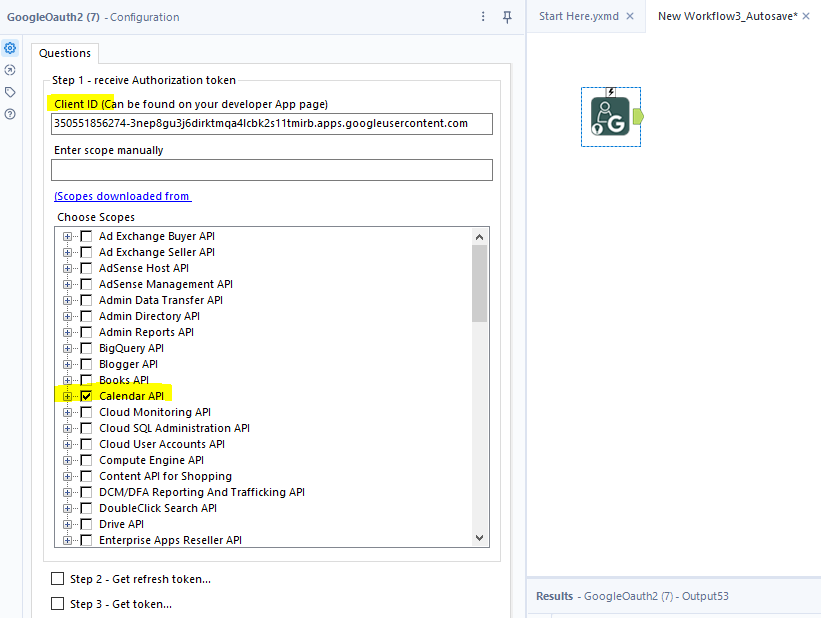
Using the GoogleOauth2 Macro
--download macro
--right click blank canvas -> insert -> browse -> Select GoogleOauth2
Complete Step 1:
--insert client ID from API browser step
--manually check "Calendar API" in list of scopes
NOTE: scope list will live in the zipped file you macro download from online
--Run the workflow and the results should produce a code
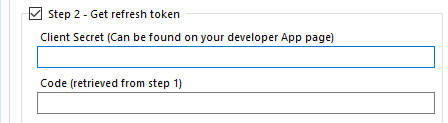
Complete Step 2:
--Fill in client secret from when you created the API project
--Use the code produced from the previous step
--Run workflow and a refresh token should be produced in the results
Now you should have:
1. Client ID
2. Client Secret
3. Refresh Token
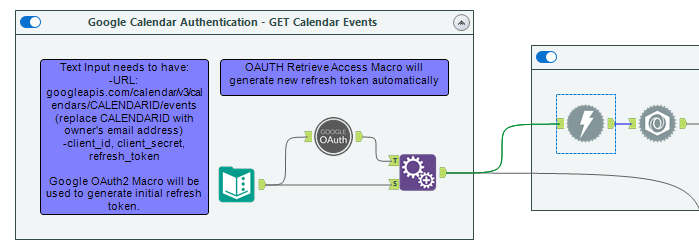
To finally connect to the API in Alteryx you will need to create a text input (on a new canvas) with the following columns:
URL (this should be: https://www.googleapis.com/calendar/v3/calendars/YOUREMAILADDRESS/events)
client_id
client_secret
refresh_token
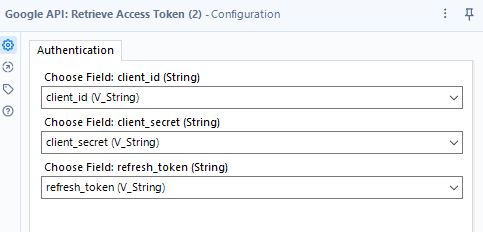
The text input should then connect to the Oauth Retrieve Access Macro and the configuration should be straightforward with how we named our columns in the text input (see below). Run the workflow and the results should produce an Authorization code.
(LAST STEP BEFORE DOWNLOAD TOOL)
Use an append tool to append the original text input tool (URL, client_id, client_secret, refresh_token) onto the results from the Oauth Retrieve Access tool to create one table with URL, client_id, client_secret, refresh_token, Authorization.
Finally, connect the results from your append tool to a Download tool using the "URL" field in the Basic Configuration and selecting the "GET (or FTP)" in the HTTP Action section of the Payload Configuration.

You will know if your download tool worked correctly if the results table now has "DownloadData" and "DownloadHeaders". If this step did not execute properly, the DownloadHeaders section will say "BAD" instead of "OK".

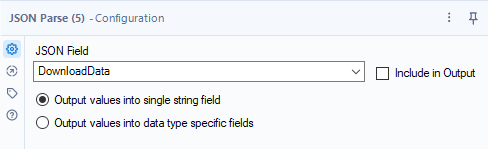
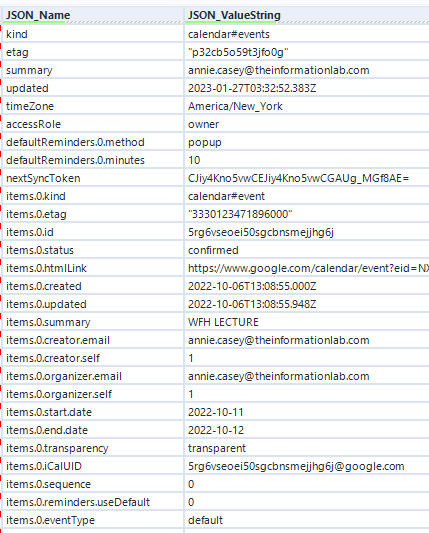
Use your JSON Parse tool with the DownloadData. You will know your JSON Parse tool worked if yours results pane looks similar to below which is now ready for transforming and cleaning:
Stay tuned for how I used this to create and post new calendar events!