It is nice to see the values of a selected item or category directly at first sight. Sometimes if you have a great amount of values it is difficult to always focus on the line/ value which you have selected, to compare it to others. For that you can create a set action to move your selected item to the top of your table.
I will show you an example with the superstore-sample data.
First you can start with a first look on the “normal” chart:
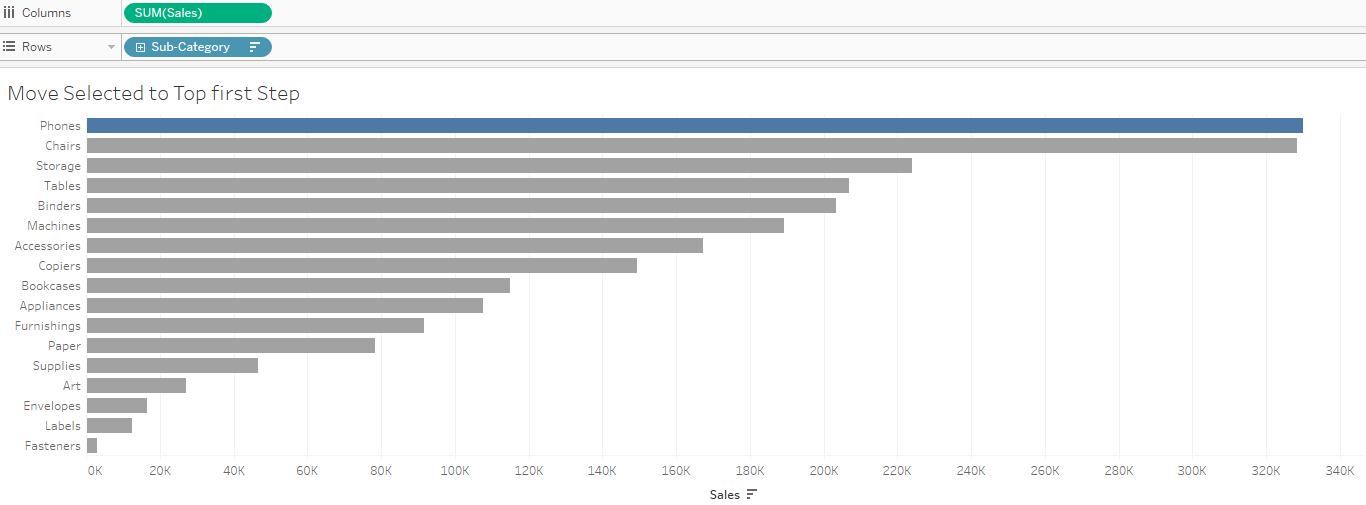
If you click on any of the subcategories it will be highlighted but will not change the position. So, let’s start to build the set.
1. To create a set for the subcategory you have to right click on the subcategory, select the Create option and then select Set. In the edit window just click on one of the subcategories (but you haven’t to it can also stay unclicked) and press okay. Now a Sub-Category-Set is created to link in the next steps.
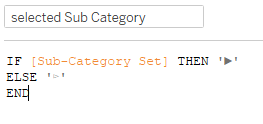
2. The next step is to create a calculated field in which you tell Tableau if the set is activated (a subcategory is selected), it should show the black arrow otherwise the white one.
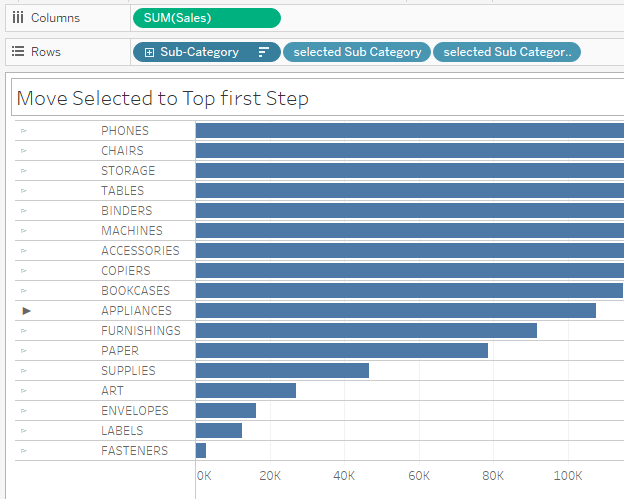
3. If you put the created field in the rows you have the following output:

(Appliances got the black arrow, because I selected it in the step where I created the subcategory set)
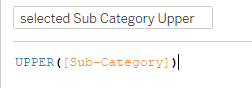
4. If you want to, you can now create a second field where every subcategory got upper letters (this is an optional step). Therefore you have to type:
5. When you now drop this field on the rows and hide the Sub-Category (original item) via right click and untick the Show Header option, your chart will look like this:
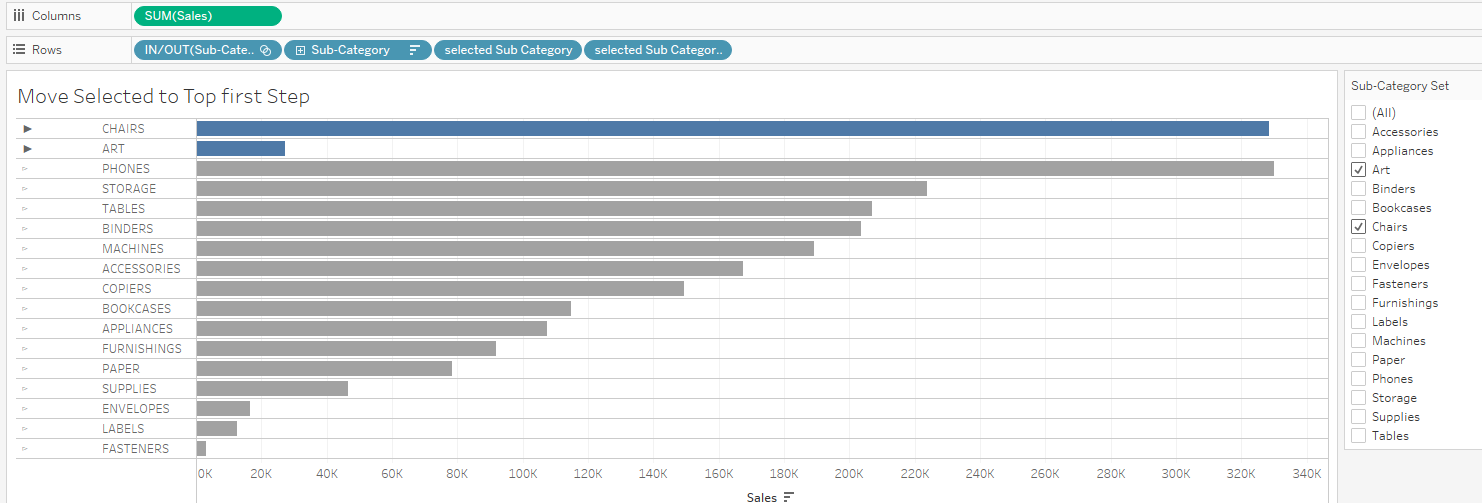
6. Now it is time to use the set you created in the beginning. So, take the Sub-Category-Set and put it into the rows and in the marks field on color. Also, you can right-click the set to make it visible (Show Set), which helps you see if it works. You can see now that only the number of subcategories you selected are blue while the rest of the bars are grey.
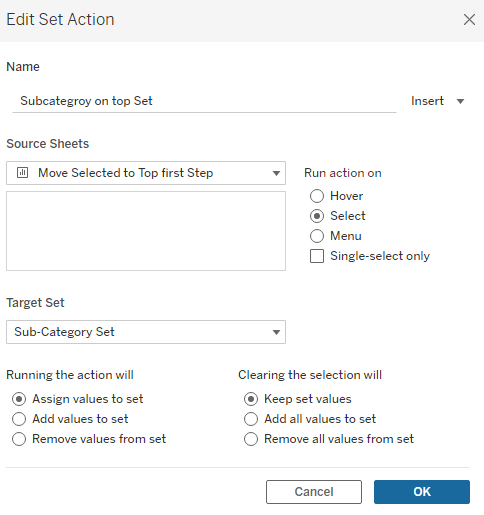
7. The final step is to add an action to the set. For this you have to go to the Actions option on your Worksheetan add a Change Set Values action. The Name in the edit window is the name of the action. The Source Sheet defines the worksheet on which the action should be done. The Target Set is the set that was created in the beginning. Then click on okay to save the action to your worksheet.
8. You can now click on the legend of the Sub-Category Set to select the subcategories you want to have on the top or just select one by clicking on it in the chart.
This is a good way if you want to compare (in this example) the sum of sales for different subcategories in a visual way next to each other.