I have never got along very well with Parameters. To be fair I do not think I had ever used them before, as I’d always find a way of just using Filters.
That changed when during a Makeover Monday using Donald Trump’s schedule, coach Andy suggested that I could have a Date Picker in the format of a calendar instead of the common dropdown that gave absolutely no context of days and is pretty boring. That being said, I had no idea how to do it.
After some googling I found that I would have to make peace with Parameters and start to learn how they work. So here is my solution (based on my research) on how to go from this (image below on the left)…. to this (image below on the right):
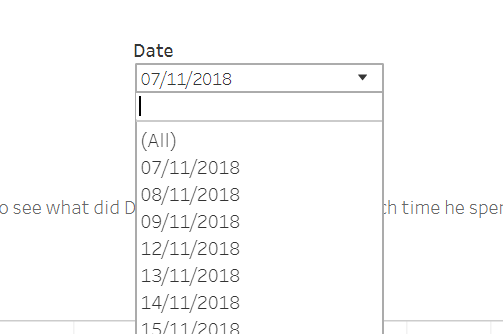
Dropdown Date Picker 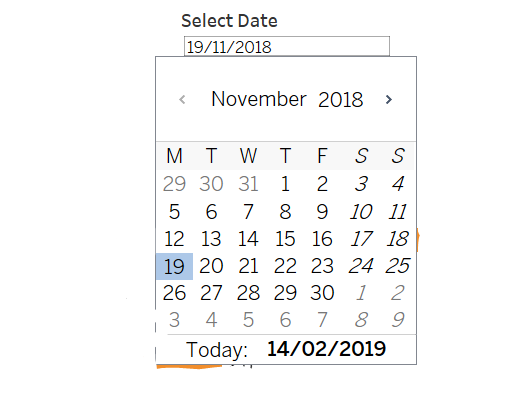
Calendar Date Picker
Create a Parameter
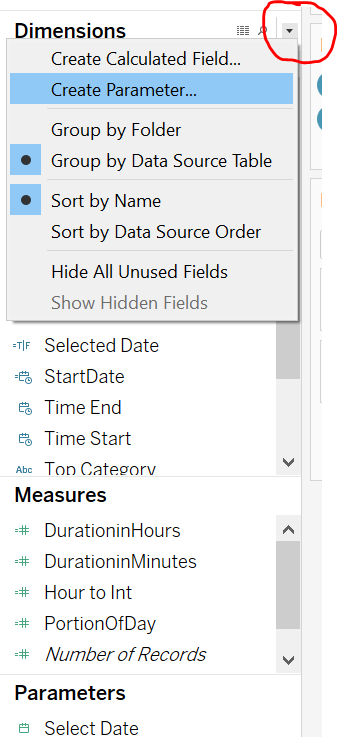
The first step is to create a Parameter. For that you just click on the little arrow next to Dimensions (careful not to hit the one next to Analytics as this will just hide the entire sidebar) and select Create Parameter.
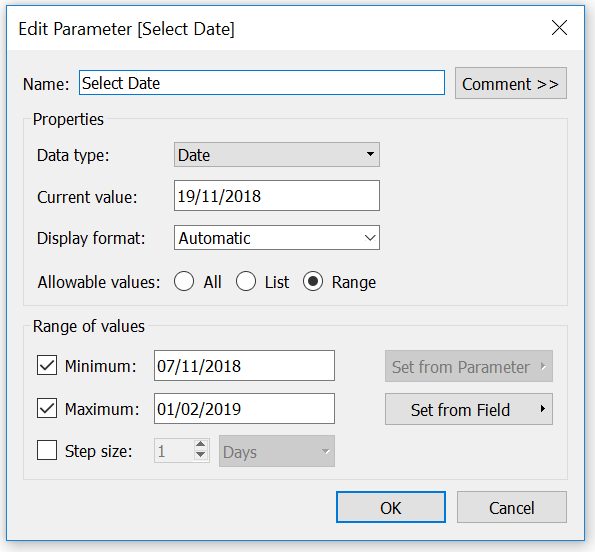
Next you just “personalise” your parameter. For that you want to change the Data Type to “Date” and then choose the value you want to appear by default (Current Value) and decide the allowable values. In my case I wanted a range of values from the minimum to the maximum date values from my field Date on the datasource. And Tableau lets you do it! When you click on “Set from field” it will show you the different Date fields you have on your data and you can choose the desired one.
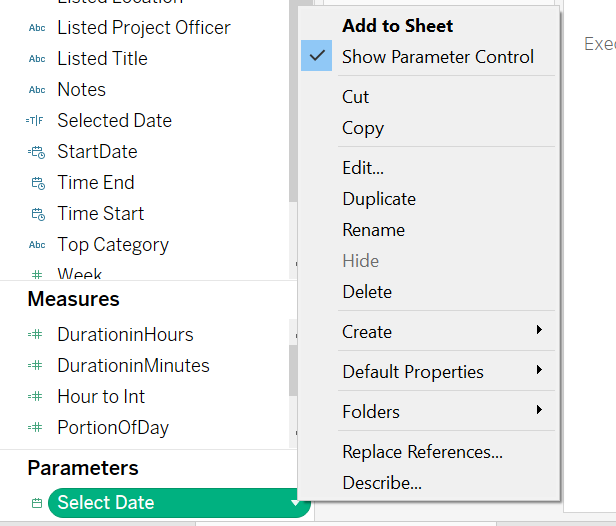
You may feel sad because the only result from this is that a Parameter appears on your Data sidebar, on the bottom left. But do not give up yet – right click it and choose Show Parameter Control and that will allow your users to have a nice calendar date picker!
Create a Calculated Field
That will still not affect your view, though, as there is nothing connecting that parameter with it. So what you have to do is creating that connection through a Calculated Field. For that you will click again on the little arrow next to Dimensions and this time select the Create Calculated Field option.
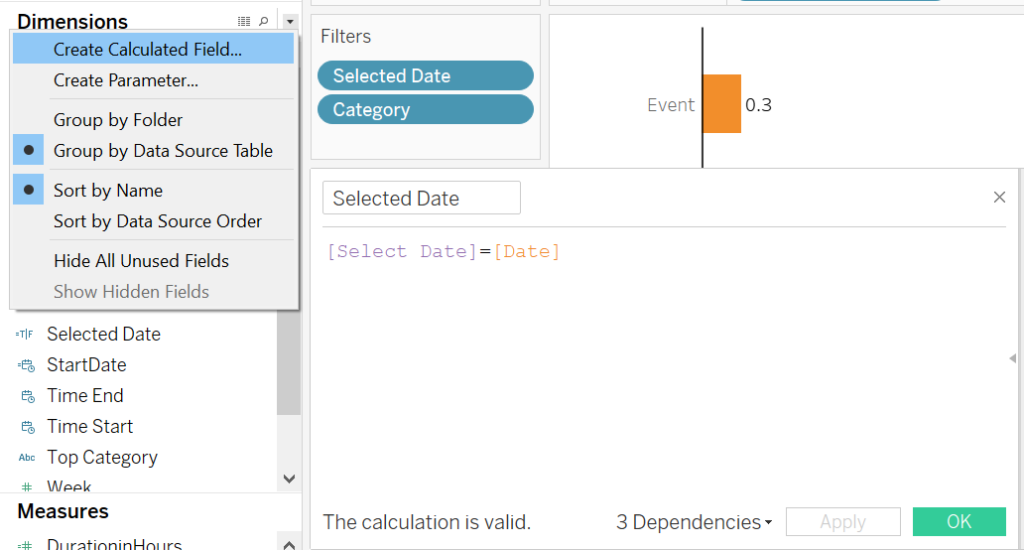
In this case, what I want is that only the data corresponding to the Selected Date (on the parameter control) is displayed. Hence my Calculation: [Select Date] = [Date] where [Select Date] is my Parameter (that is why this is Purple!) and the [Date] is a field from my database. When that condition is met, this field (the calculated field that I named [Selected Date] will be True; otherwise it will be False.
Filter your view
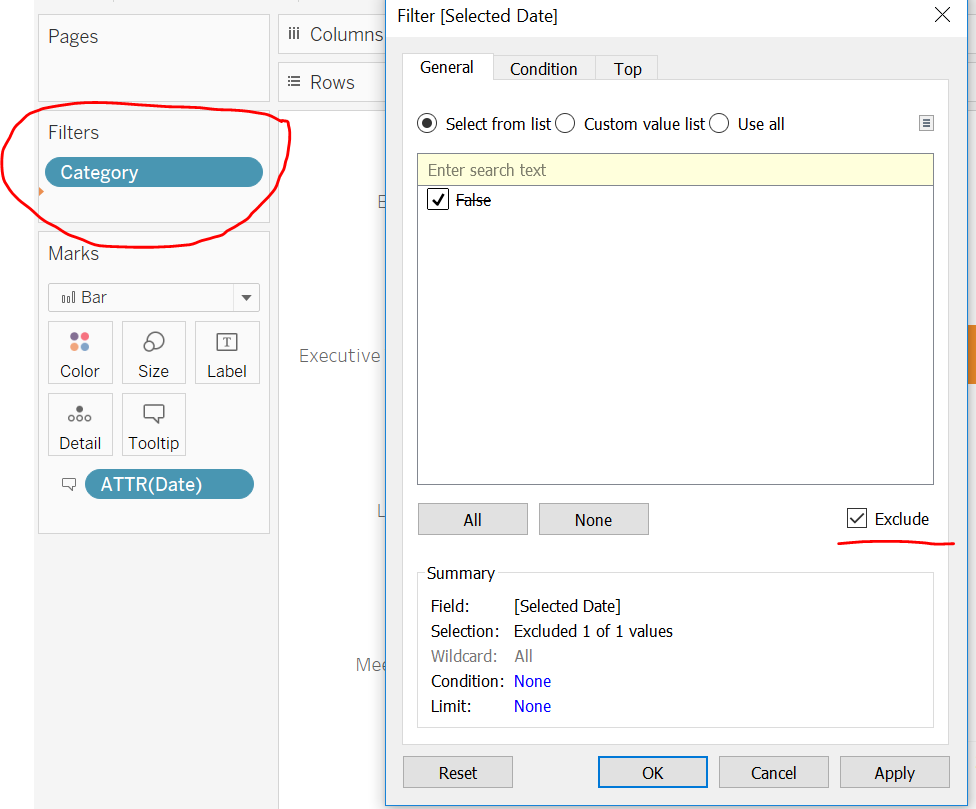
Now all you have to do is add that Calculated Field to your Filters shelf (the one with a red circle in the image below) and select what you want to filter! In my case I want only the data where the [Selected Date] calculated field has the value True to appear on the view but the only option that popped on my window was False. The solution is to select that one (False) and tick the Exclude option (underlined with red in the image below). That will do what I want – the data where the [Selected Date] is false will be excluded from the view.
And that is it! I finally allow the users to select a Date from a Calendar instead of a Dropdown menu, and so can you!
